Broadcast emails are one-time campaigns sent to a specific audience, ideal for sharing sneak peeks, announcing offers, or revealing major updates.
They’re great for building hype, driving immediate sales, and encouraging repeat purchases.
In this blog, you’ll learn:
- What broadcast emails are
- How to send an email broadcast directly from your WordPress dashboard
- How to A/B test your email broadcasts for better results
- Real-world examples of email broadcast
- Pro tips to get the most out of every send
- Top WordPress email broadcast plugins
- And much more.
Let’s begin
Short on time? Watch the video :
What is a Broadcast Email?
A broadcast email is an email sent to a large group of recipients all at once. Using broadcast emails to send mass messages saves the time and effort of contacting each contact individually.
In most cases, broadcast emails are sent to inform and excite your audience about news and updates related to your brand. Usually, broadcast emails are sent to share
- Promotional campaigns
- Special offers
- Product launch
- Newsletter etc.
Broadcast emails are a powerful way to keep your audience informed about your latest updates, promotions, and offers, all in one go. They save time, maintain message consistency, and help you reach your entire subscriber base efficiently.
How To Send a Broadcast Email From WordPress?
To send broadcast emails, we are going to use FunnelKit Automations today.
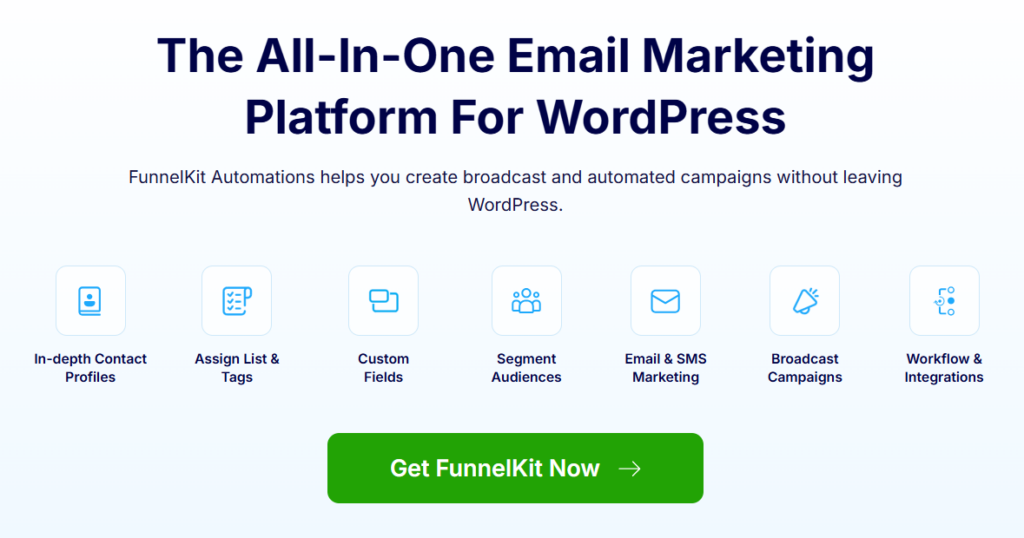
This is an all-in-one email marketing platform for WordPress users, allowing you to send custom transactional emails, autoresponders, and broadcasts directly from your WordPress dashboard.
After sending a broadcast, you get detailed analytics to track performance. Additionally, it features an innovative sending option that enhances the effectiveness of A/B testing broadcasts.
Make sure to install and activate FunnelKit Automations (both free and premium).
Step 1: Add a new broadcast
Hover on the FunnelKit Automations from the WordPress dashboard and click on Broadcast. Then click “Create Email Broadcast” to create a new email broadcast.

After that, provide a name and click on Add.

Clicking on Add will create a new email broadcast.
Clicking on Add will create a new email broadcast. Here, we will create an email broadcast to inform the selected audience about the upcoming holiday offers.
Step 2: Provide broadcast information
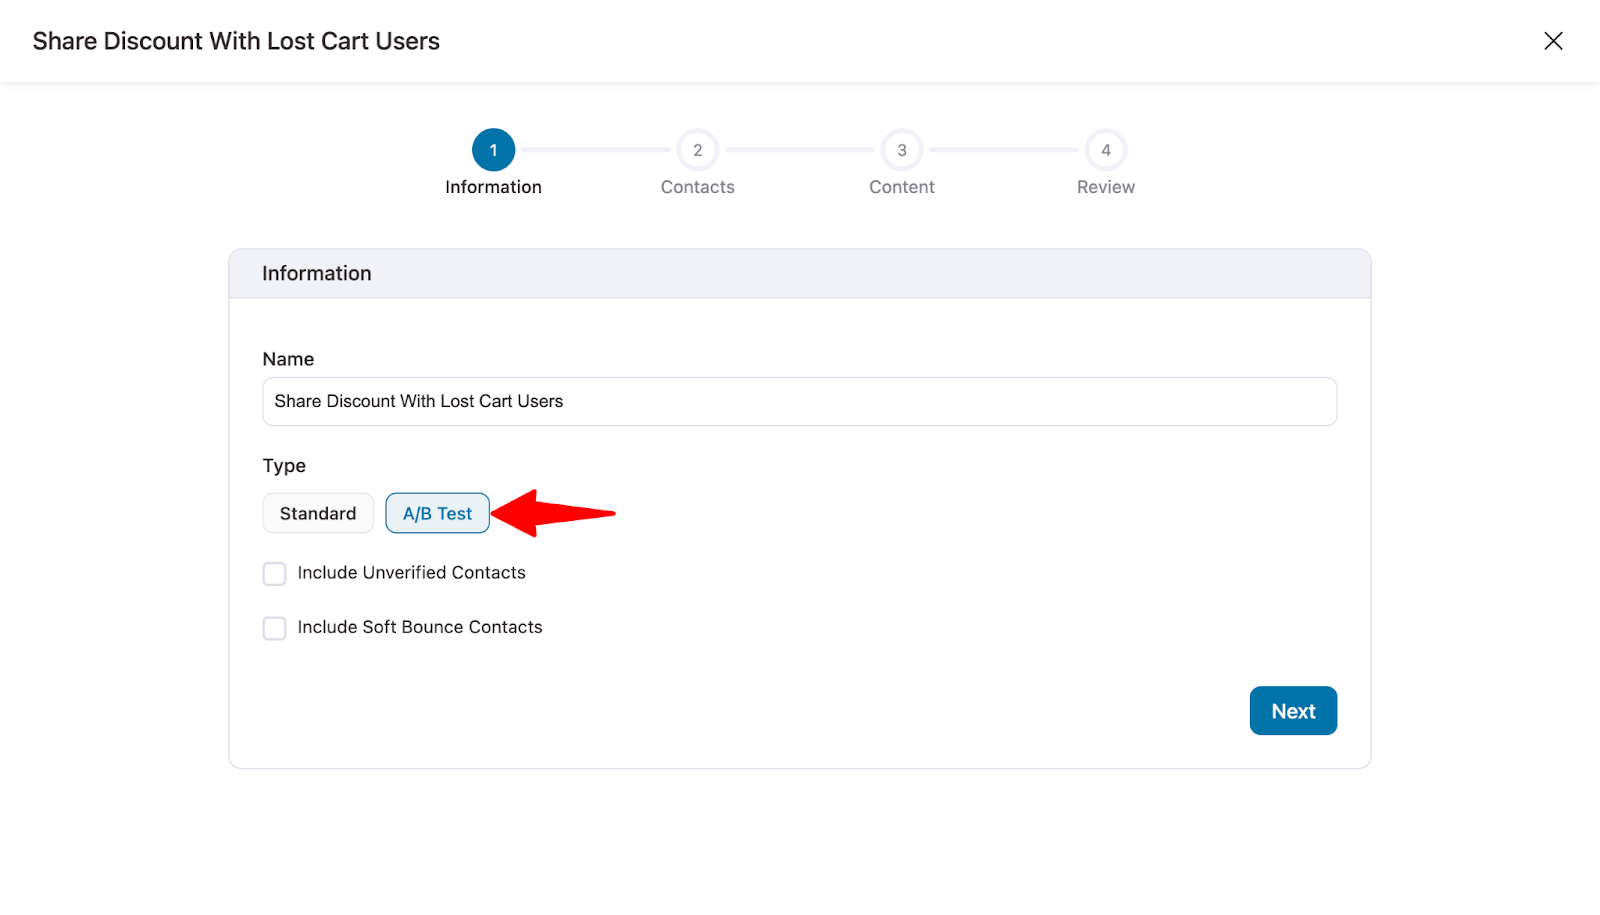
You can change the broadcast email at this step as well. After that, you need to choose the email type. You can select the email type as
- Standard: This default option will send a single email to all the selected contacts.
- A/B Test: With this option, you can split-test your broadcast email and create more than one variant of the same. This way, you can find out which works better.
If you want to send the emails to unsubscribers as well, go with the Standard option.
After choosing the option, select the next option

Step 3: Select your audience
You can send your email to your audience or segment your audience with Funnelkit Automations. To segment your audience, you need to create filters.
Click on the + icon to add a filter.

You can segment based on Segments, Contact Details, Users, Custom Fields, WooCommerce, etc.
We will only send emails to the audience that purchased within the last year.
For that, choose WooCommerce.

Now choose the option last order days.

You can filter the last order days by using three options: Over, in the past, and in the period. We are choosing the “in the past” option. Now choose 365 days. Finally, click on Filter to filter the audience.

Now you should see a list of audiences that fulfill the filter you set. Once you have the audience you want to target with your broadcast emails. Then, click on "Next" to go to the next step.

Now you should see a list of audiences that fulfill the filter you set. Once you have the audience you want to target with your broadcast emails. Then, click on Next to go to the next step.
Step 4: Customize email-related content
In this step, you can change
- From Name: This will be displayed as the sender's name.
- From Email: Provide the email from which the broadcast will be sent.
- Reply-To Email: Give the email address to which the audience can reply.

Step 5: Design the broadcast email
First, write an email subject line and preview the text. Make sure your subject line is clear and catchy.

To design an email, FunnelKit Automations provides four options, of which we will choose Visual Builder (New).

Now, you should see many prebuilt templates. We are going to choose the Declaration of Sale. To do this, hover on the template.

Now, import the template.

After importing the email, you can customize it to fit your brand and the offer you want to share with your customers.
Here, we have replaced the top free shipping order text with our offer, updated the banner, and replaced it with our custom banner that highlights our offer.

After you add the banner, make sure you link it to your store shop page so that when users click on the CTA, they are redirected to your store.

Next, we want to share a coupon code that users can use to avail of the discount. For this, we will delete the existing section and replace it with a coupon block. The WooCommerce coupon block is ready-made to beautifully highlight any discount code.
To delete the section, select the row and click on the three dots at the top right. Then, click the Delete option.

After that, drag and drop the WooCommerce coupon block.

After adding the coupon block, select the coupon on the left side and change the coupon block text to match your coupon offer.

Additionally, link the shop page to the 'Shop Now' CTA for the coupon block.

You can add another section by highlighting your best-selling products to entice your customers to make an order.
To add a best-selling section, drag and drop the WooCommerce product block and select the number column you want. We are going with 3.

Now, search for and add the product you want to showcase.

Repeat the process to add as many products as you want to showcase as best-selling products.
Each product block, by default, shows the product image, title, price, and a “Buy Now” button that links directly to that specific product.
However, if you want, you can choose to hide/show any of these elements of this product block.

Once you are done designing your email, click on Save Changes. After that, you can click on “Preview and Test” to send test emails and figure out how the email will look in a real inbox.

Here is what the email structure and design look like in a user's inbox:

Click on Next to move to the next step.

Step 6: Review and send broadcast email
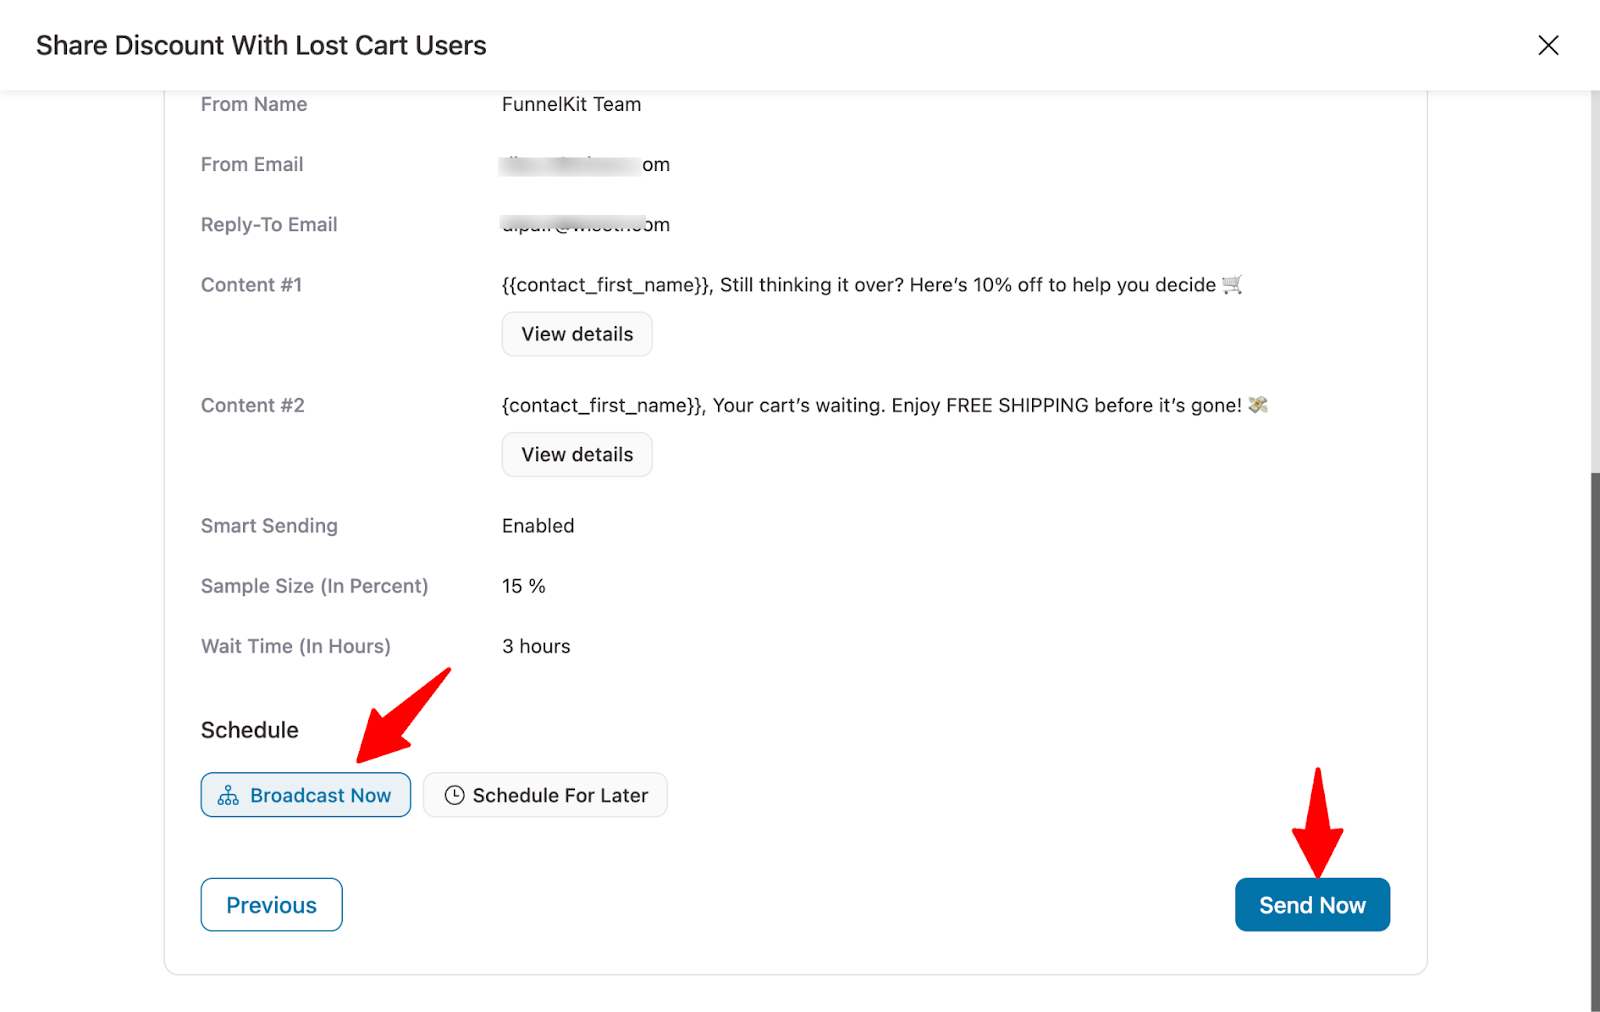
In the last step, you can review your broadcast campaign. You can then go back to the previous step and alter anything you want.
FunneKit Automations provides two options: you can send your broadcast emails right away or schedule them for later.
If you want to send it right now, choose, click on Broadcast Now, and hit Send Now.

If you want to send an email later, click on Schedule For Later, pick a time and date, and hit Send Now.

And that’s it. Your broadcast emails will be sent to the chosen audience on time.
How to A/B Test Email Broadcast From WordPress Dashboard?
You can easily run A/B tests for your email broadcasts using FunnelKit Automations.
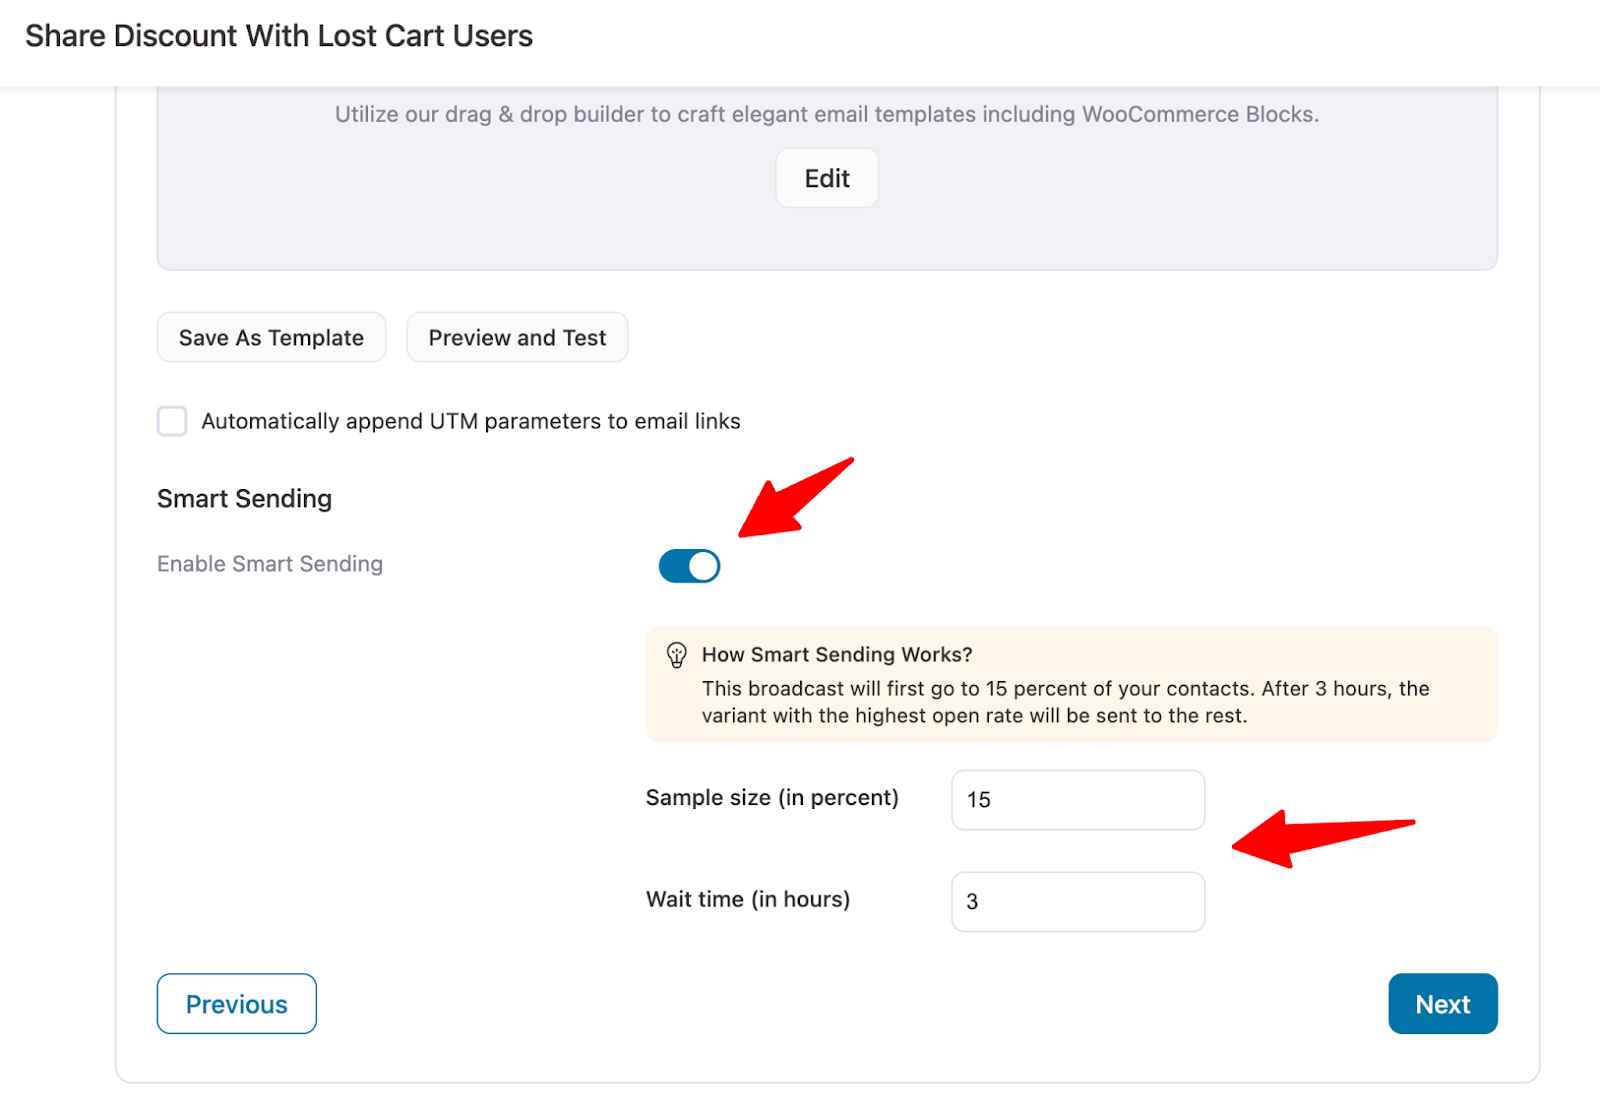
FunnelKit also offers a powerful feature called Smart Sending to enhance your A/B tests. With Smart Sending enabled, the system first sends your variants to a small sample of your audience.
Based on engagement (like open or click rates), the winning version is automatically sent to the remaining subscribers, helping you get better results with less guesswork.
When setting up your broadcast, choose “A/B Test” as the type.
Then, select your audience and create multiple variants, each with different subject lines, preview text, or content to see what resonates best.

Simply set your sample size and wait time when activating Smart Sending.
Finally, send the broadcast right away or schedule it for later.
Once the broadcast is complete, go to Overview ⇒ Content ⇒Smart Sending Stats to view metrics like emails sent, open rate, click rate, and revenue. The winning variation will be clearly marked.
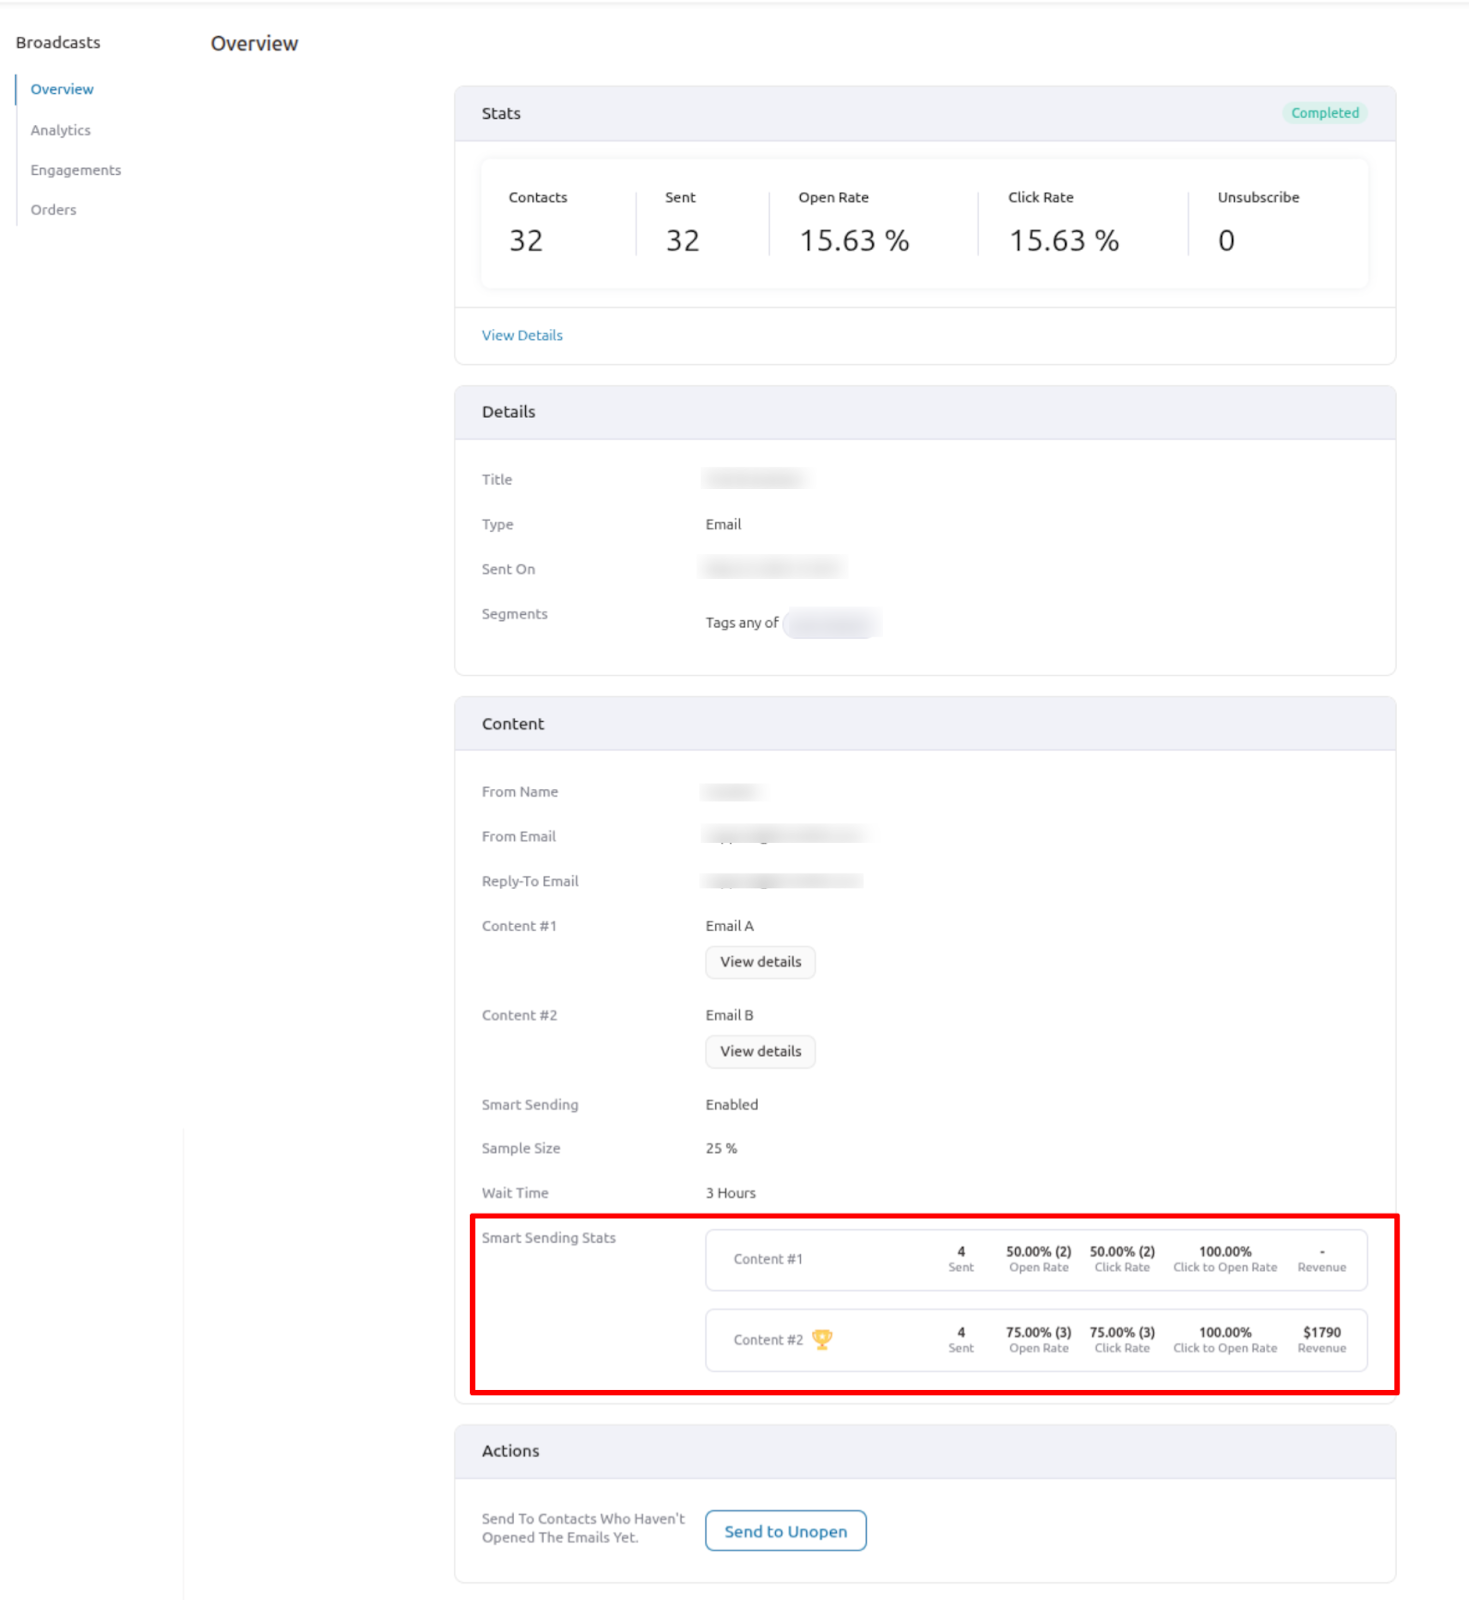
This is how you can A/B test your broadcast emails right from your WordPress dashboard.
5 Types of Broadcast Emails With Real-Life Examples
Here are some of the different kinds of broadcast emails with an example:
1. Product launch/update
Sending broadcast emails to announce a new product launch or the addition of a new feature is a common practice. Most brands send emails to users before a product update or launch to create a buzz before the release.
Have a look at this product launch email by Salt&pepper.

We like this email because while the copy is simple and minimalist, the design is on point with the brand. The peppy design is eye-catching and matches their brand.
2. Newsletter
Using broadcast emails, you can send newsletters mentioning recent events. In addition, it’s also a common practice to add some of your recently published blogs. Adding recent events and blogs keeps readers updated and keeps them more engaged with your brand.
Have a look at the newsletter Penguin Random House sends to its subscribers.

This newsletter is divided into distinct sections, making it easier for readers to navigate. It highlights the latest bestsellers and provides reading material, allowing users to engage more deeply. Moreover, we also appreciate that each section is followed by a 'Read More' link, which directs users to the site.
3. Sales and offers
Every business owner wants to cash in on the holiday season. Offering minimal discounts during holidays can skyrocket your sales. You can send holiday offer emails to both subscribers and non-subscribers.
Have a look at the holiday offer email by Crello.

We like this design, especially the vibrant colors they used. This email gives us a festive vibe and highlights the discount with plain yet effective copywriting.
4. Promotions
An event invitation email can effectively inform employees about the "what," "why," "when," and "where" of your event. While calling each of your subscribers or staff members is possible, sending them a well-written broadcast email is a better choice.
Have a look at the email from Hubspot that sends user invitations for a virtual event.

We like this email because it is neat and clean. It perfectly adds all the necessary information one needs to know about the virtual event, along with a CTA that directs users to more detailed information.
5. Important announcements
Sometimes you may want to inform your audience about an essential update to your business. For example, you may need to advise customers that your site will be down for 2 hours due to maintenance work. Another example is informing customers about new policies and so on.
Have a look at the email Microsoft sent to its users informing them about the security breach they had with Outlook.

This email is straightforward and addresses the topic at hand. It doesn't have any fancy design as it addresses a serious issue.
7 Tips To Ensure Email Broadcasting Success
Now you know how to send broadcast emails, but to ensure you enjoy maximum success, follow these tips:
- Time it right: Send emails when your audience is most active, typically mid-morning (10 a.m. to noon), considering their time zones for better engagement.
- Send to opted-in subscribers: Avoid buying lists; only email people who’ve consented to prevent spam issues and improve results.
- Segment your audience: Target specific groups with relevant content for better engagement, especially for niche campaigns.
- Craft catchy subjects and previews: Use personalization, urgency, curiosity, or emojis to boost open rates.
- Make emails mobile-friendly: Ensure your emails look great on all devices using responsive templates like those in FunnelKit Automation.
- Deliver valuable content: Keep subscribers engaged with useful offers, updates, or resources aligned with their interests.
- A/B test and optimize: Experiment with different elements and adjust based on performance to maximize success.
You’ve seen how FunnelKit Automation simplifies email broadcasting within WordPress. To help you explore all your options, we’ve put together a list of the top broadcast plugins—featuring FunnelKit alongside other popular platforms worth considering.
5 Best WordPress Email Broadcast Plugins
Here is a list of the top email broadcast plugins for wordpress with key features, price, and broadcast email limit.
1. FunnelKit Automations
An all-in-one email marketing plugin designed specifically for WordPress users. FunnelKit Automations allows you to create, send, and manage email broadcasts directly from your WordPress dashboard, streamlining your email marketing efforts.
Key Features:
- Send email broadcasts, autoresponders, and transactional emails directly from WordPress.
- A/B testing with Smart Sending for optimized performance.
- Detailed analytics and reporting within the dashboard.
- Seamless integration with WooCommerce.
- Mobile-responsive email templates.
- Can send broadcast, triggered emails, and SMS right from the WordPress dashboard.
Price: A free version is available; the premium starts at $99.5/year.
Email Limit: Unlimited
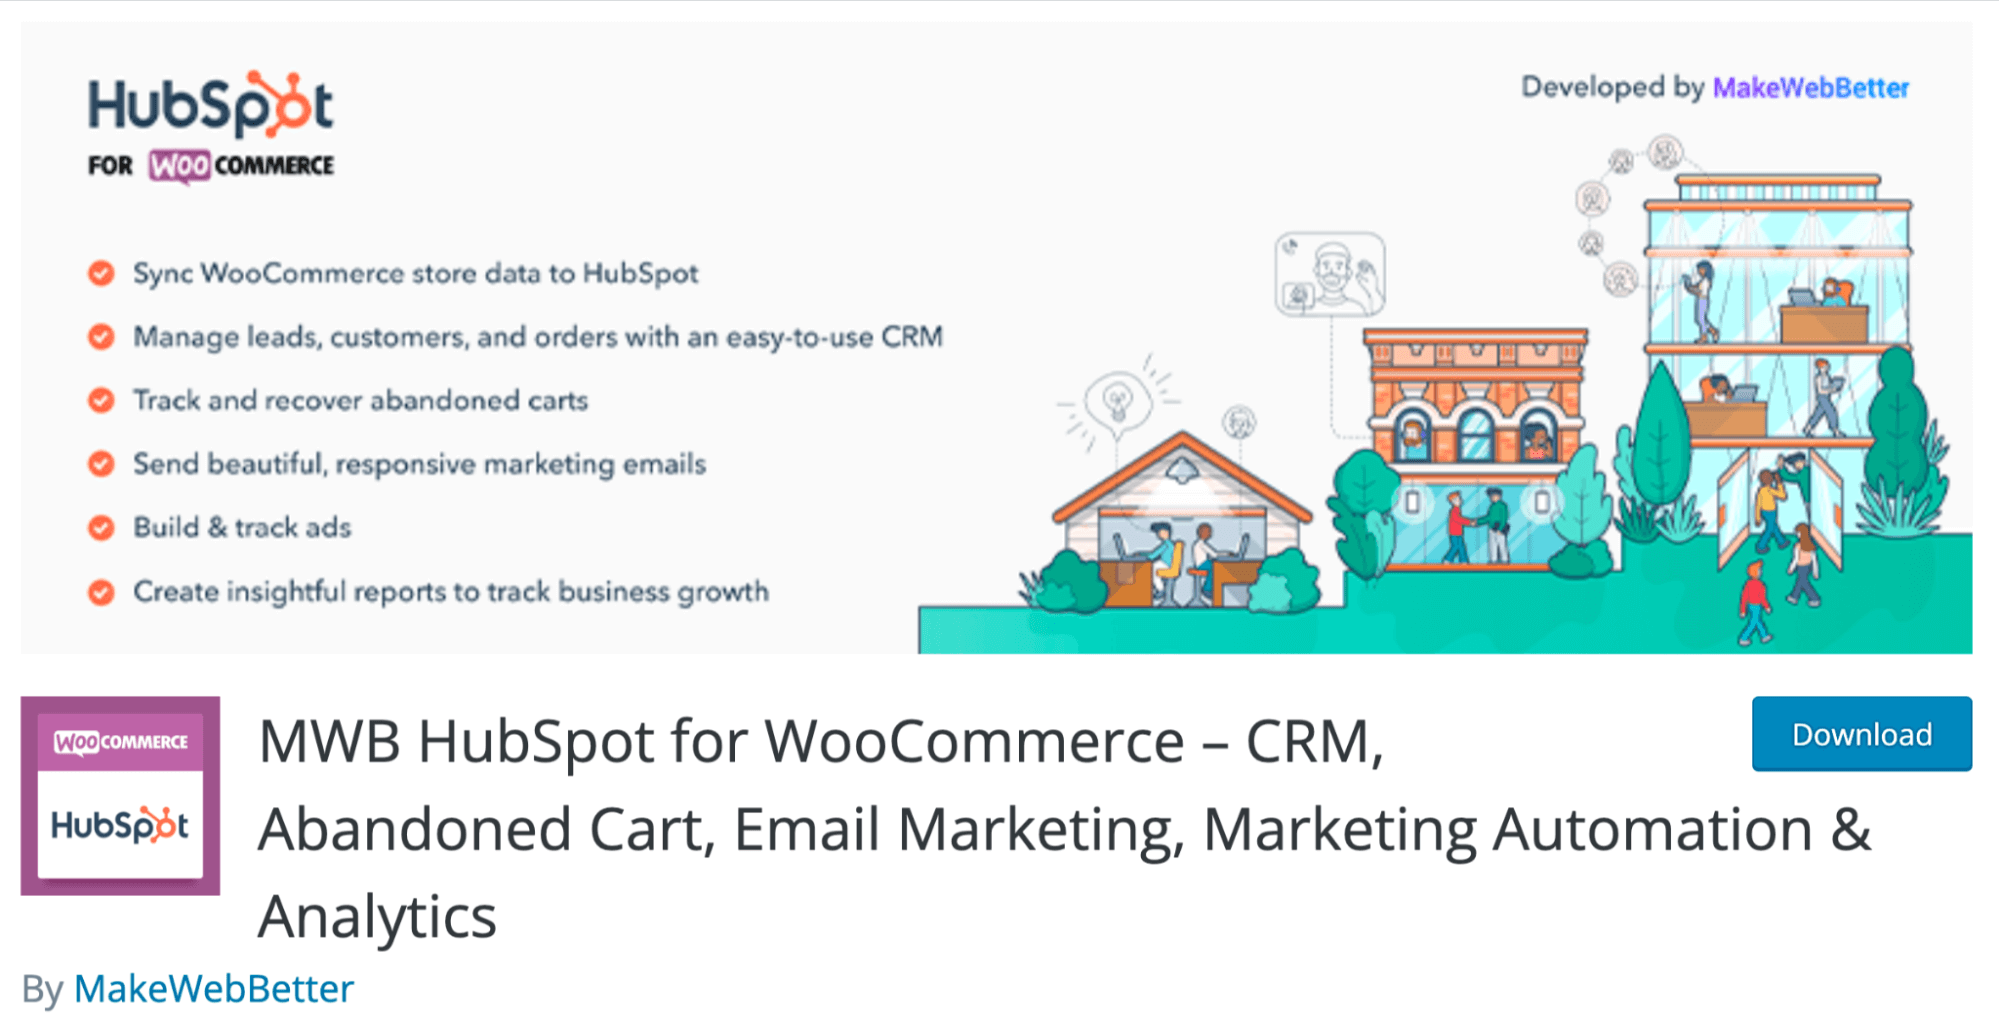
2. HubSpot
A comprehensive email marketing solution offering personalized broadcast emails and in-depth contact management. While HubSpot integrates with WordPress, email campaigns are managed through HubSpot’s external platform.
Key Features:
- Drag-and-drop email editor.
- Smart personalization.
- Contact segmentation and CRM integration.
- Advanced analytics and reporting.
- Free tier available.
Price: Free plan available; paid plan starts at $50/month
Email Limit: 1,000 emails/month
3. Mailchimp
Mailchimp is a widely recognized email marketing platform offering robust broadcast capabilities. You can sync your WordPress contacts and collect leads easily, but email broadcasts and campaign management happen on Mailchimp’s external dashboard, providing full control and detailed analytics.
Key Features:
- Drag-and-drop email builder.
- Advanced audience segmentation.
- Marketing automation workflows.
- Comprehensive analytics and reporting.
- Integrations with various platforms, including WooCommerce.
Price: A free plan is available with basic email marketing; the premium version starts at $13/month
Email limit: 500 contacts / 500,000 emails/month
4. Constant Contact
A user-friendly email marketing plugin for WordPress offering tools to create and send broadcast emails. Contact syncing with WordPress is supported, but email broadcasts are handled entirely within Constant Contact’s external platform to provide full-featured campaign tools.
Key Features:
- Professionally designed email templates.
- Contact management and segmentation.
- Automation workflows.
- Real-time reporting and analytics.
- Integrations with various platforms, including WooCommerce
Price: No free plan; the pro version starts at $12/month
Email Limit: 10 times the number of contacts per month
5. Brevo
A WordPress plugin offering email and SMS campaigns, marketing automation, and more. Brevo lets you capture leads from WordPress, but all campaign creation and broadcast sending must be done through Brevo’s web app.
Key Features:
- Email and SMS campaigns.
- Marketing automation workflows.
- Real-time tracking and reporting.
- API and plugin integrations for WordPress.
- Free plan with a daily sending limit
Price: A free plan is available with daily email limits; the premium version starts at $25/month
Email Limit: 20,000 emails/month
Email Broadcast vs. Email Autoresponder
Before we wrap up, it's important to understand how email broadcasts differ from autoresponders, since both are key parts of any email strategy.
A broadcast email is sent manually to a specific audience, usually to announce time-sensitive updates like product launches or sales. For instance, you might notify only your U.S. audience about a 4th of July offer.
In contrast, autoresponders (or triggered emails) are sent automatically based on user actions, like a welcome email sent right after someone subscribes to your list.
Here is a quick overview of the difference between email broadcasts and email auto-responders:
| Topic | Email Broadcast | Email Autoresponder |
|---|---|---|
| Timing and audience | Sent simultaneously to a large audience, often for time-sensitive content or announcements | Sent to individual customers when triggered by a special event based on the user's interaction with the website. |
| Purpose | Usually, to update customers about promotions, newsletters, or general announcements. | To effectively communicate with customers based on their interaction with the site to nurture and convert them. |
| Email content | Typically, it consists of general content targeting a large audience. | The content is dynamic based on the actions of the user that trigger this autoresponder. |
| Frequency | Usually, when there is a need to share something with a large audience. | Since user actions or predefined conditions trigger autoresponders, their frequency depends on the number of times the event occurs and when autoresponders get triggered. |
| Example | Examples include promotions, newsletters, and general announcements. | Examples include welcome series, order confirmation email, abandoned cart recovery email, etc. |
Are You Ready to Send Broadcast Emails?
We hope you now know how to send a broadcast email with minimal effort. Broadcast emails make the job of sending an email to a group of people super easy.
And FunnelKit makes this job even more efficient. That's because with this WordPress email broadcast plugin, you can segment your audience, design emails using the visual builder, and A/B test your emails.
Additionally, you gain a 360-degree contact overview, allowing you to view contact information, purchase history, and their engagement with your website. Moreover, with FunnelKit Automations, you can also do SMS marketing.
So, are you ready to utilize the amazing FunnelKit Automations to send out beautiful broadcast emails without any hassle?
The post How to Send a Broadcast Email from WordPress Dashboard appeared first on FunnelKit.