Great news, FunnelKit users!
The wait is finally over!
Your favorite FunnelKit Automations now seamlessly integrates with the lead capture wizard, OptinMonster.
This dynamic duo helps turn your website visitors into leads and, ultimately, paying customers.
Now, you can easily set up stunning lead-capture forms with OptinMonster and convert those leads using FunnelKit Automations, all from your WordPress dashboard.
In this blog, we'll walk you through a simple, step-by-step guide to integrating OptinMonster with FunnelKit Automations. Plus, we'll share some real-world examples to help you get the most out of this powerful integration.
Let’s begin.
Watch the video below to learn about the integration of FunnelKit Automations and OptinMonster 👇
OptinMonster - The Most Powerful Lead Generation Tool
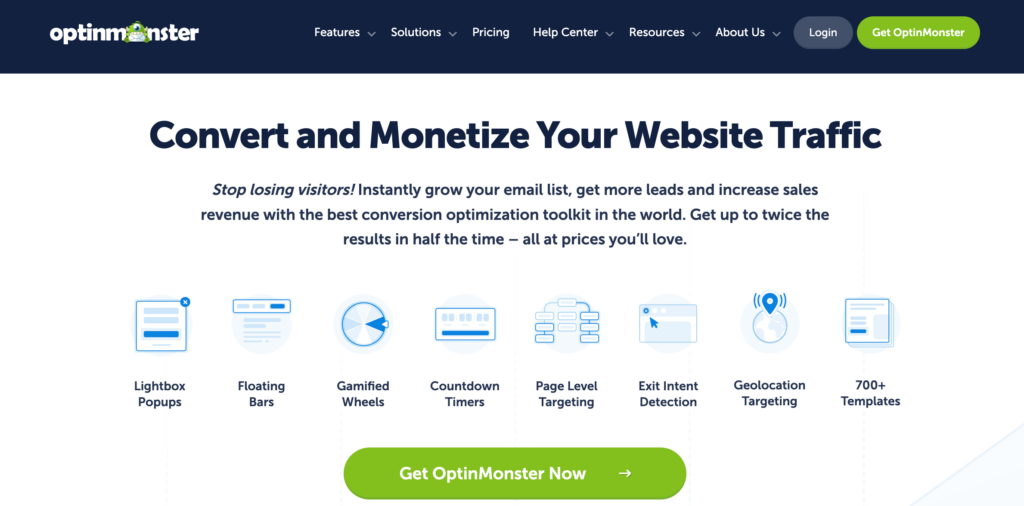
OptinMonster is the ultimate tool for generating leads on your WordPress website with captivating lead-generation forms.
It offers various pre-built templates that you can use to collect email addresses in exchange for the following:
- Subscriptions to the email list
- A discount code
- Free shipping
- Free PDFs or freebies
- Exclusive gifts
- Webinar registrations, and more.
Along with the lead generation form, you can use OptinMonster templates to promote social media channels, ask for surveys, and so on.
You can create different types of forms using this lead generator, such as:
- Lightbox popups
- Floating bars
- Fullscreen forms
- Inline form
- Slidein
- Gamified etc.
In short, OptinMonster is a comprehensive tool that can turn your website visitors into highly qualified leads or subscribers.
FunnelKit Automations Integrates with OptinMonster: Unlock New Marketing Opportunities
FunnelKit Automations and OptinMonster join forces to offer you powerful tools for converting leads into paying customers, helping you maximize your marketing efforts.
While OptinMonster excels at lead generation, FunnelKit Automations is the ultimate solution for email marketing on WordPress and WooCommerce.
OptinMonster helps you collect leads, enhance communication, and build trust with users. However, you'll need to nurture these leads to convert them into paying customers.
That’s where this highly anticipated integration comes into play.
With this integration, once users sign up for an OptinMonster, you can use FunnelKit Automations to:
- Send them a follow-up email to give them the email opt-in items.
- Loop them in an email drip campaign to convert them.
- Add them to your contact list and send them promotional emails to boost sales during promotions, and so on.
Let’s move on to the next section to learn how the integration works. Later, we can discuss some practical use cases of this powerful integration.
How To Integrate FunnelKit Automations With OptinMonster?
Integrating OptinMonster with FunnelKit is super easy and only requires a few steps. Before you move to the main process, make sure to install and activate.
- FunnelKit Automations
- OptinMonster
Now, follow these steps:
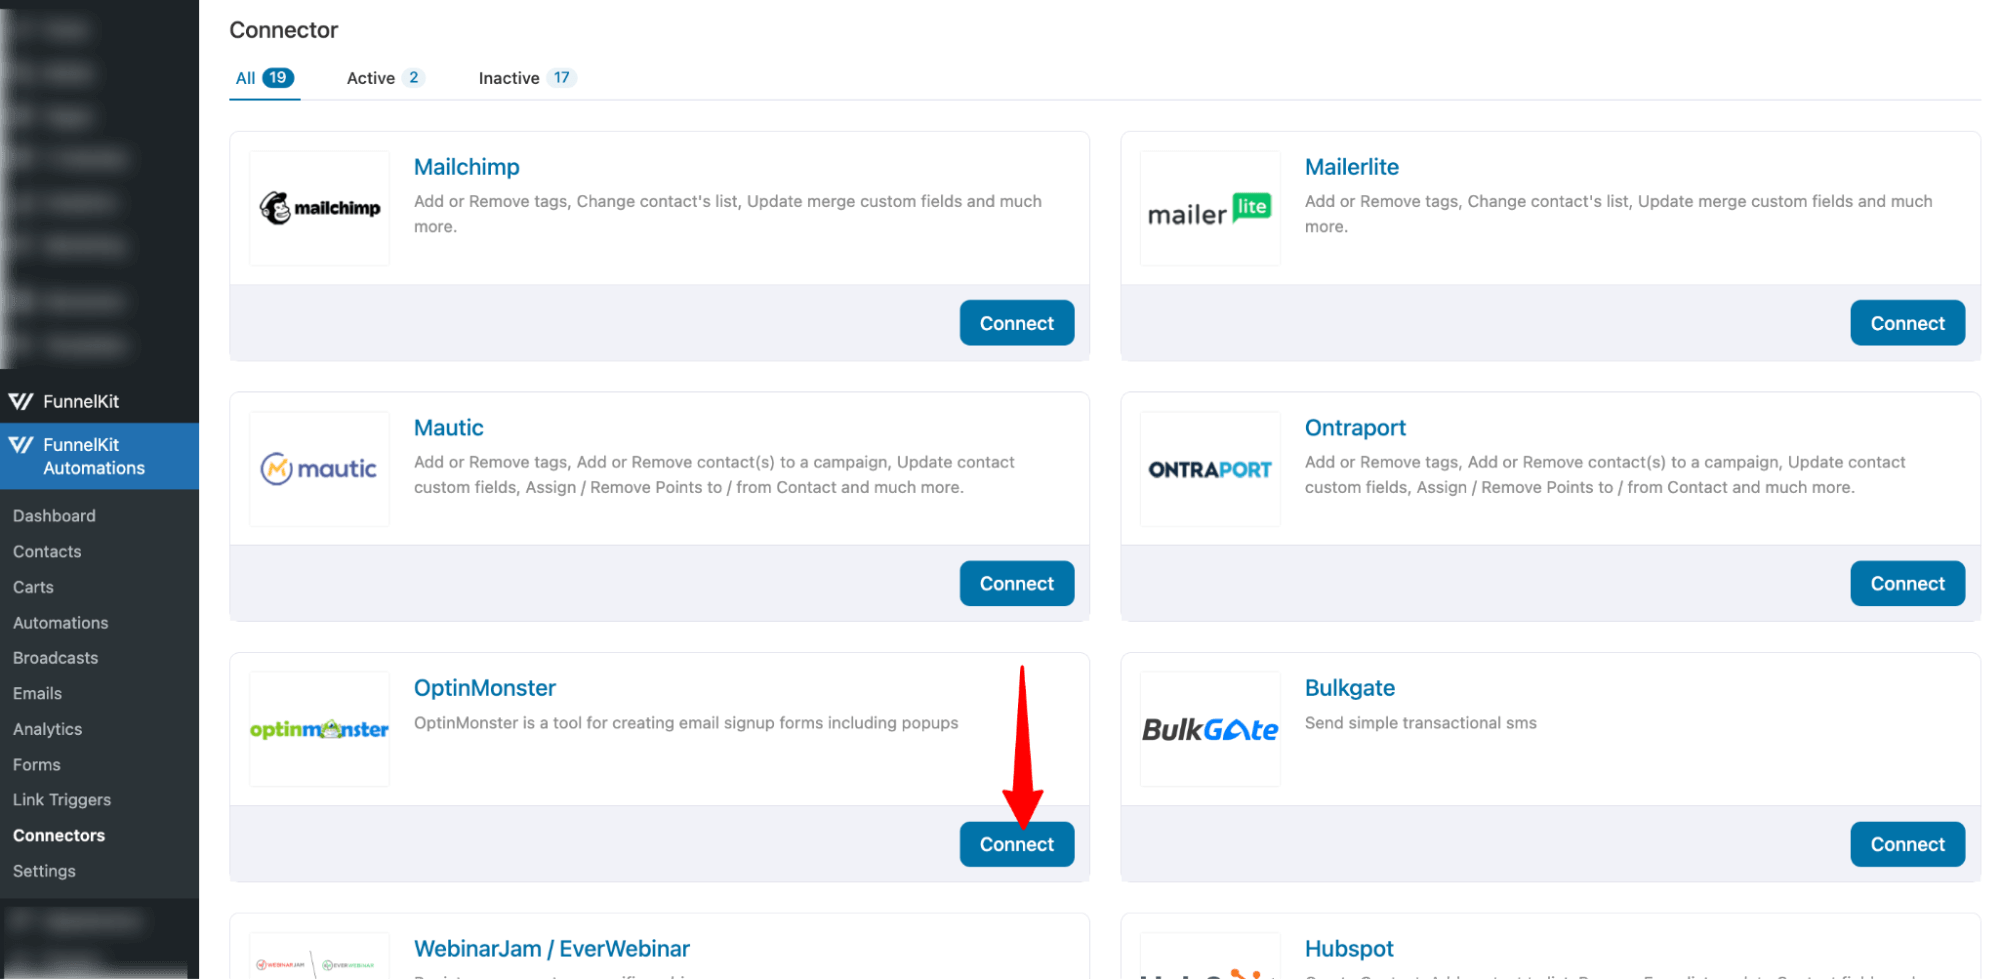
Step 1: Connect OptinMonster with FunnelKit Automations
First, you need to connect OptinMonster with FunnelKit Automations. To do so, navigate to FunnelKit Automations ⇒ Connectors, scroll down to the OptinMonster option, and hit the “Connect” button.
At this stage, if OptinMonster isn’t installed on your site, you will be asked to install and activate it.
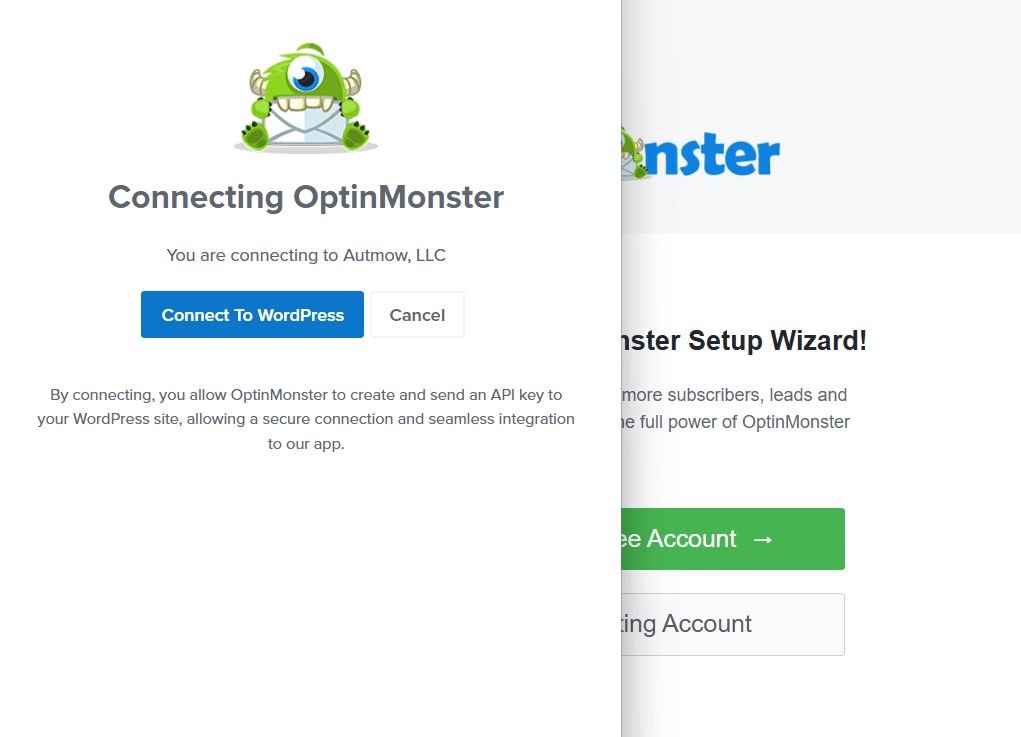
Otherwise, you’ll be directed to the OptinMonster setup wizard.
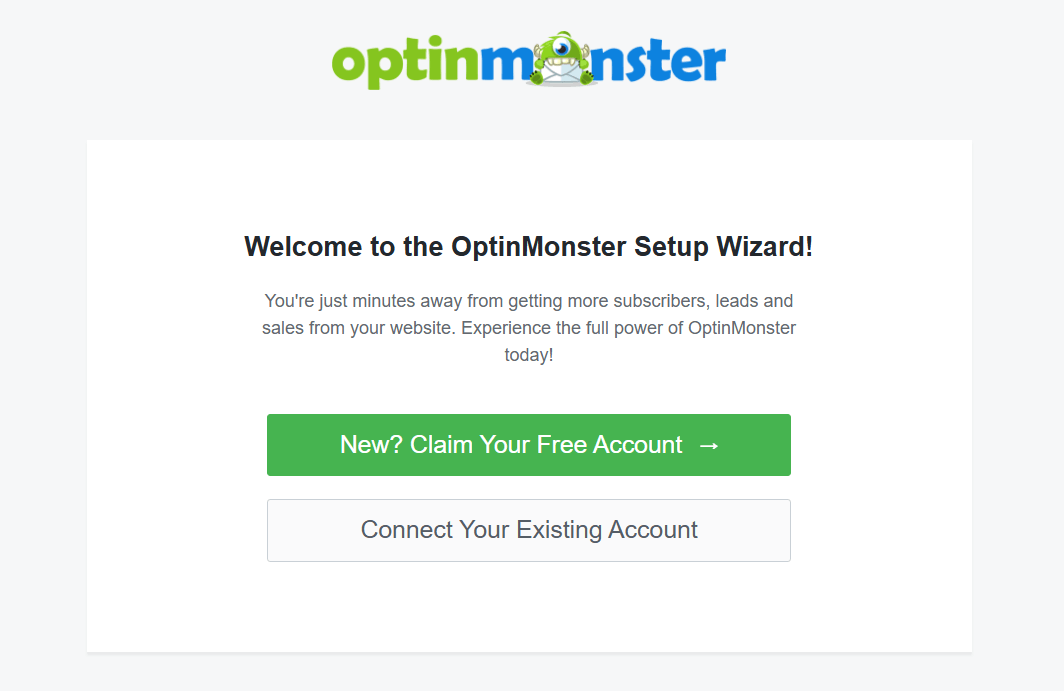
After logging in, hit Connect to WordPress.
Once it connects to your OptinMonster account, it’ll start to show all your campaigns here. On the OptinMonster account’s Dashboard, you can find the website you just connected to.
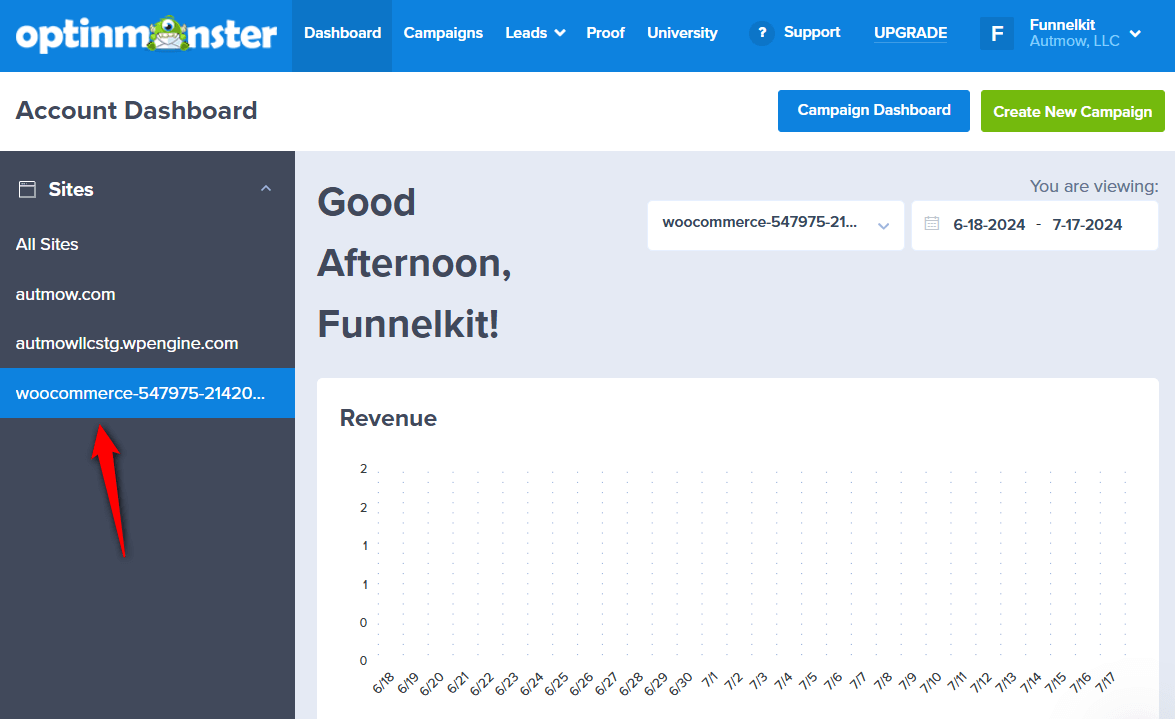
That’s it. Now, your WordPress site is connected to the OptinMonster.
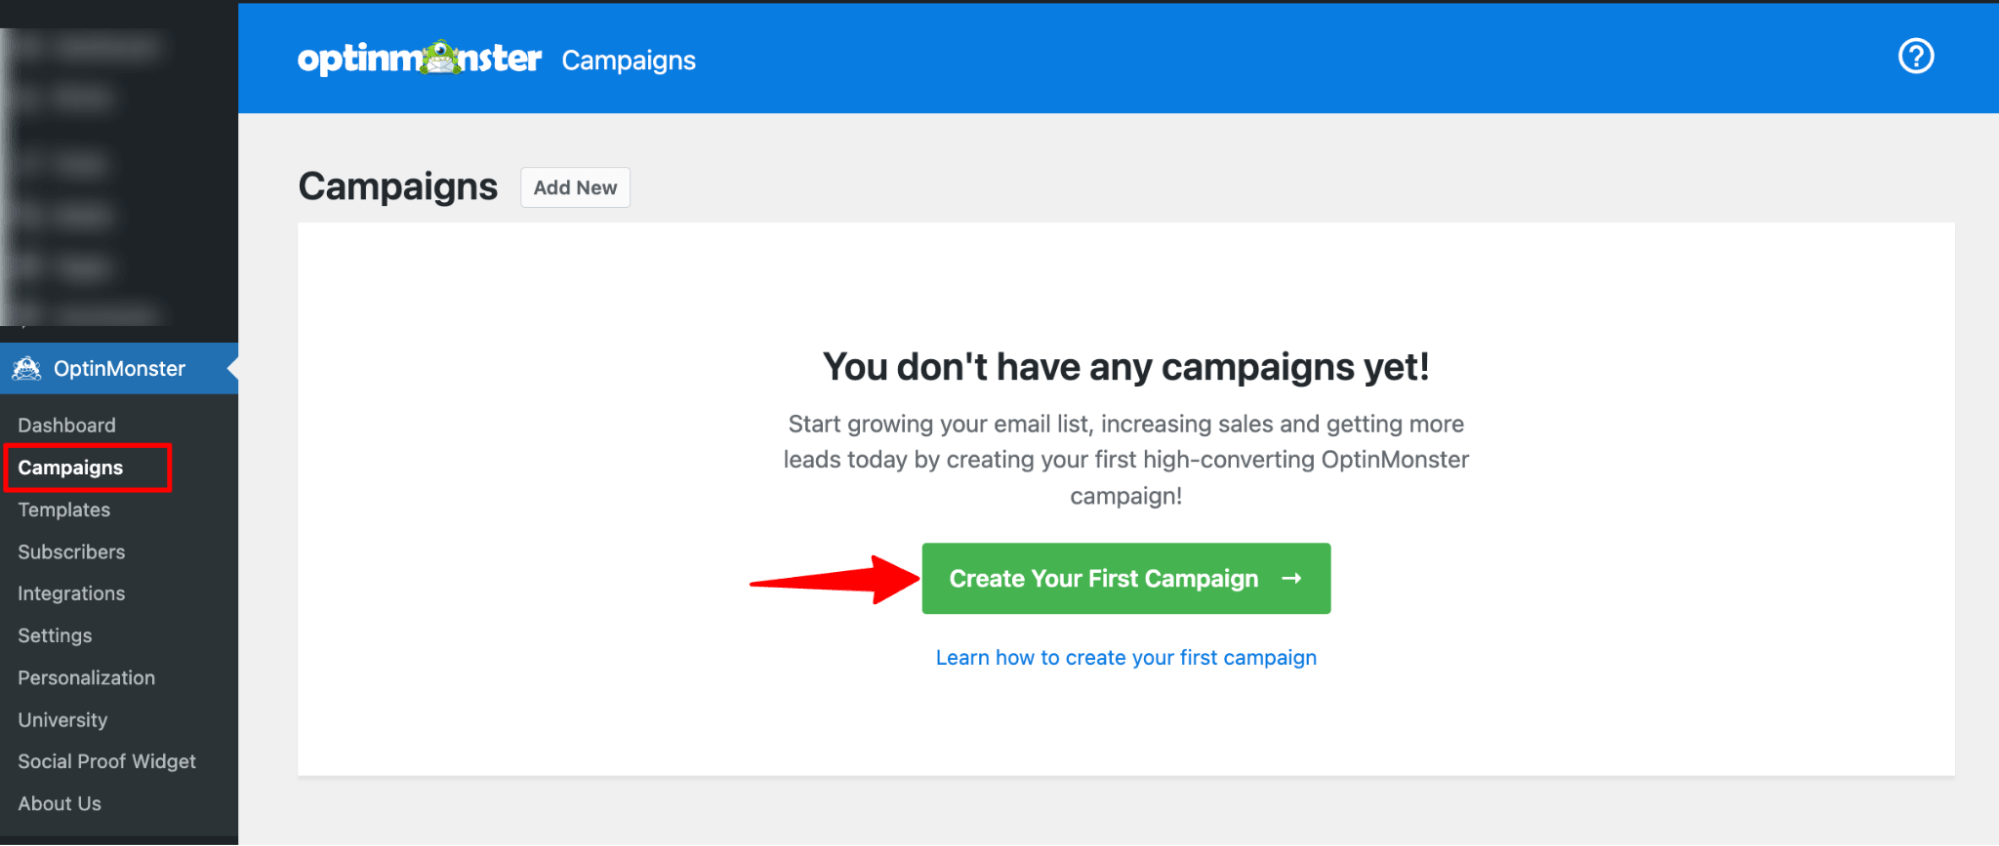
Step 2: Create a new OptinMonster campaign
The next step is to create a lead generation campaign and build the form you want to promote on your website to collect leads.
For this, navigate OptinMonster ⇒ Campaigns and click on “Create Your First Campaign”.
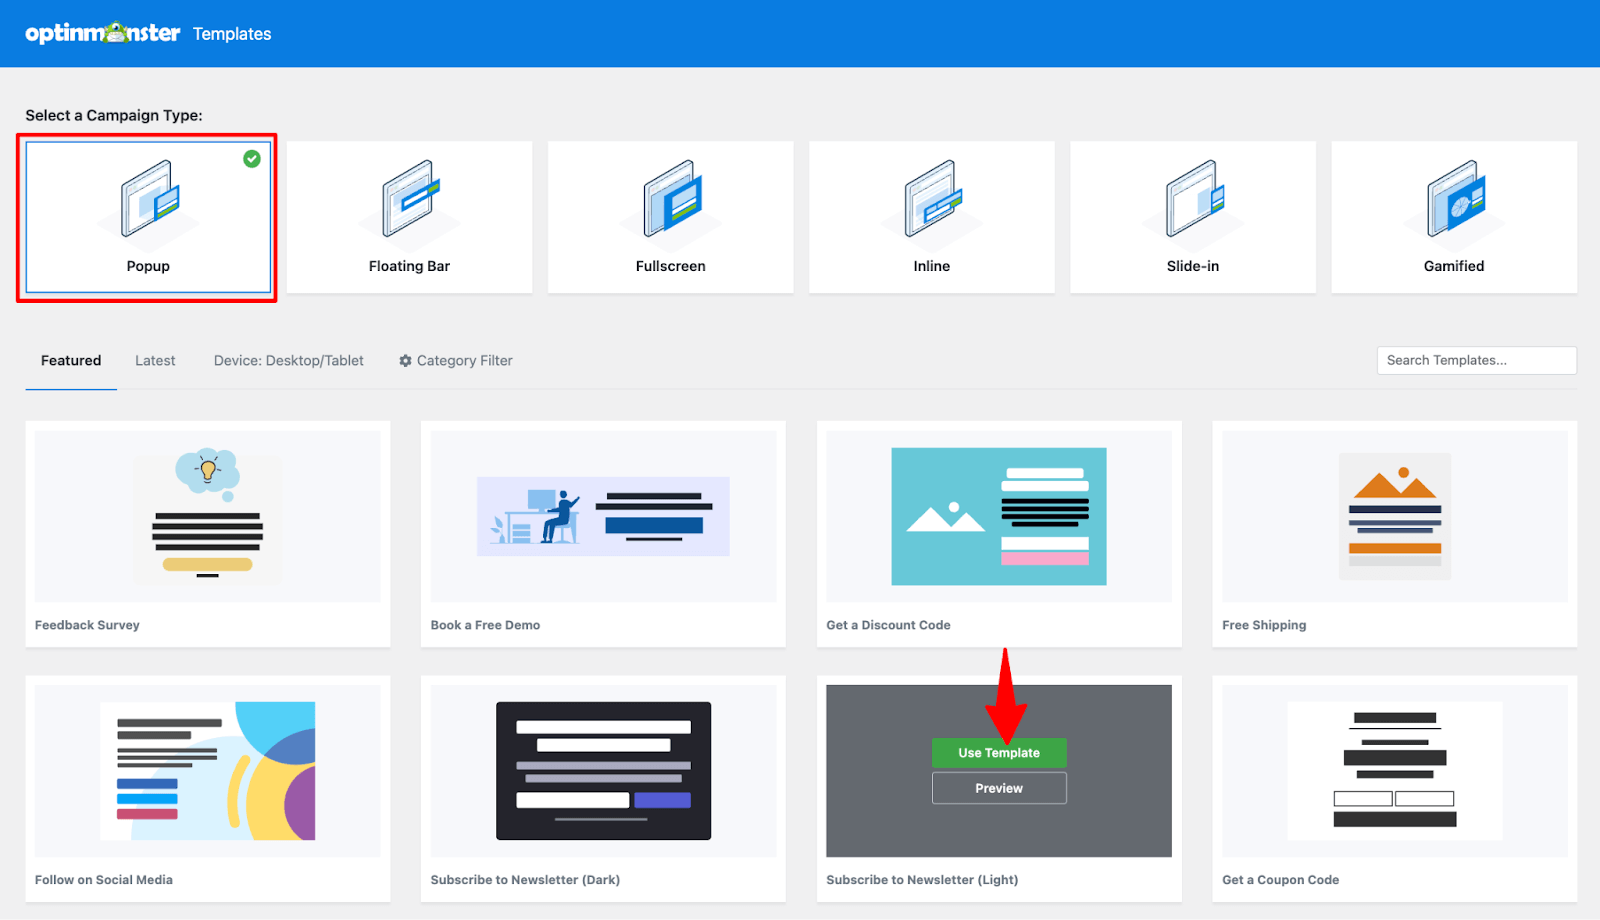
Now, choose the type of campaign you want. Here, we are going with “popup.” After that, to select any of the prebuilt templates, hover on it and hit “Use Template”.
You can click on Preview to see a preview of the template before deciding whether you want to import it or not.
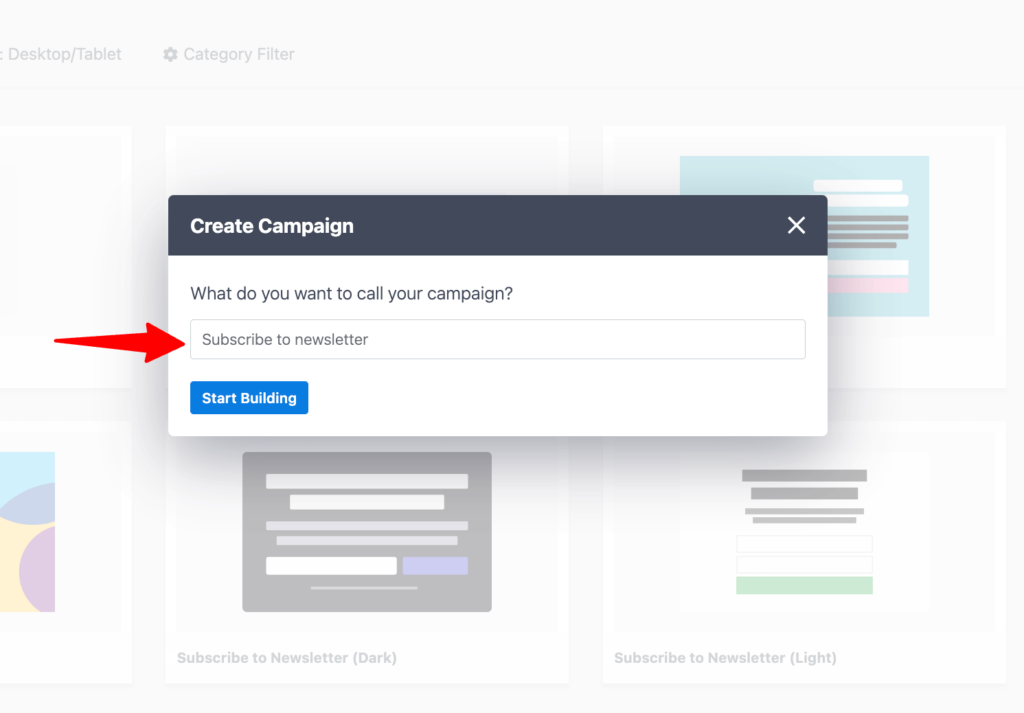
Provide a name and hit “Start Building”.
Afterward, you can customize the prebuilt form according to your needs.
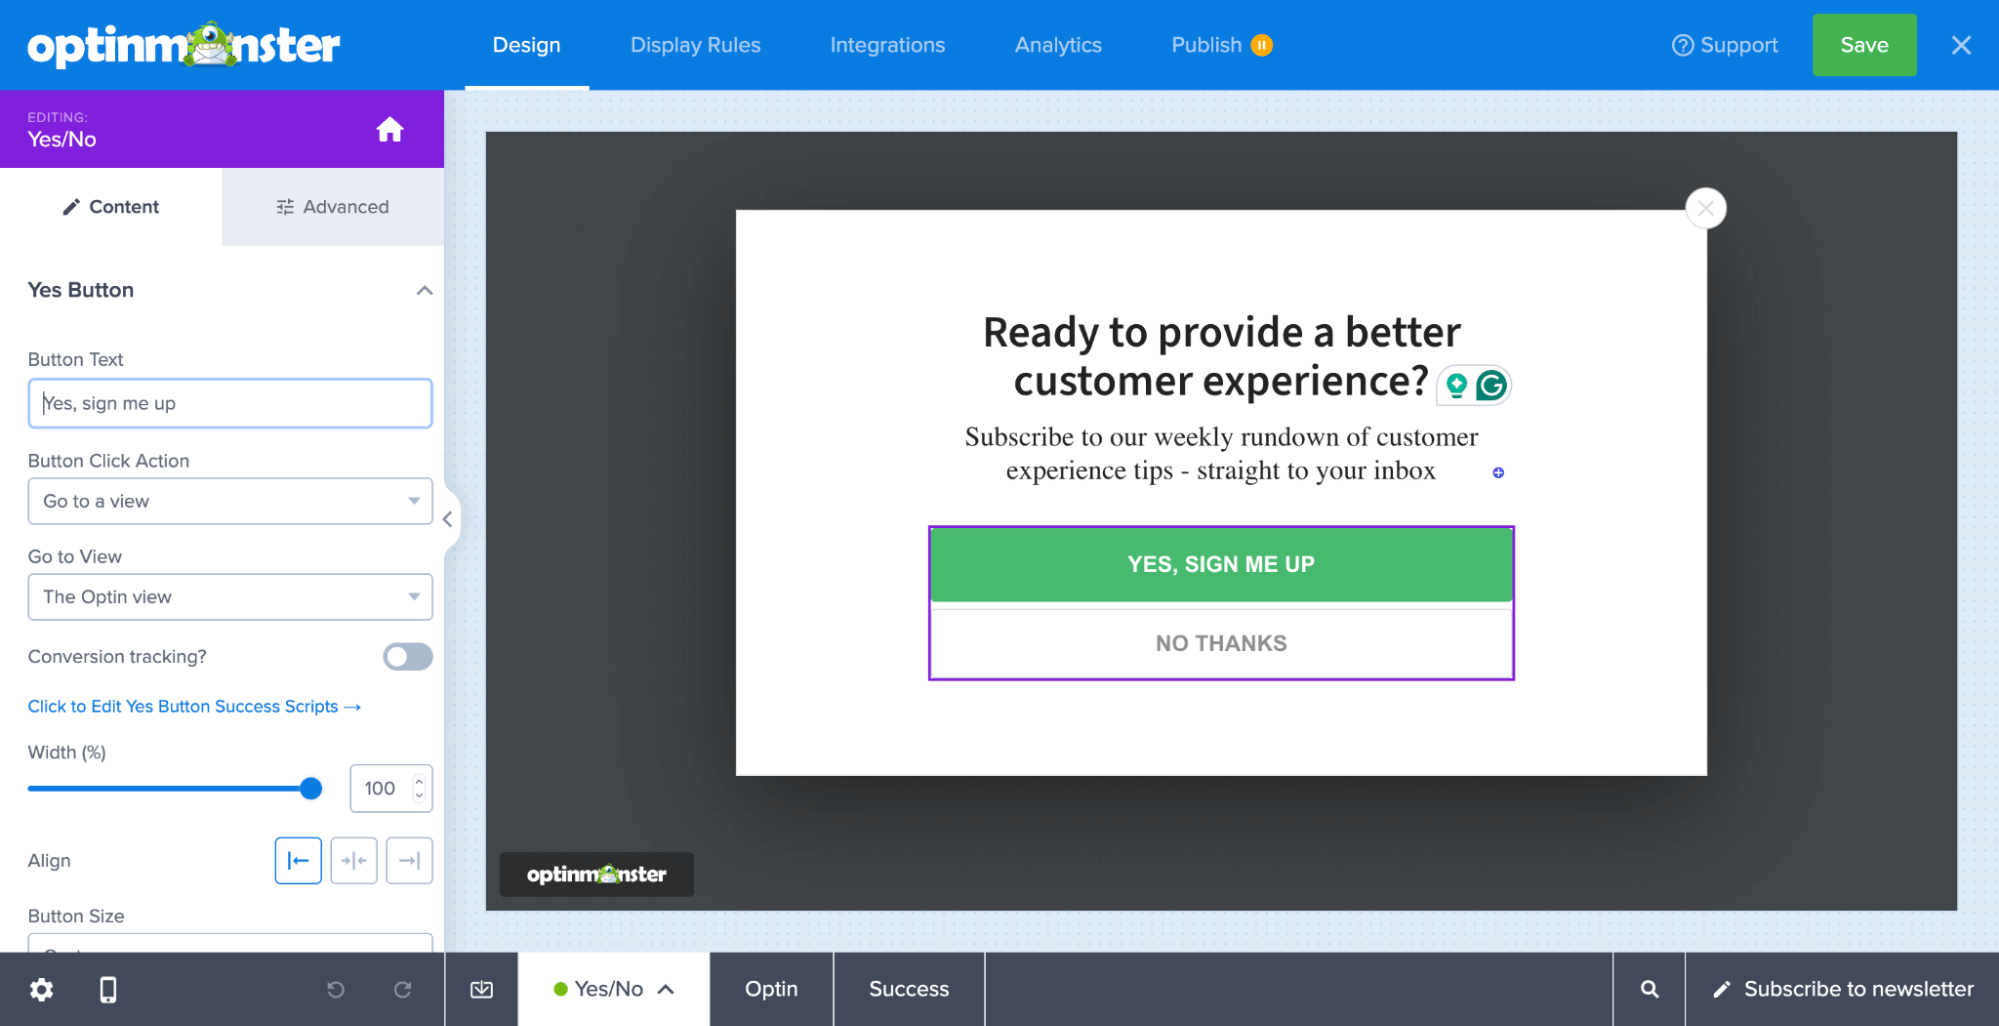
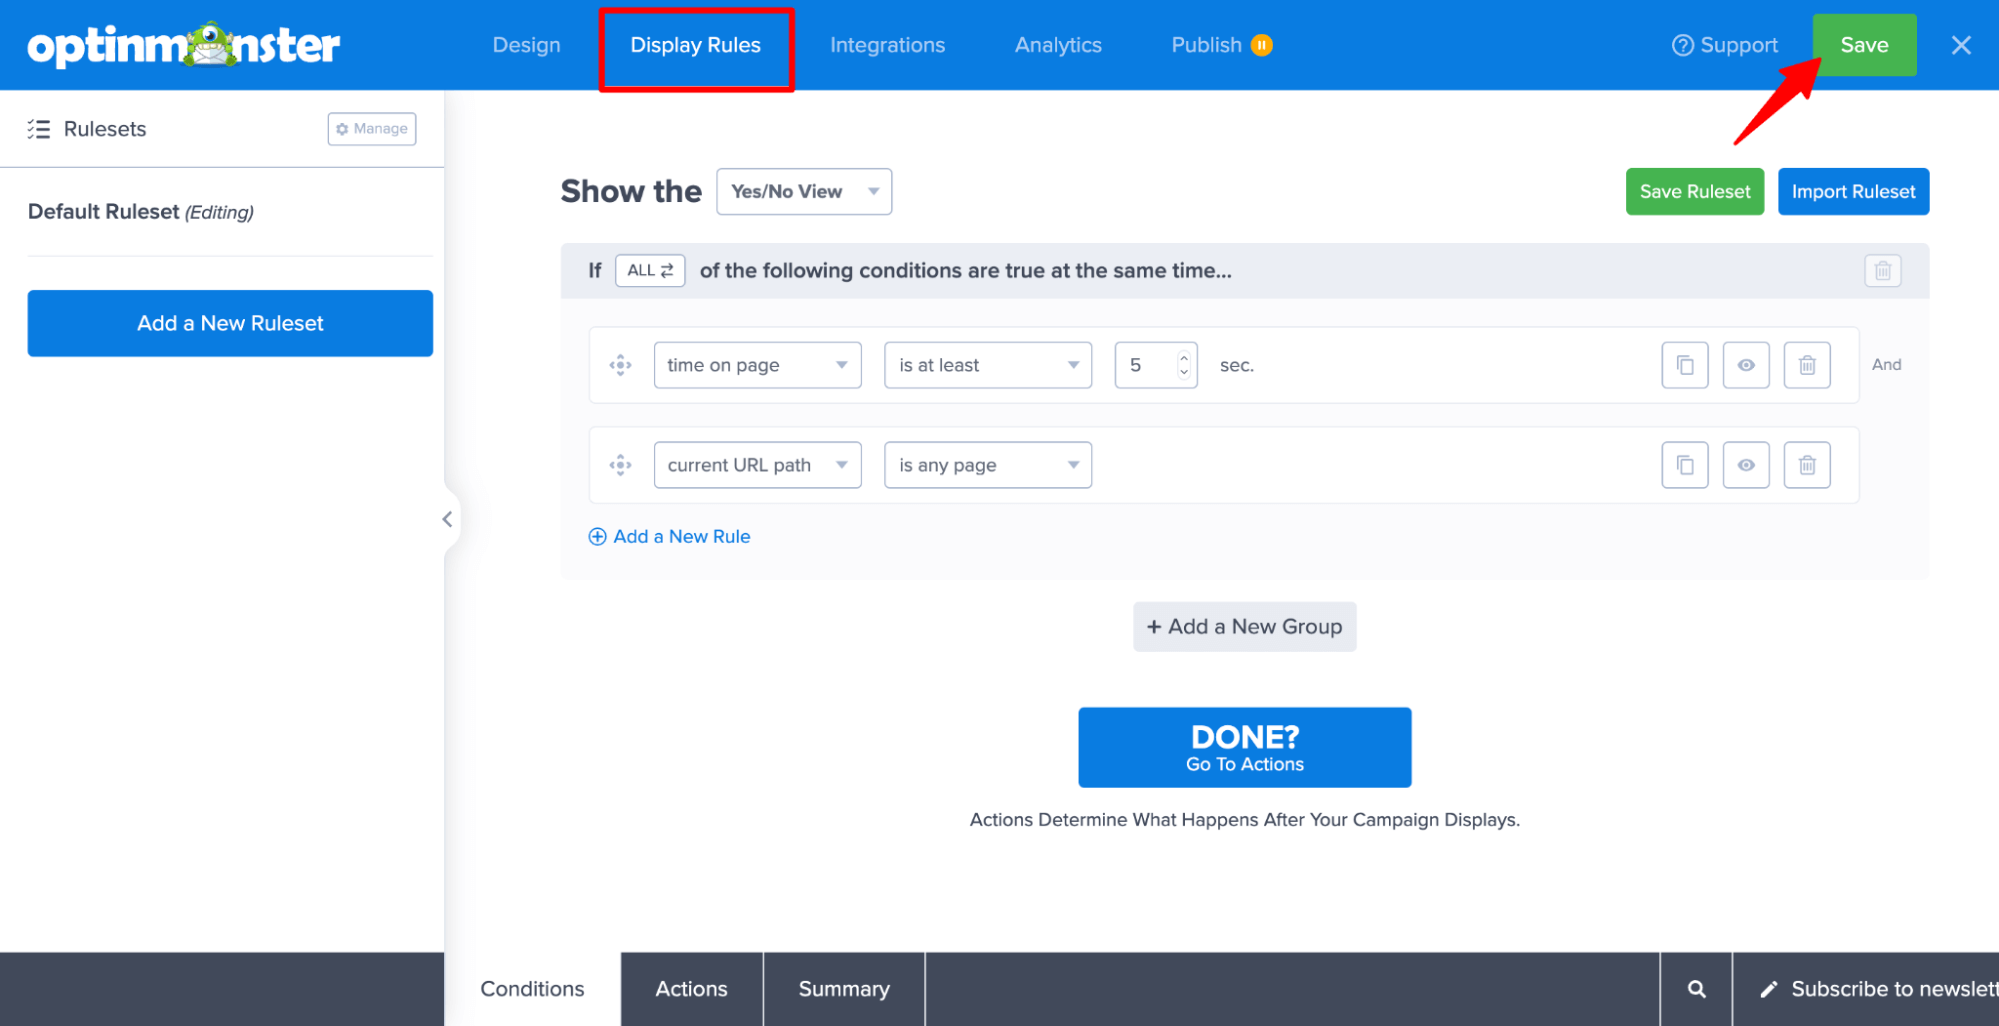
Move to the display section to set rules on how the form will be displayed on your website and save the changes.
Step 3: Add the integration
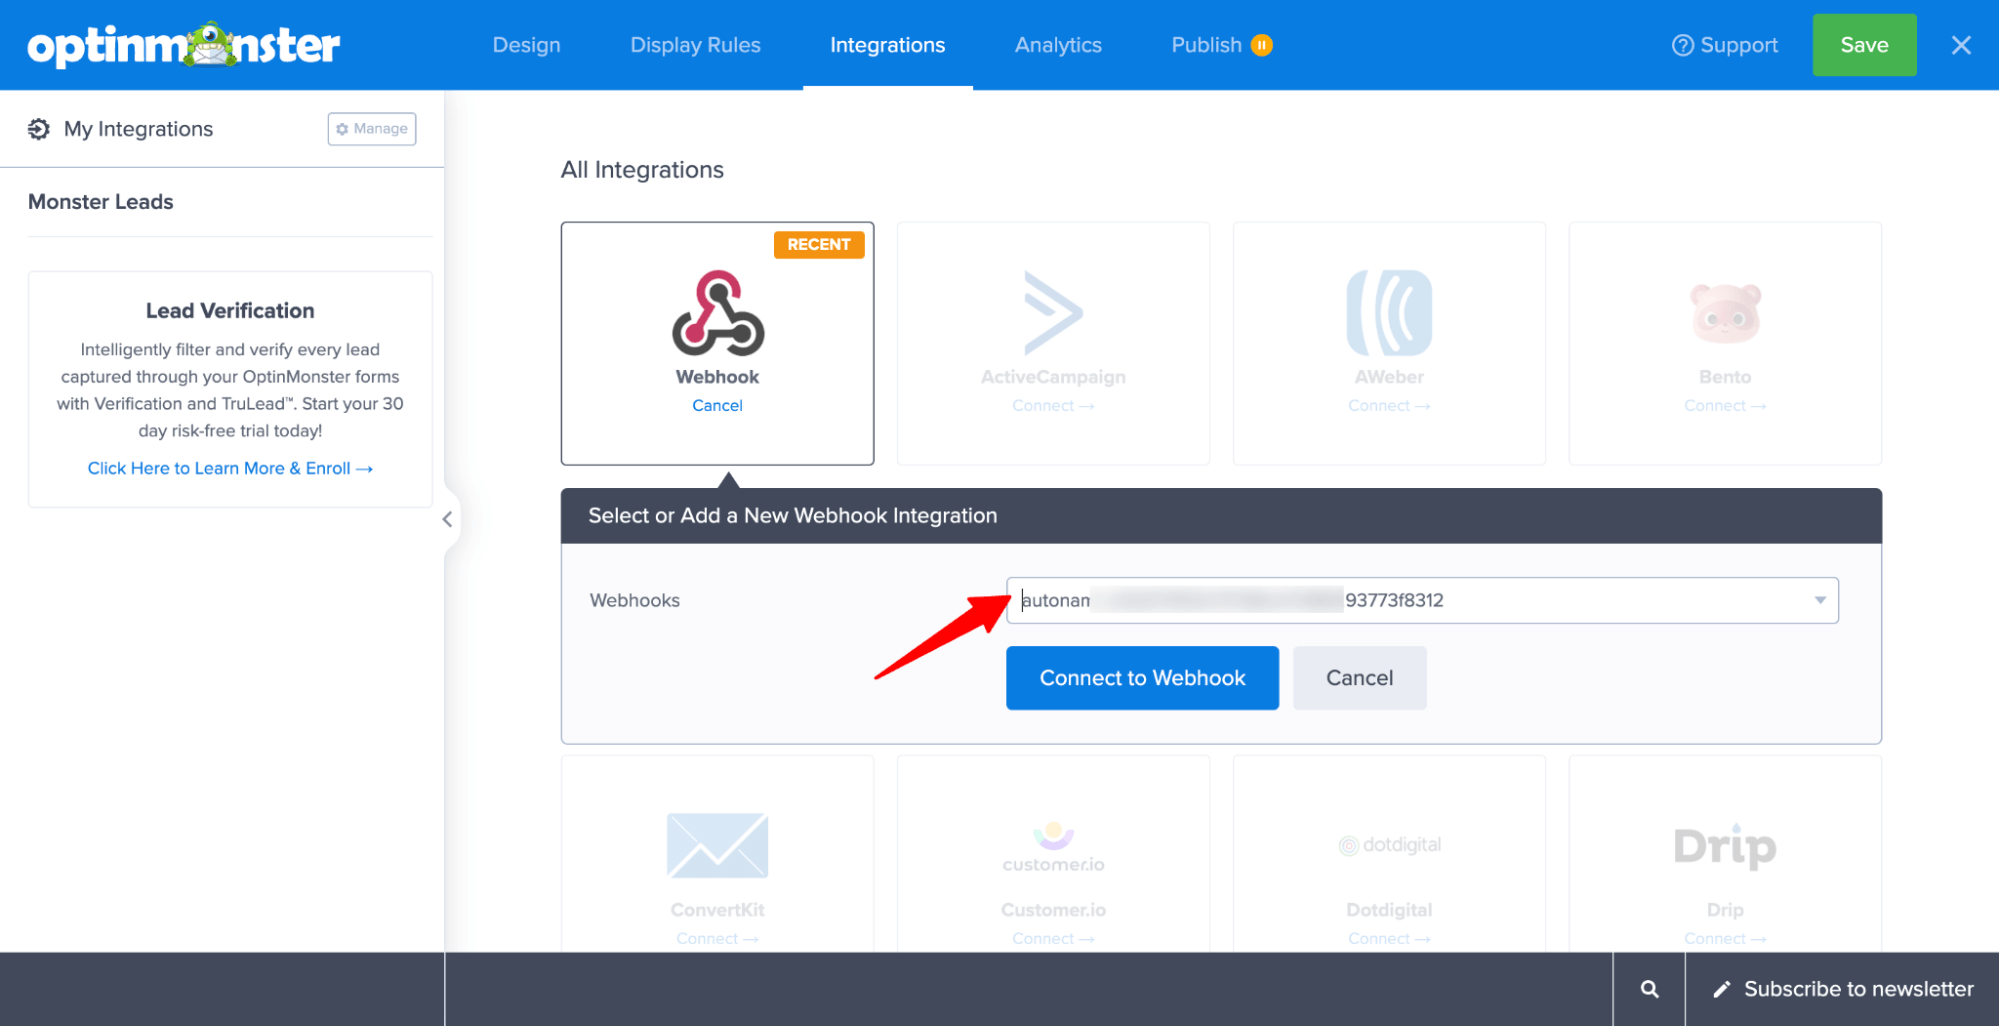
To integrate this campaign with FunnelKit Automations, go to the Integrations section and click on “Add a New Integration”.

Now scroll down to “All Integrations” and hit the Connect option for Webhook.
Then add the latest webhook from the dropdown and click “Connect to Webhook”.
Step 4: Publish the campaign
Move to the Publish tab, Choose the Publish Status as “Publish,” and hit Save.
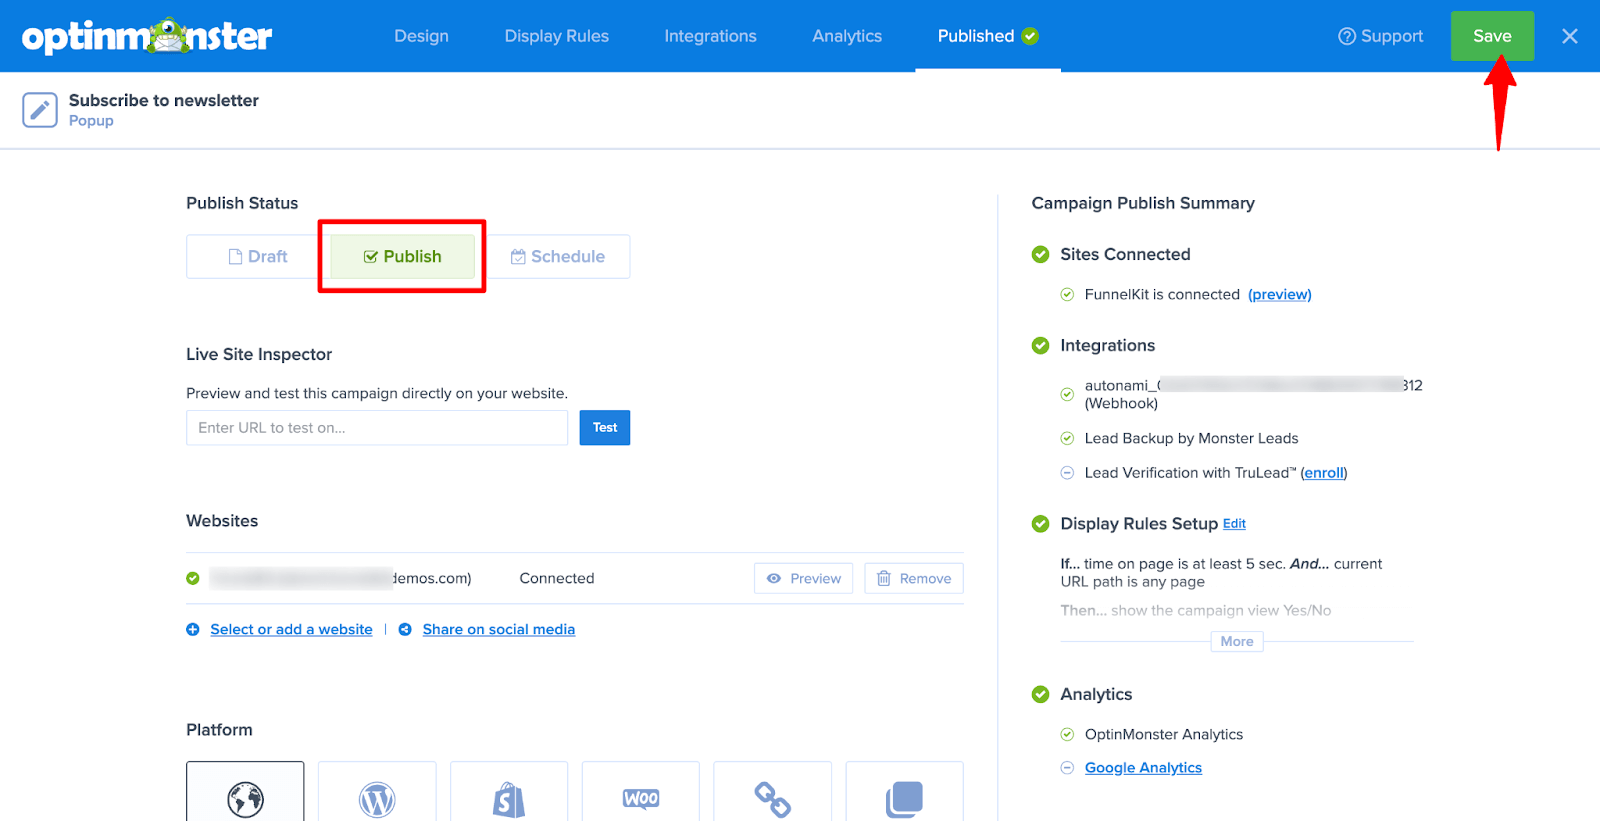
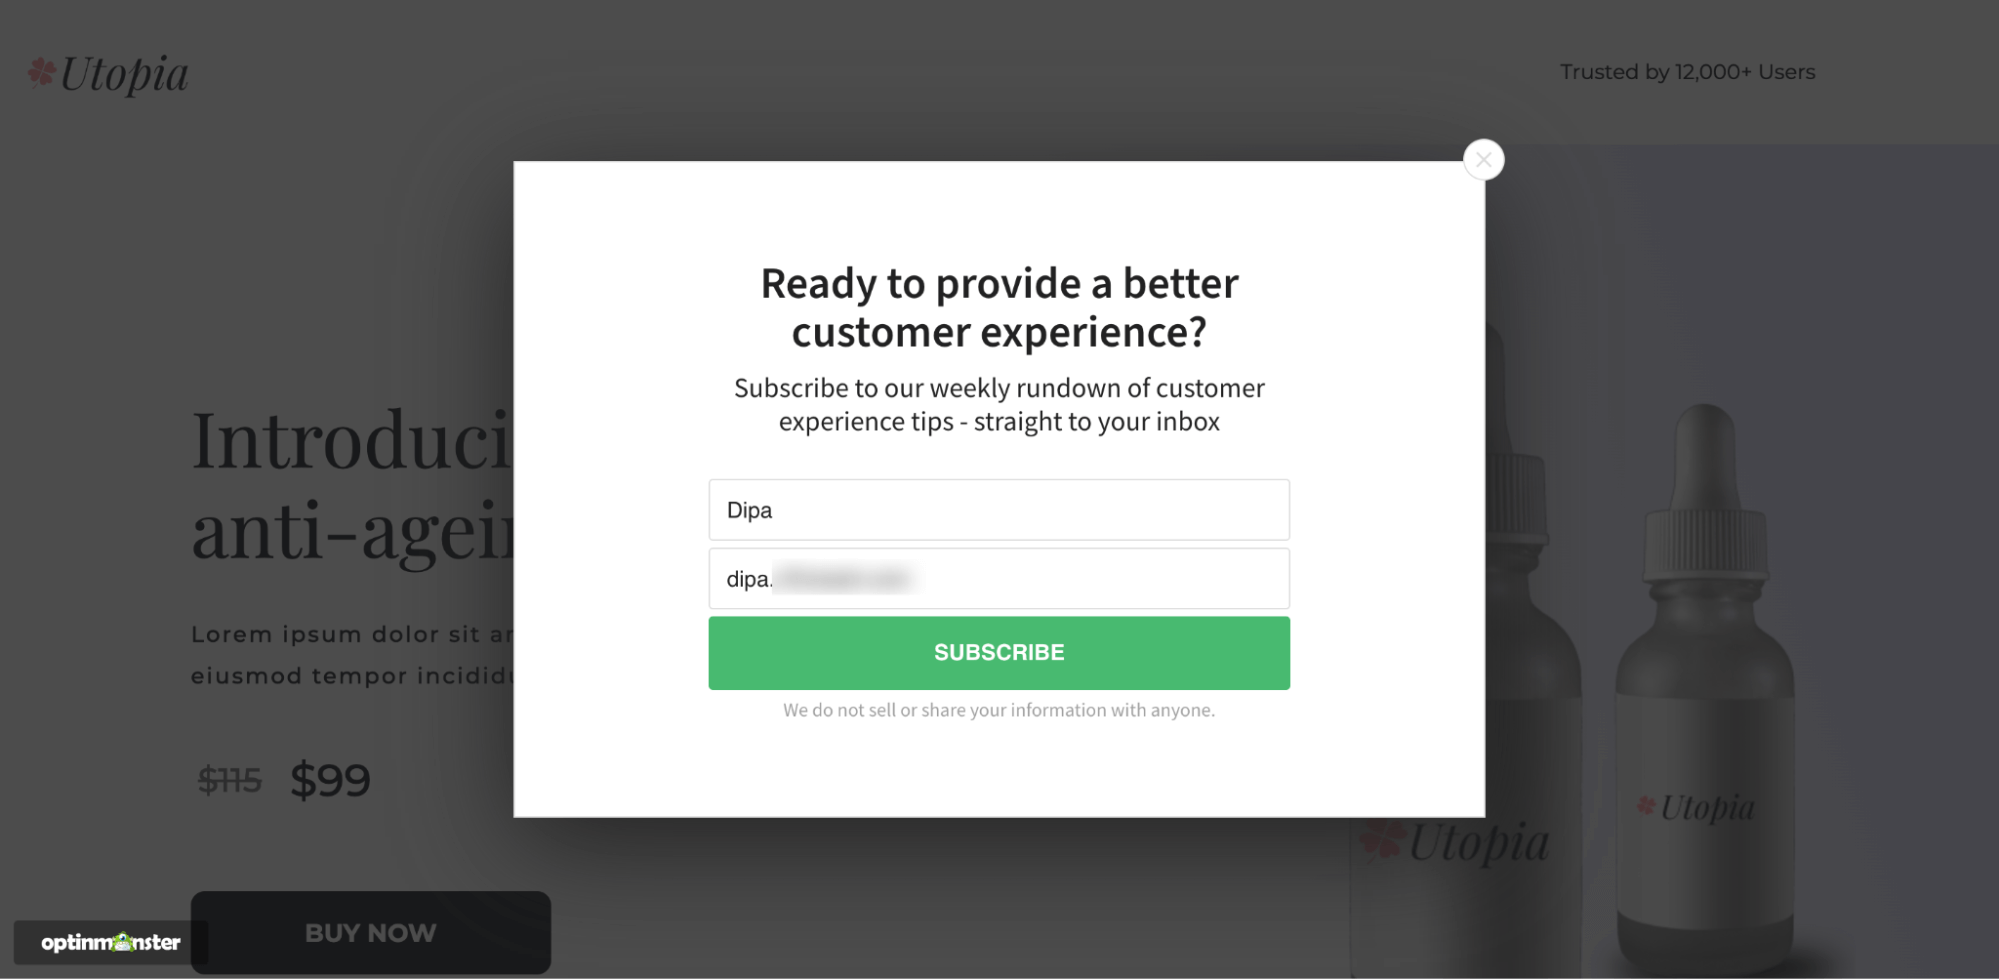
Now, your OptinMonster campaign is ready. Here is how it will show up on the front of the website.
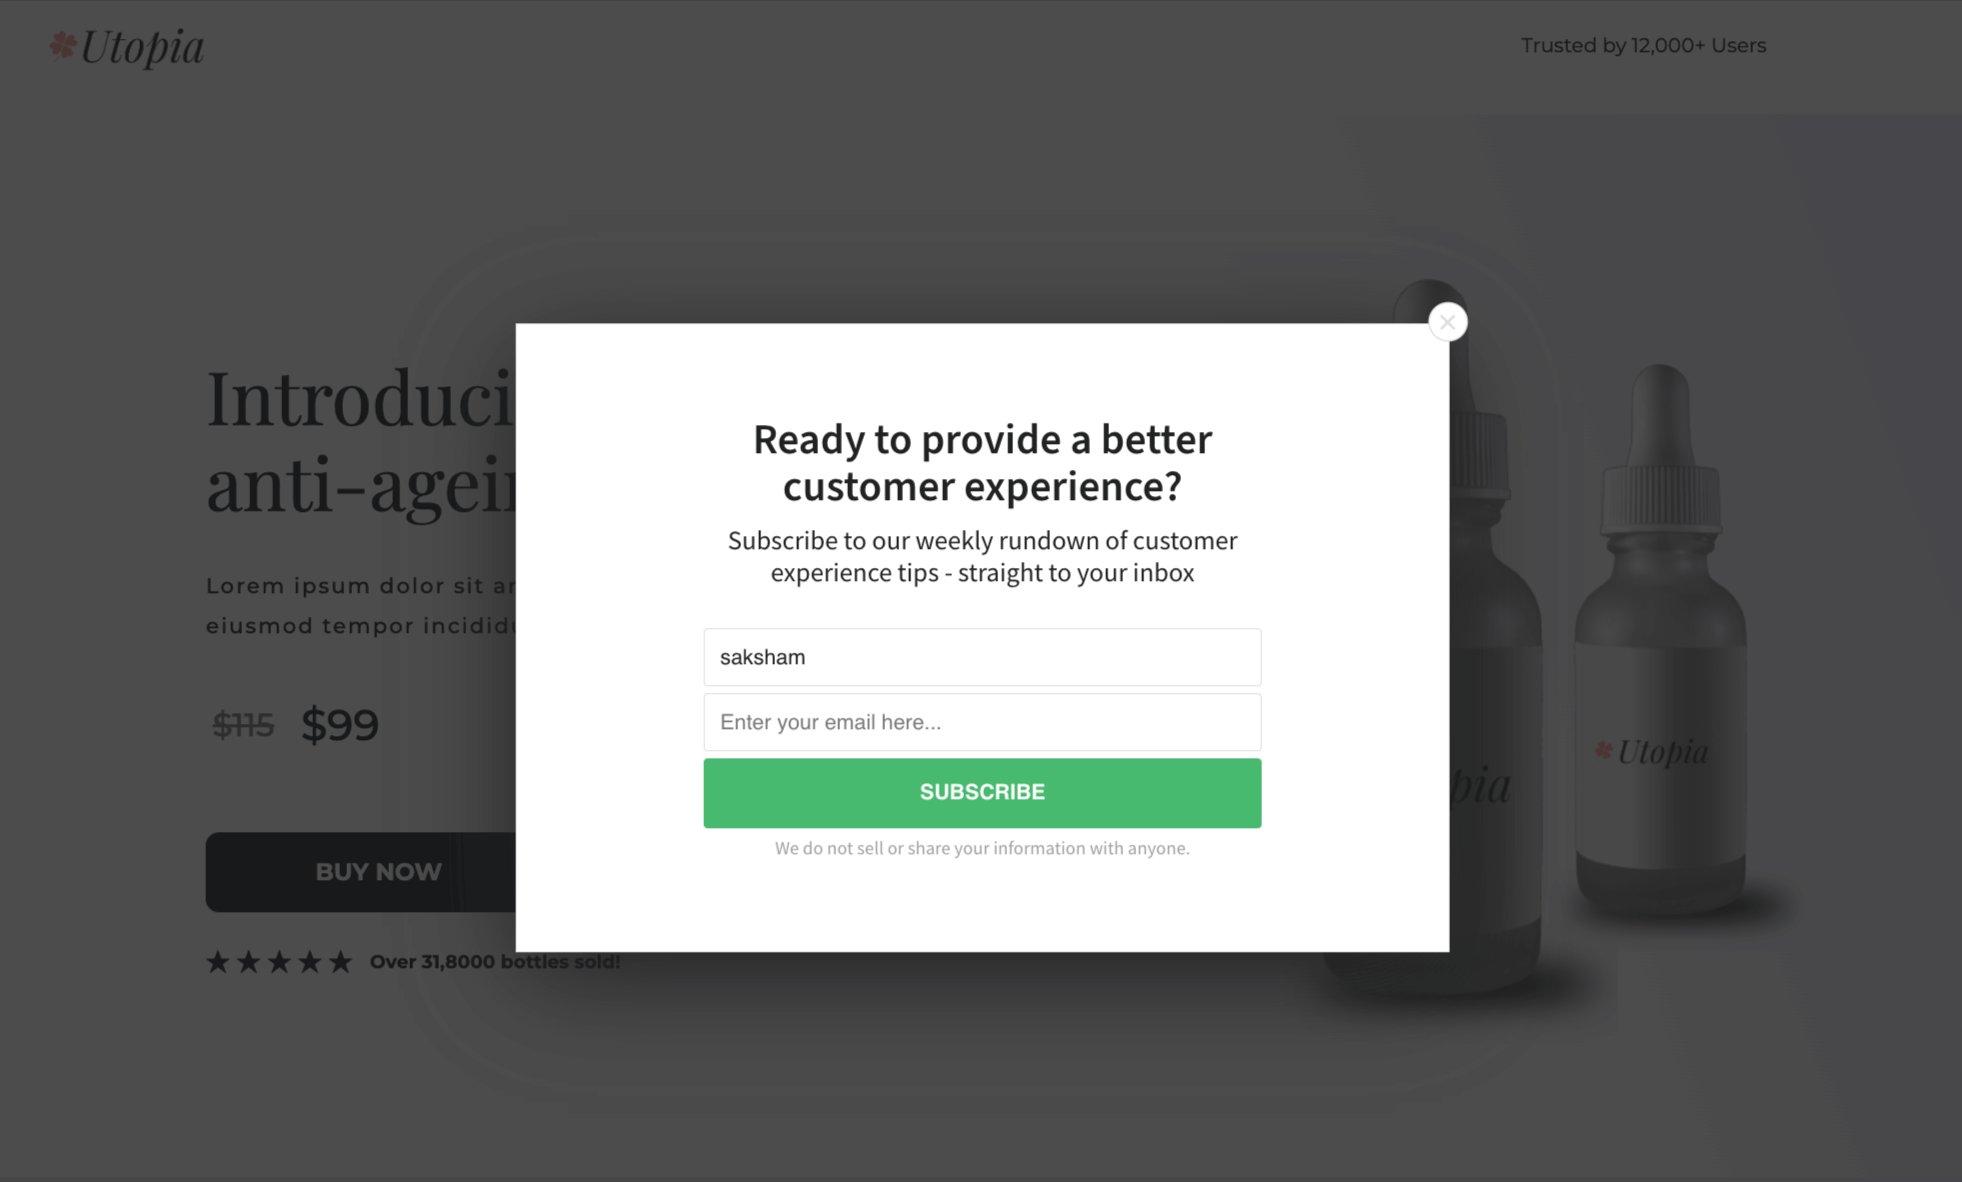
All there is left to do is connect it with automation.
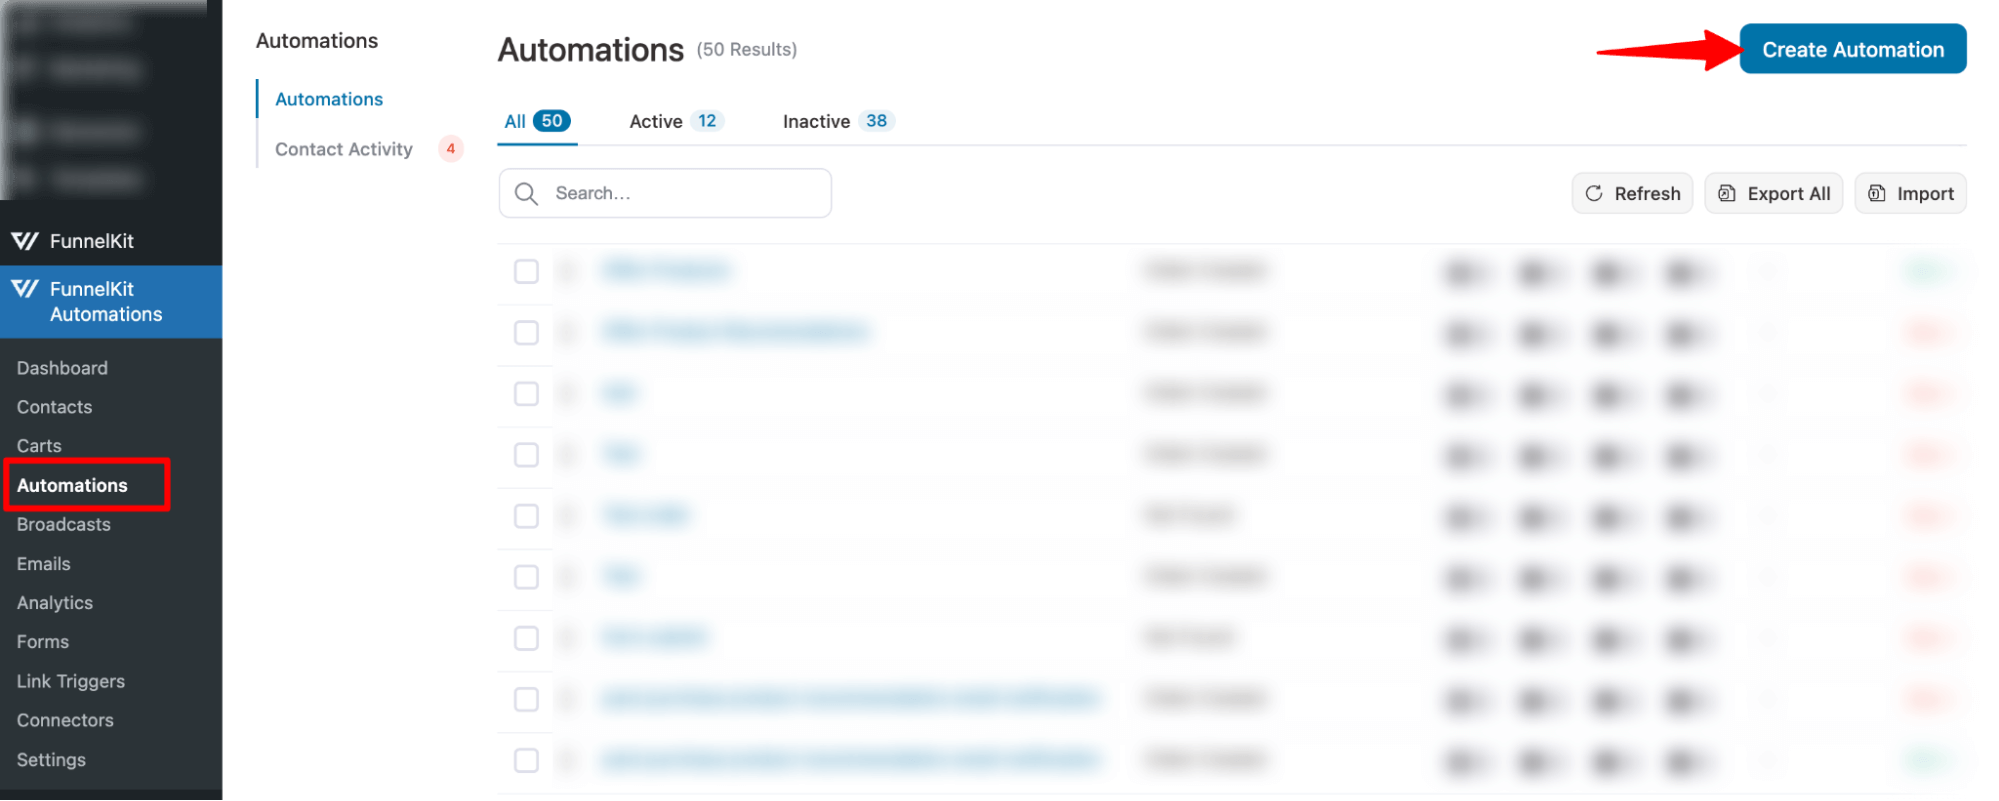
Step 5: Create automation to integrate with the OptinMonster campaign
To create an automation, navigate to FunnelKit Automations ⇒ Automations and hit “Create Automation”.
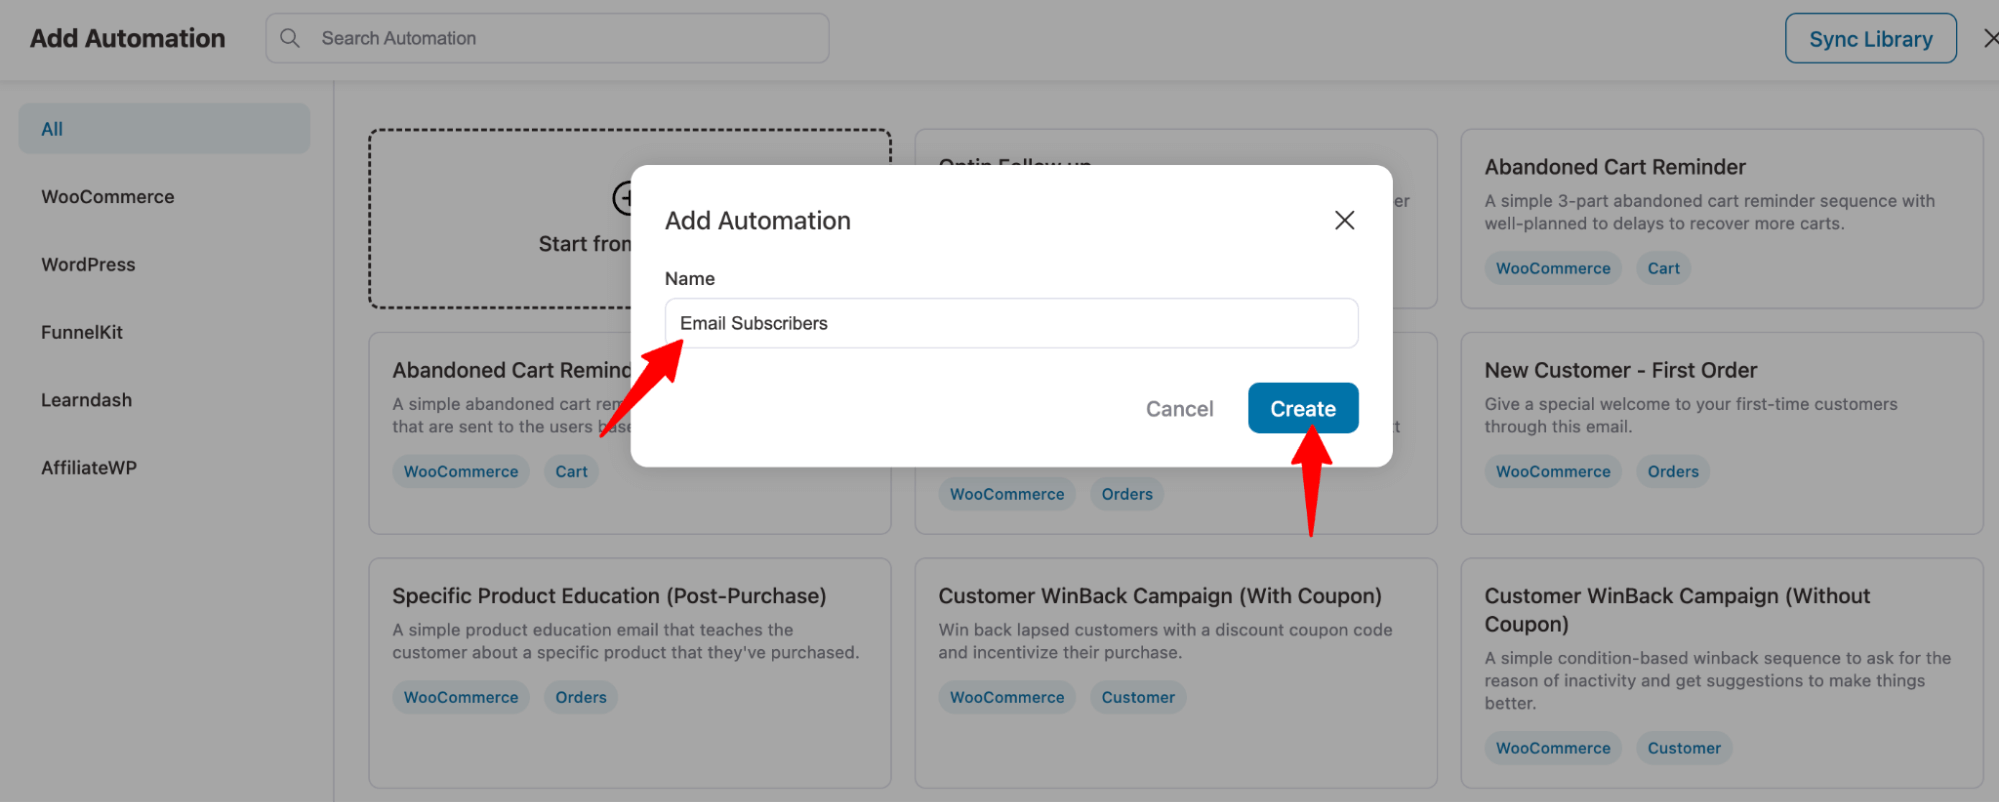
Select the start from scratch option, name it, and hit “Create”.
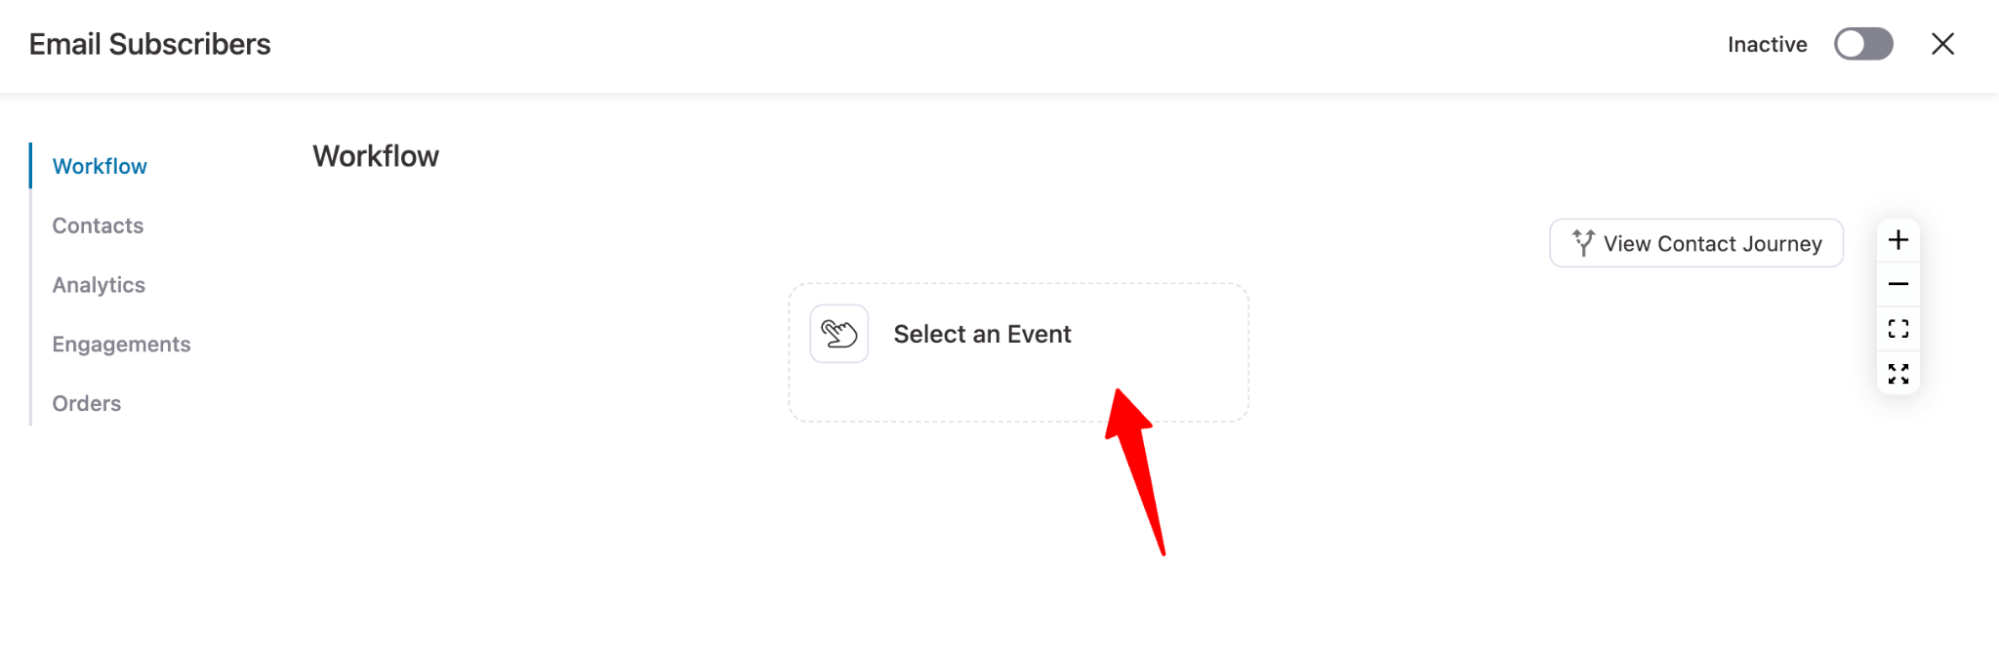
Step 6: Configure the OptinMonster form submit the event
Now, it’s time to configure the event that will trigger the automation. In our case, we used an OptinMonster form to create our campaign earlier.
Click on “Select an event”.
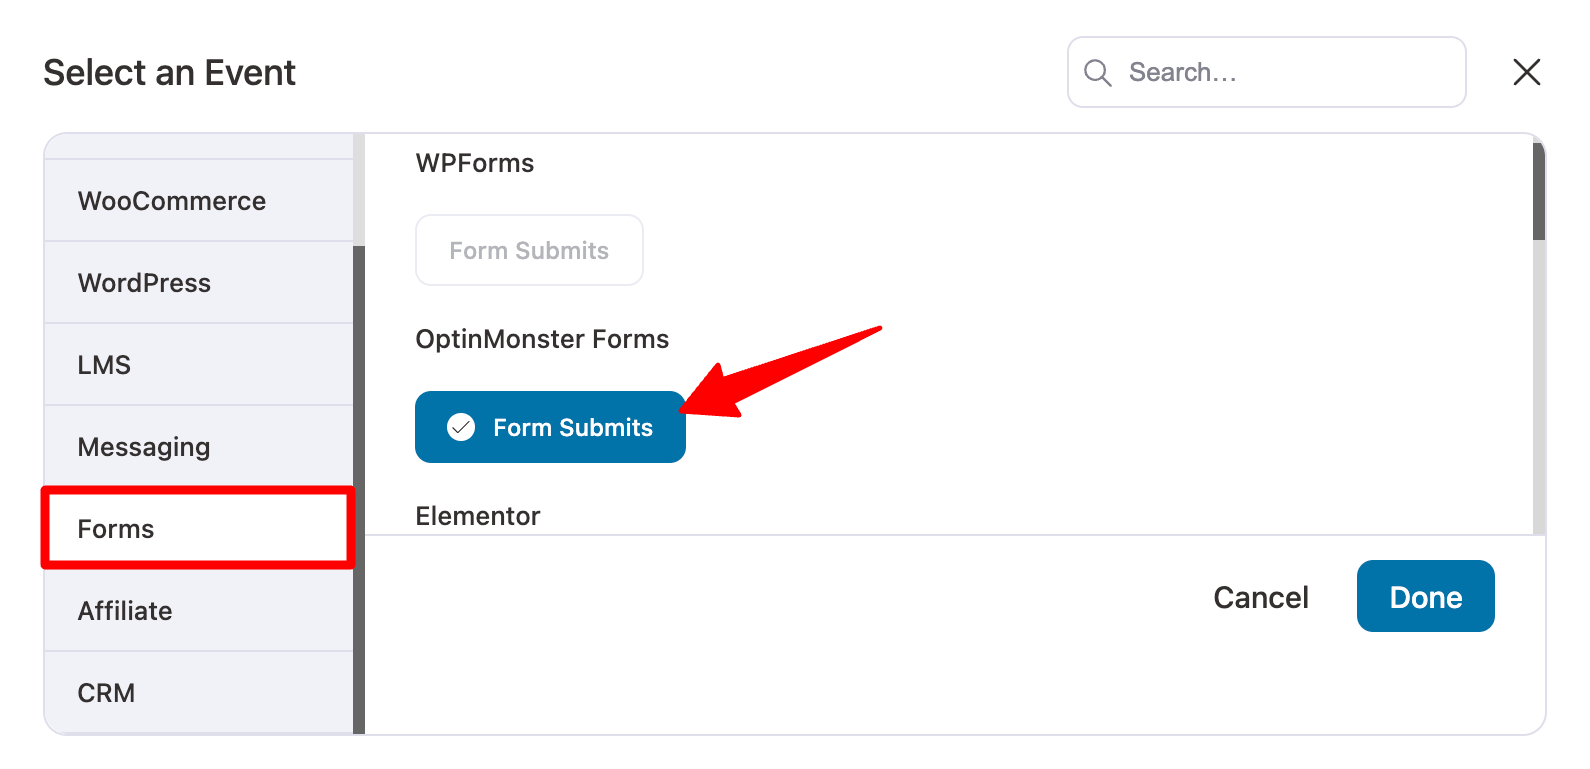
Next, you move to the “Forms” tab and choose the “Form Submits” event under OptinMonster Forms.
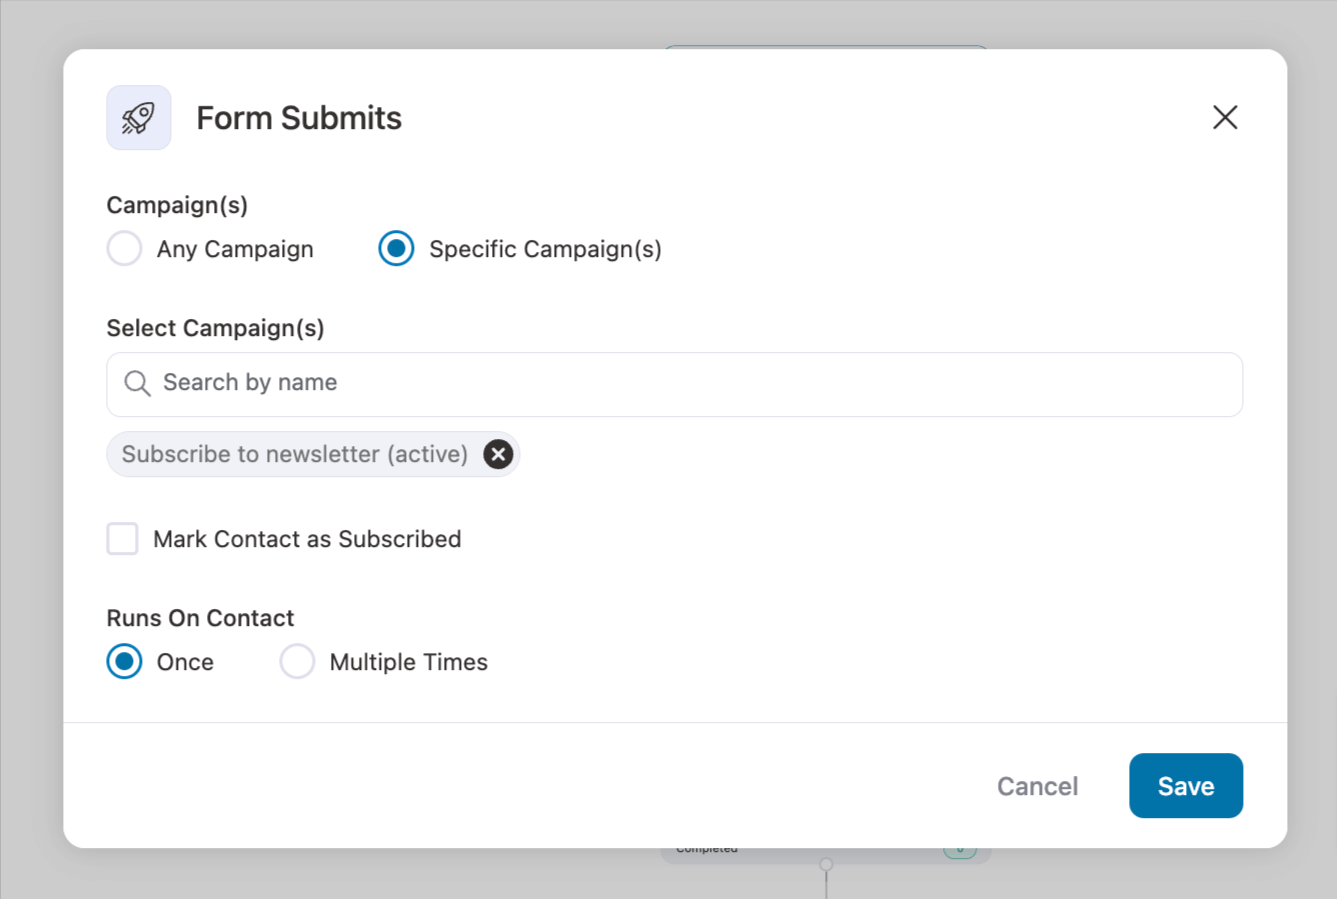
Now, it’s time to configure the Form Submits event. You need to configure the following options:
- Campaign(s): Choose any campaign or specific campaign. Since we want this automation to run only for a specific campaign to collect leads, we will choose Specific Campaigns.
- Select Campaign(s): Search and select the campaign.
- Mark Contact as Subscribed: Check this option to mark the lead as a subscriber.
- Runs On Contact: To run this automation only once for each contact, choose once.
Make sure to hit “Save”.
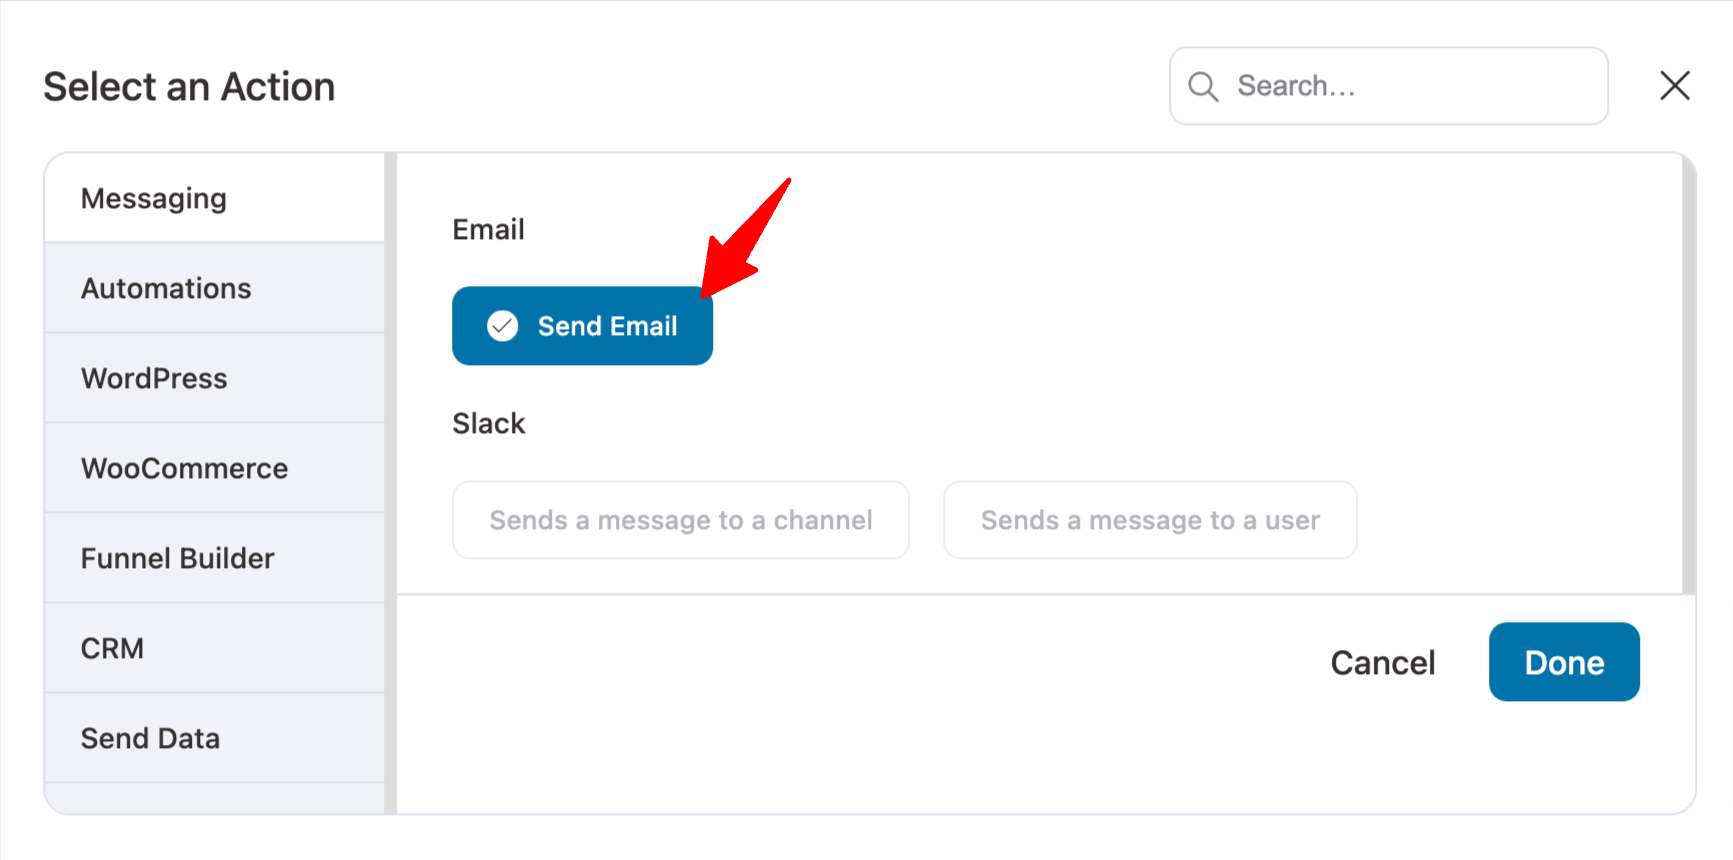
Step 7: Set a send email action
To add a send email action, click on “+” and then choose “Action”.
Then, choose the “Send Email” option under Messaging and hit Done.
Now, set the subject line and preview the text. Use merge tags to personalize the messaging.
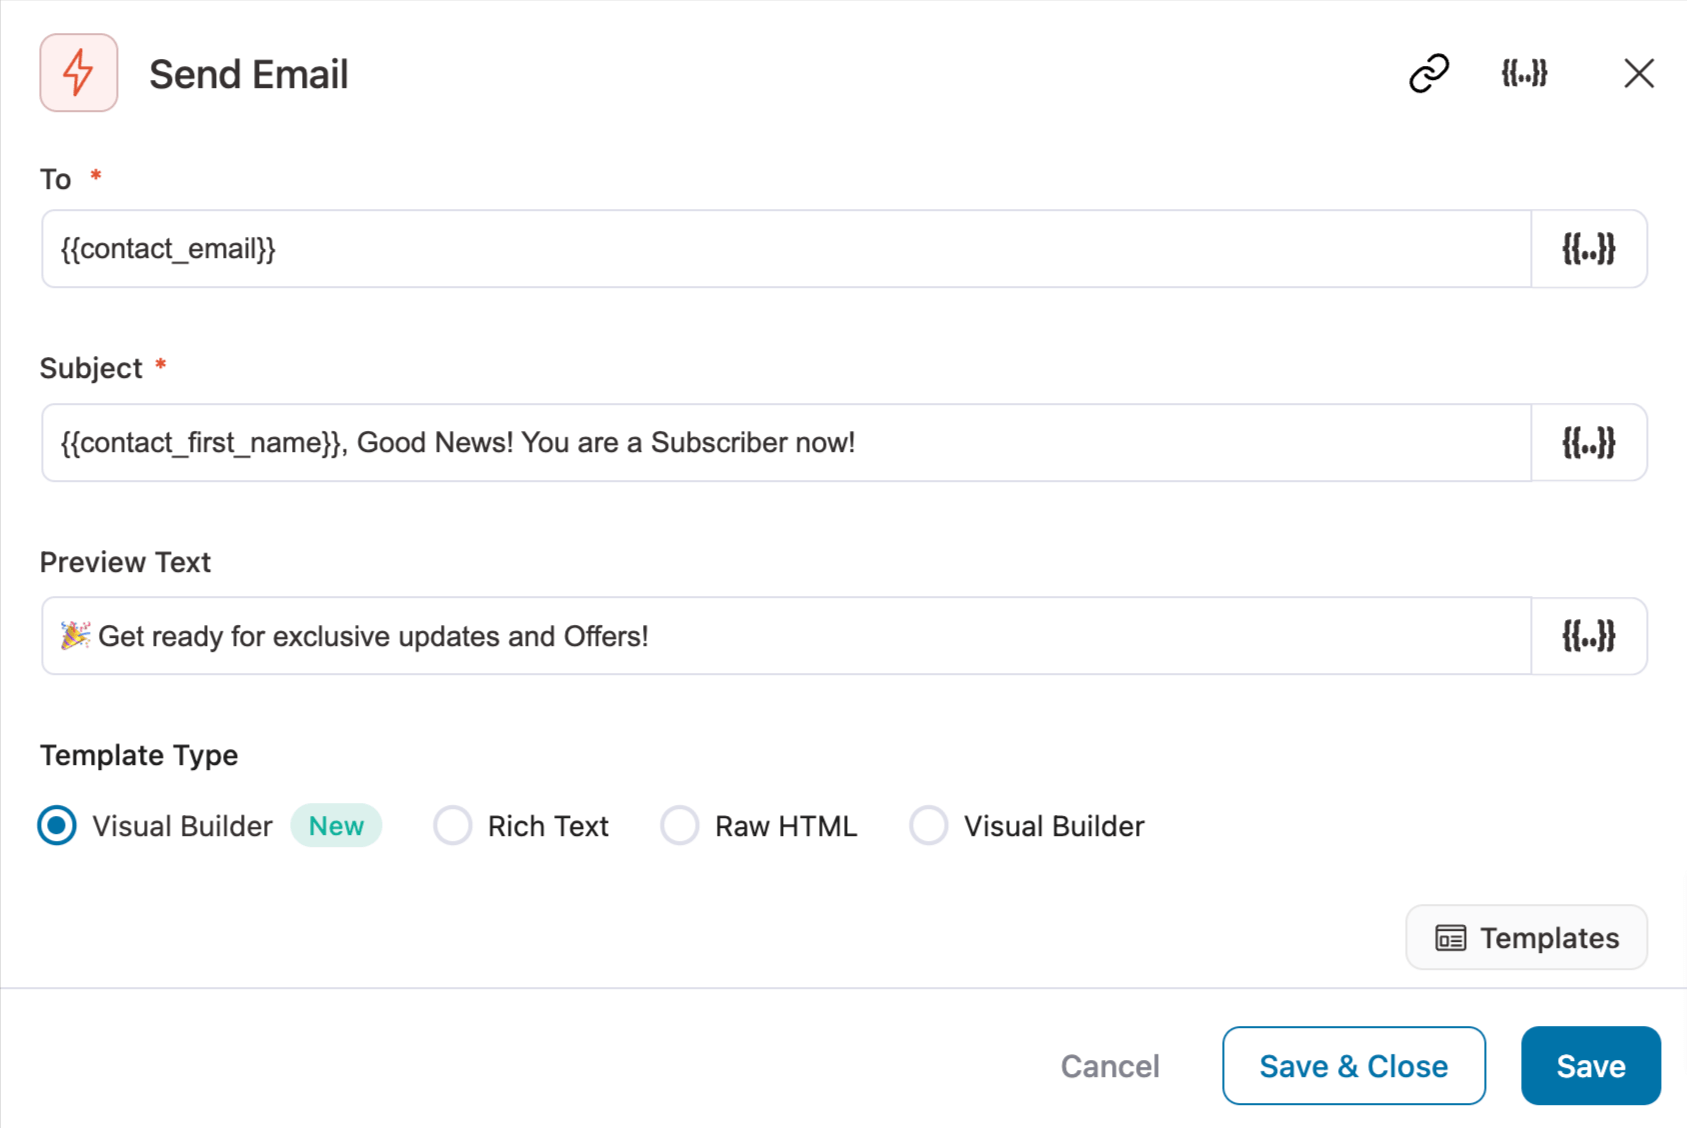
Next, we need to design the body of the email.
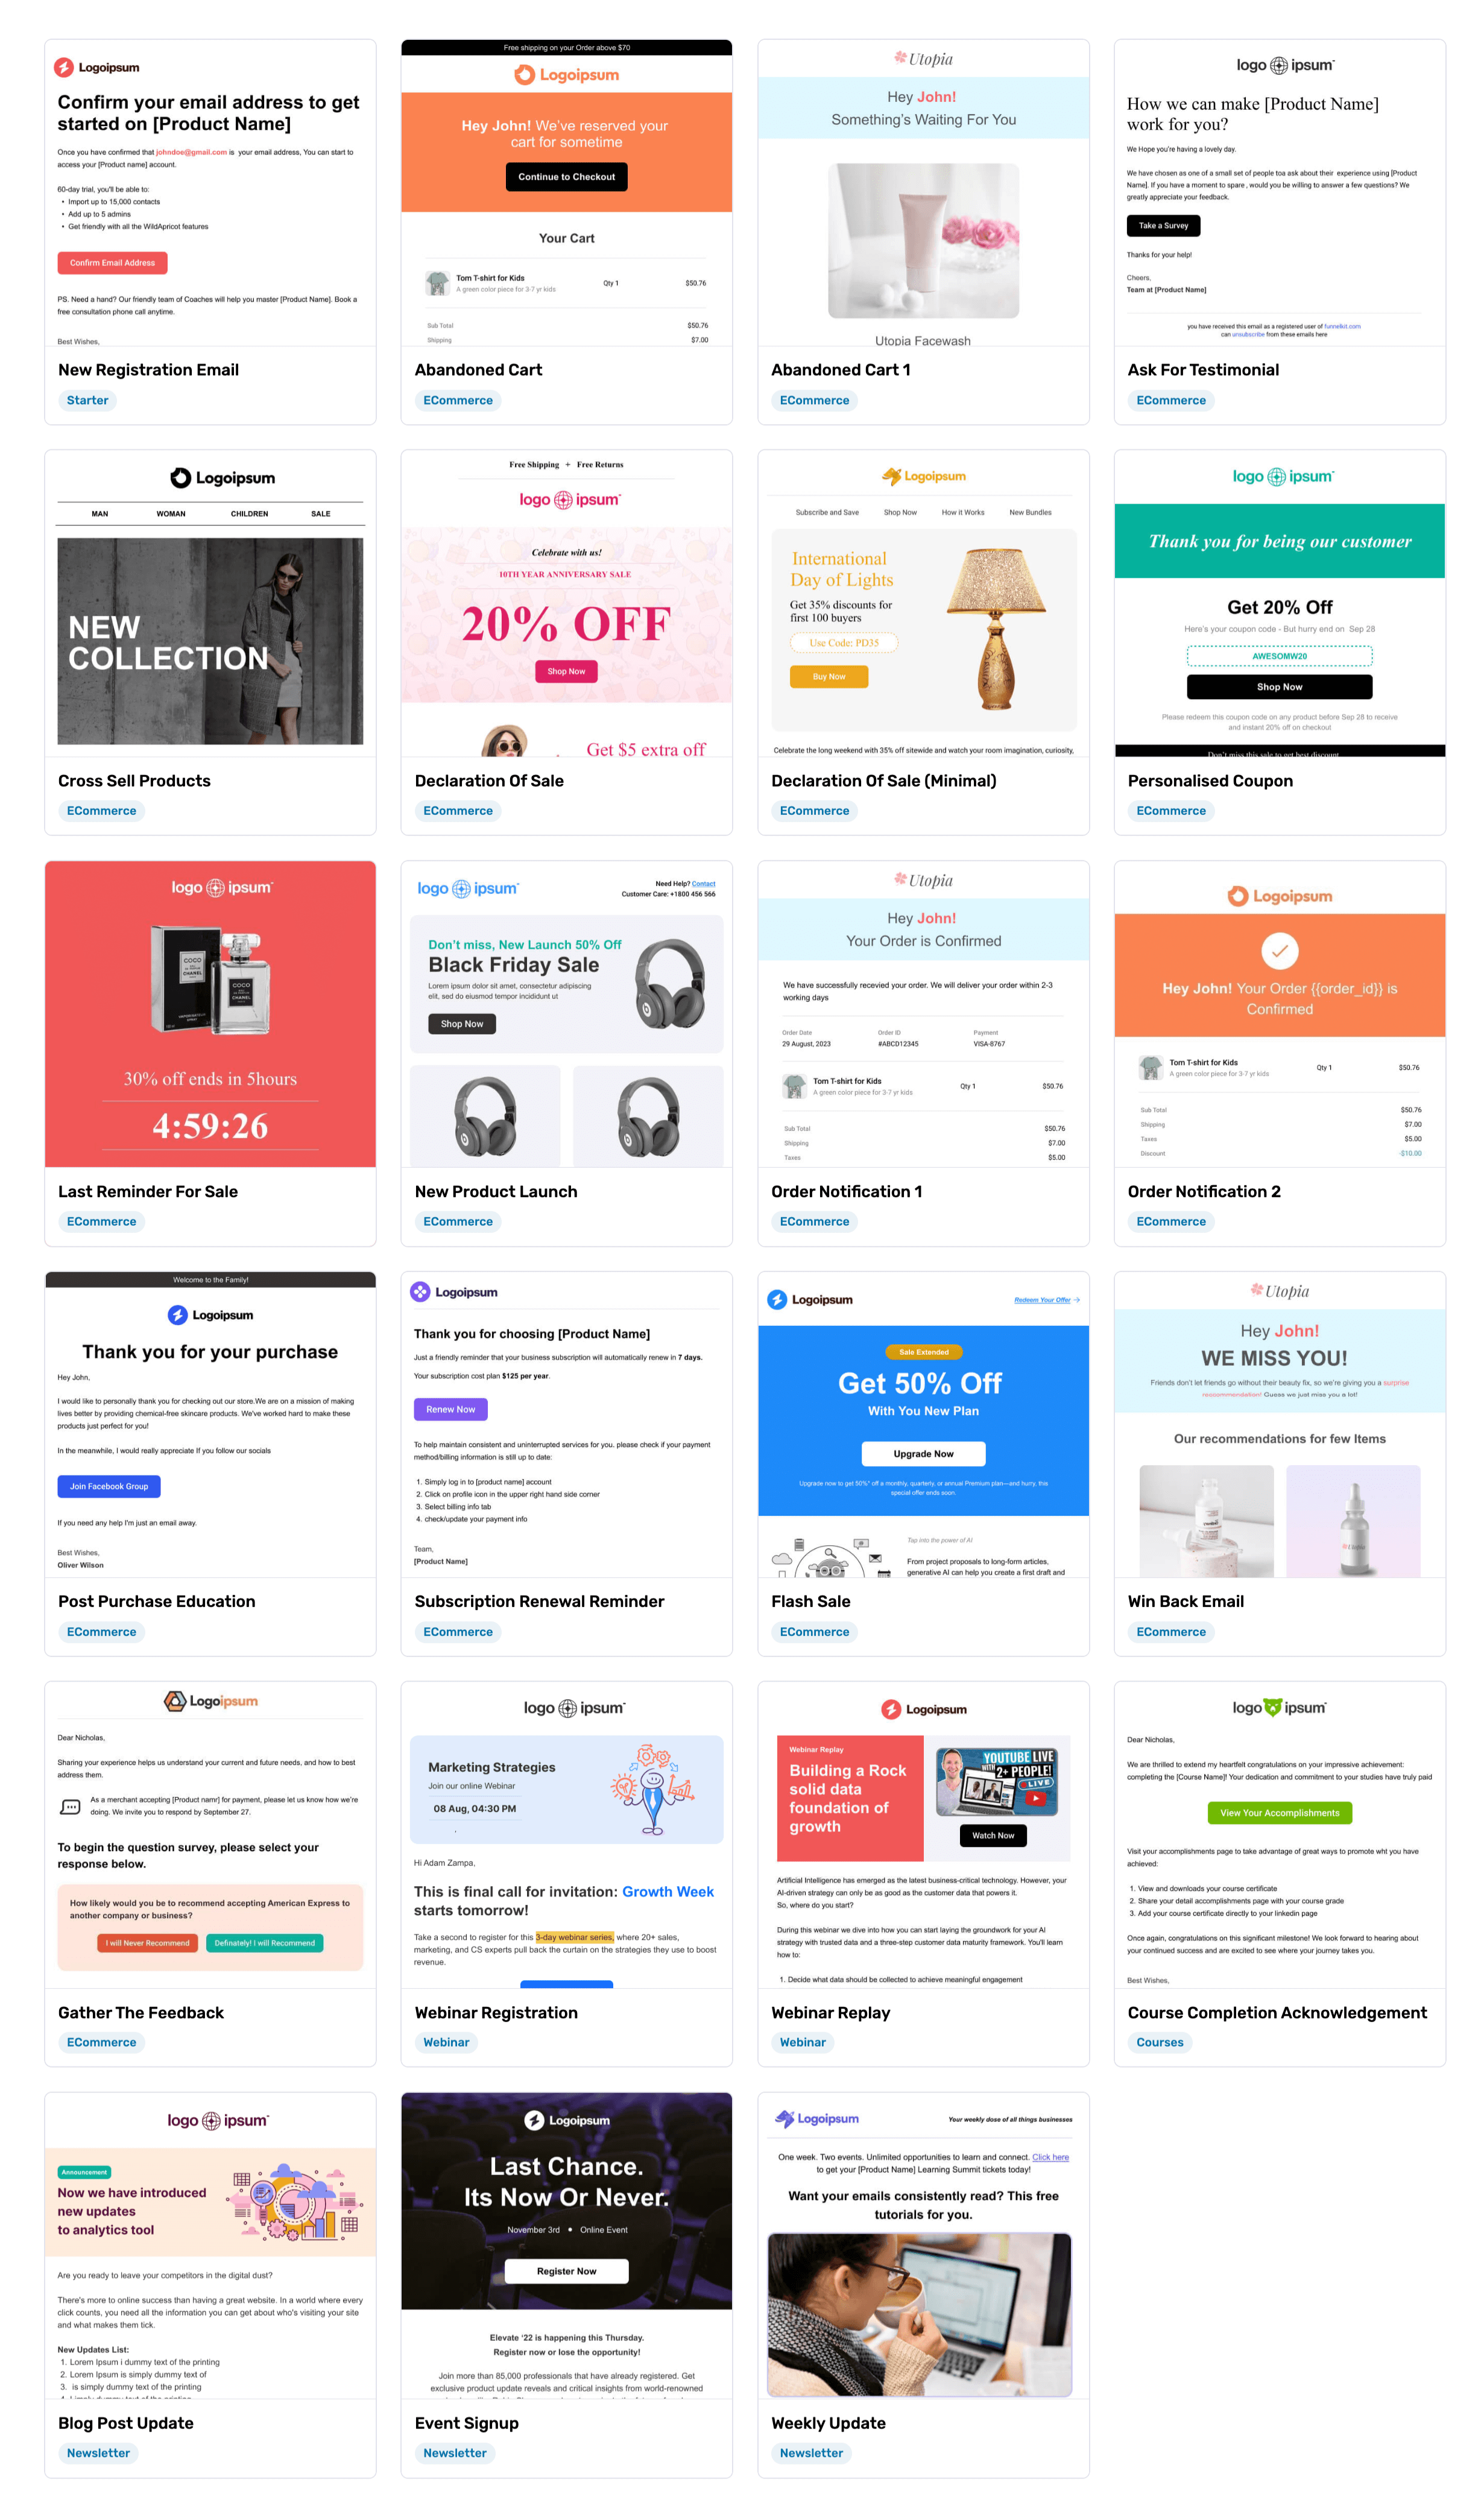
For this, we suggest you use the Visual Builder (New) option, which provides a sleek drag-and-drop interface to design beautiful emails.
Plus, it has many prebuilt email templates that you can import and customize to fit your needs.
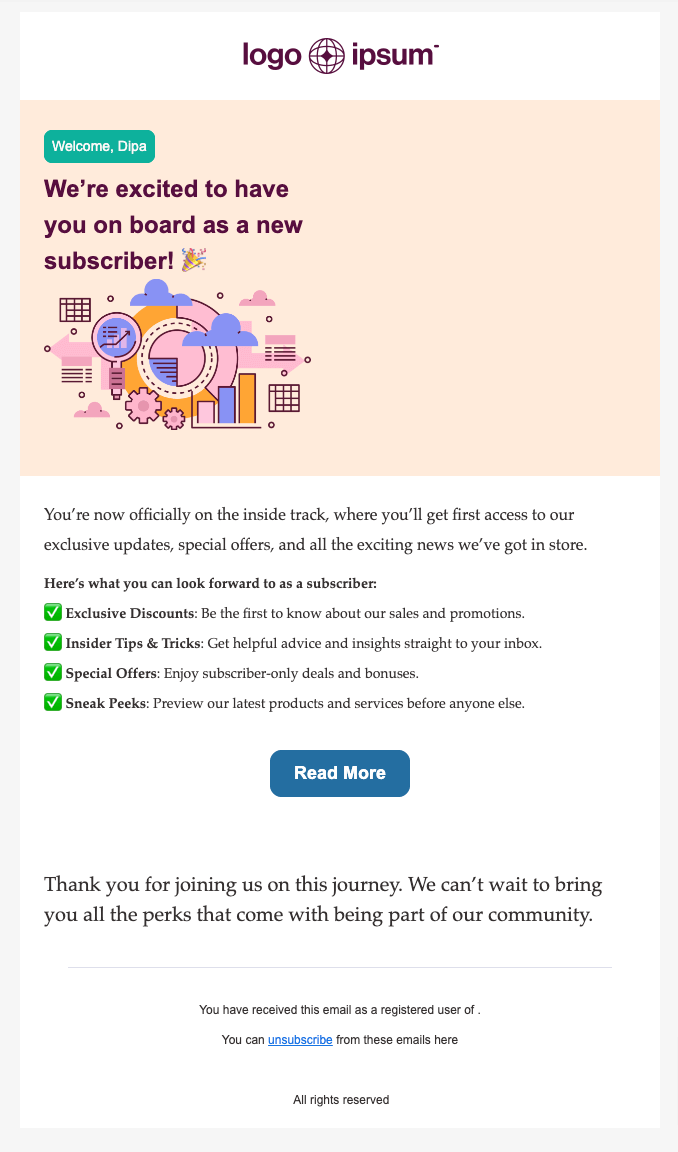
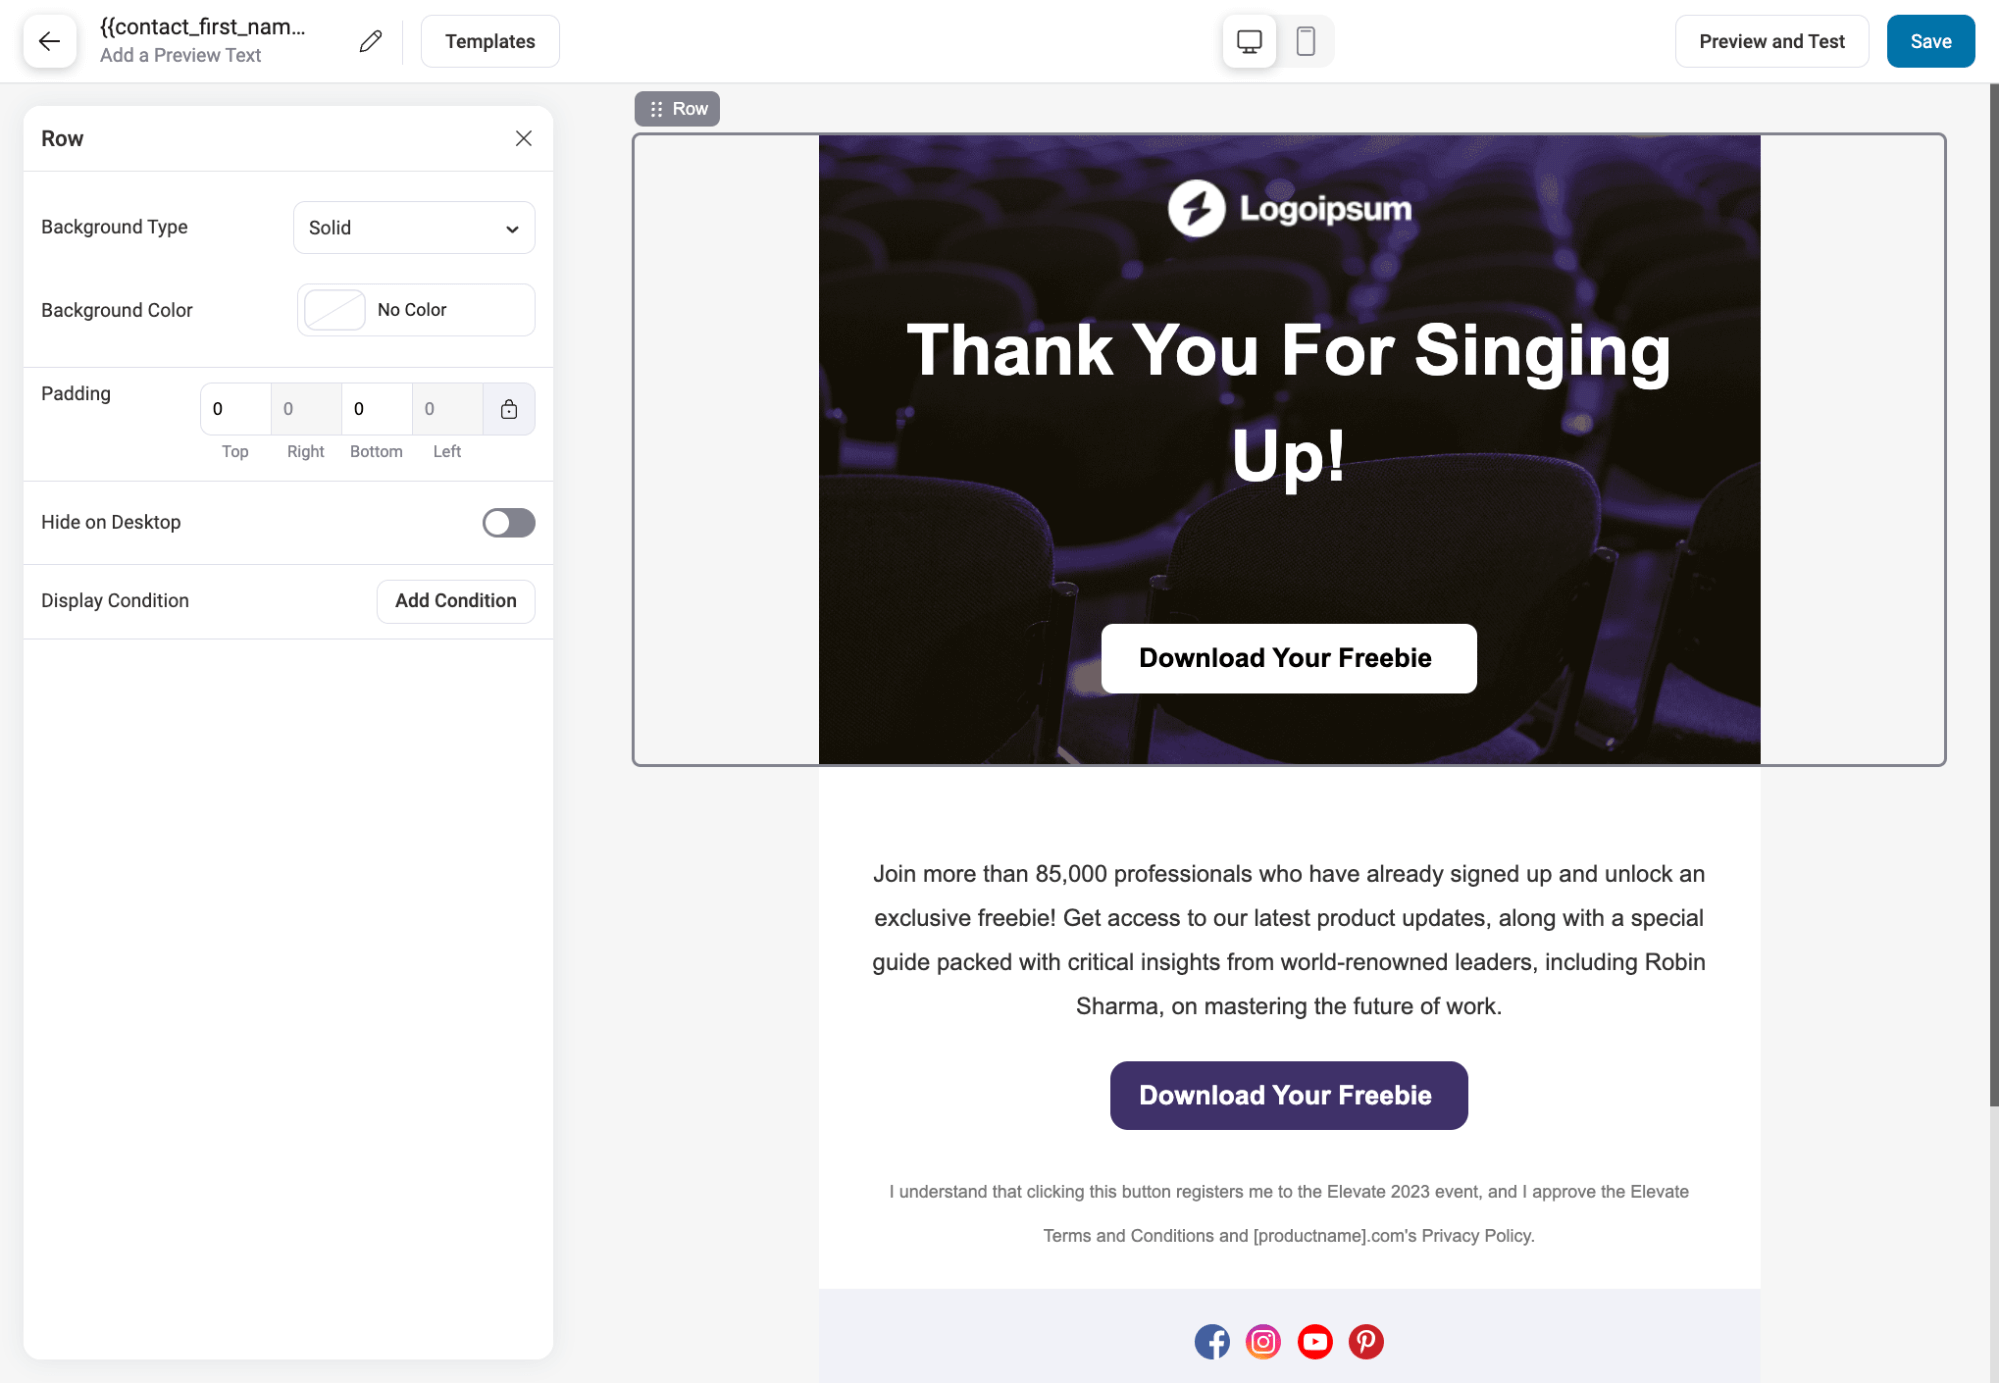
Here is the email we designed using the “blog post update template”.
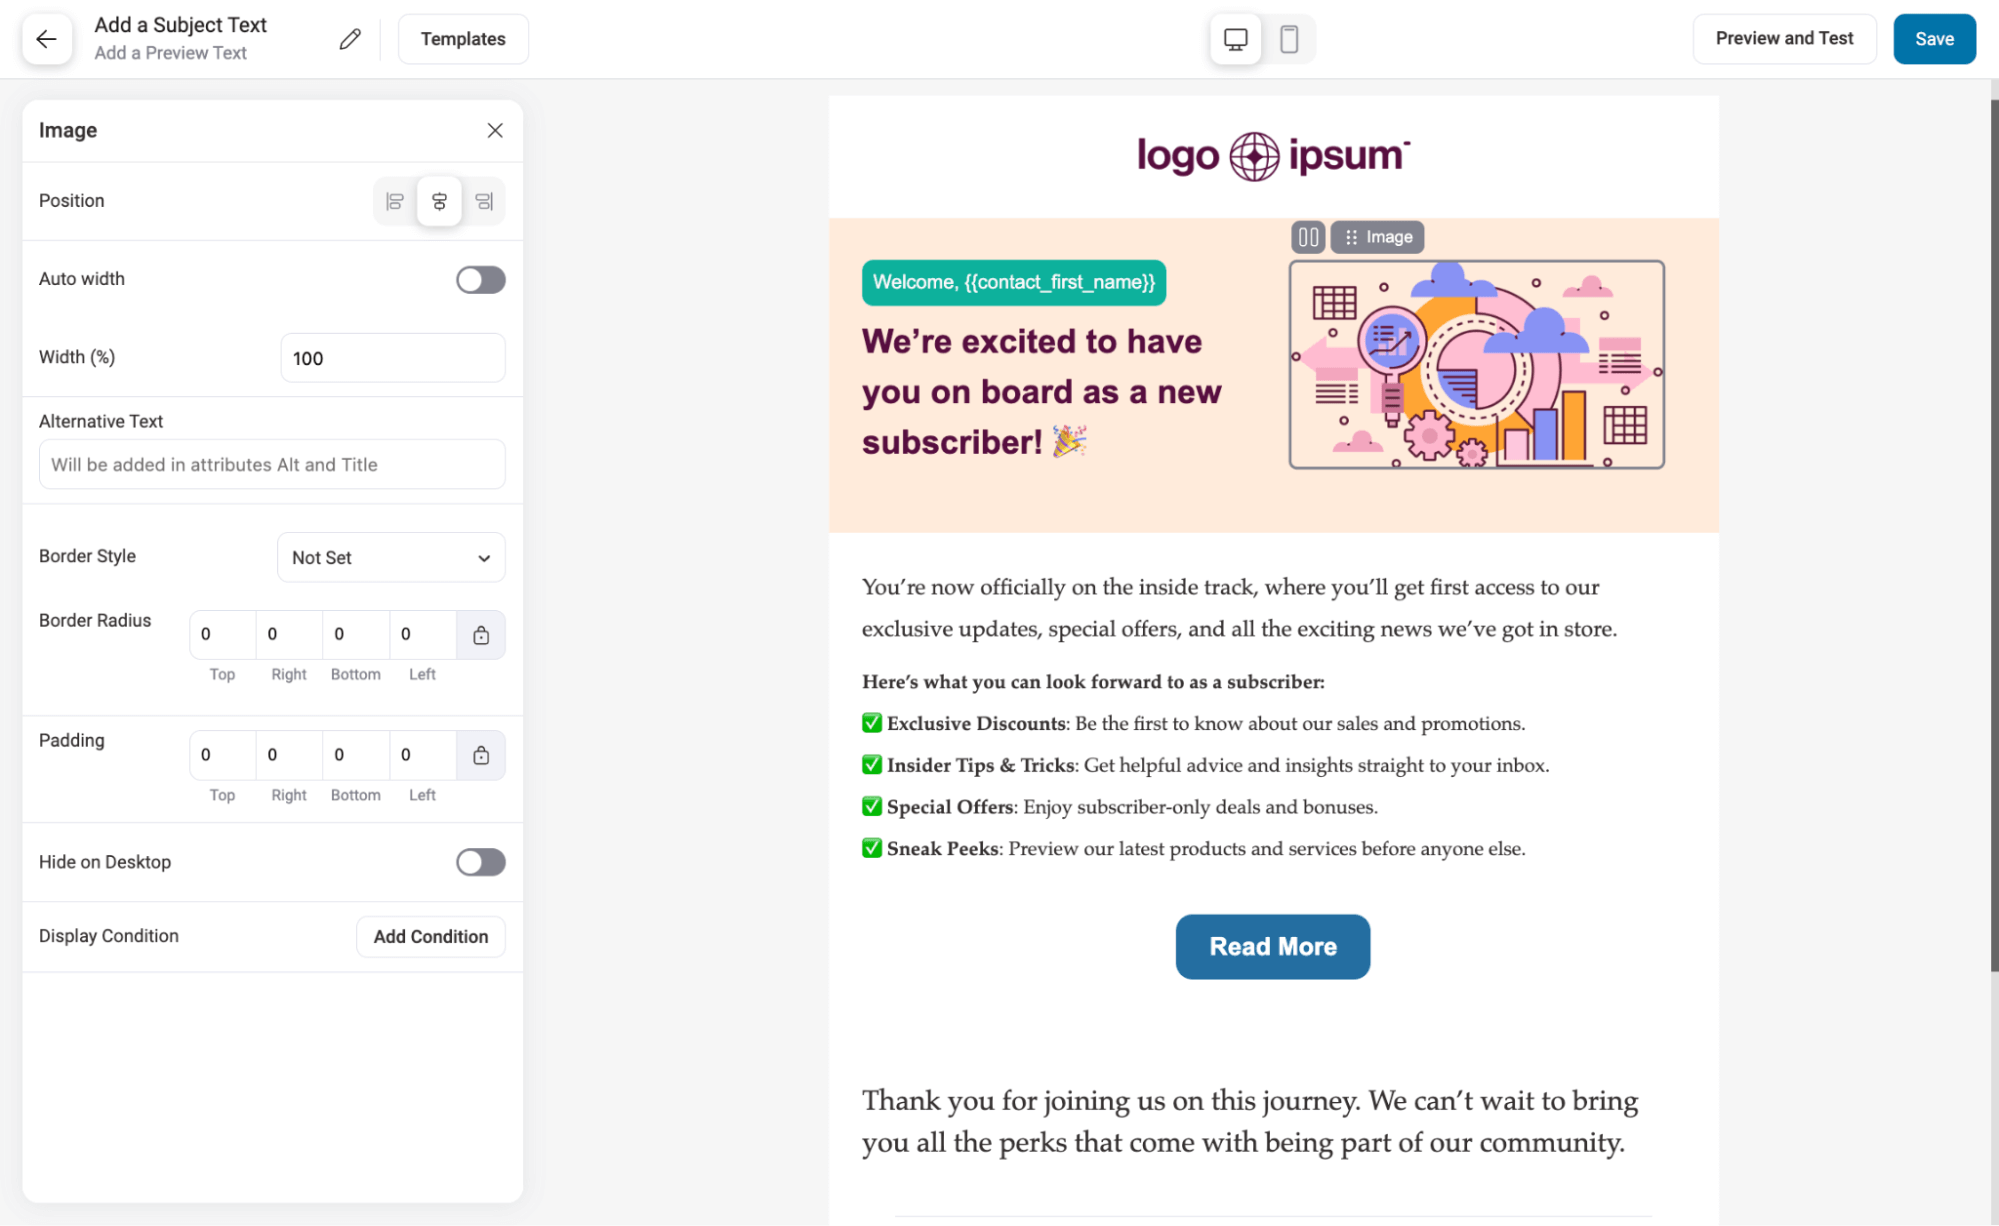
After designing the email, make sure to save the template.
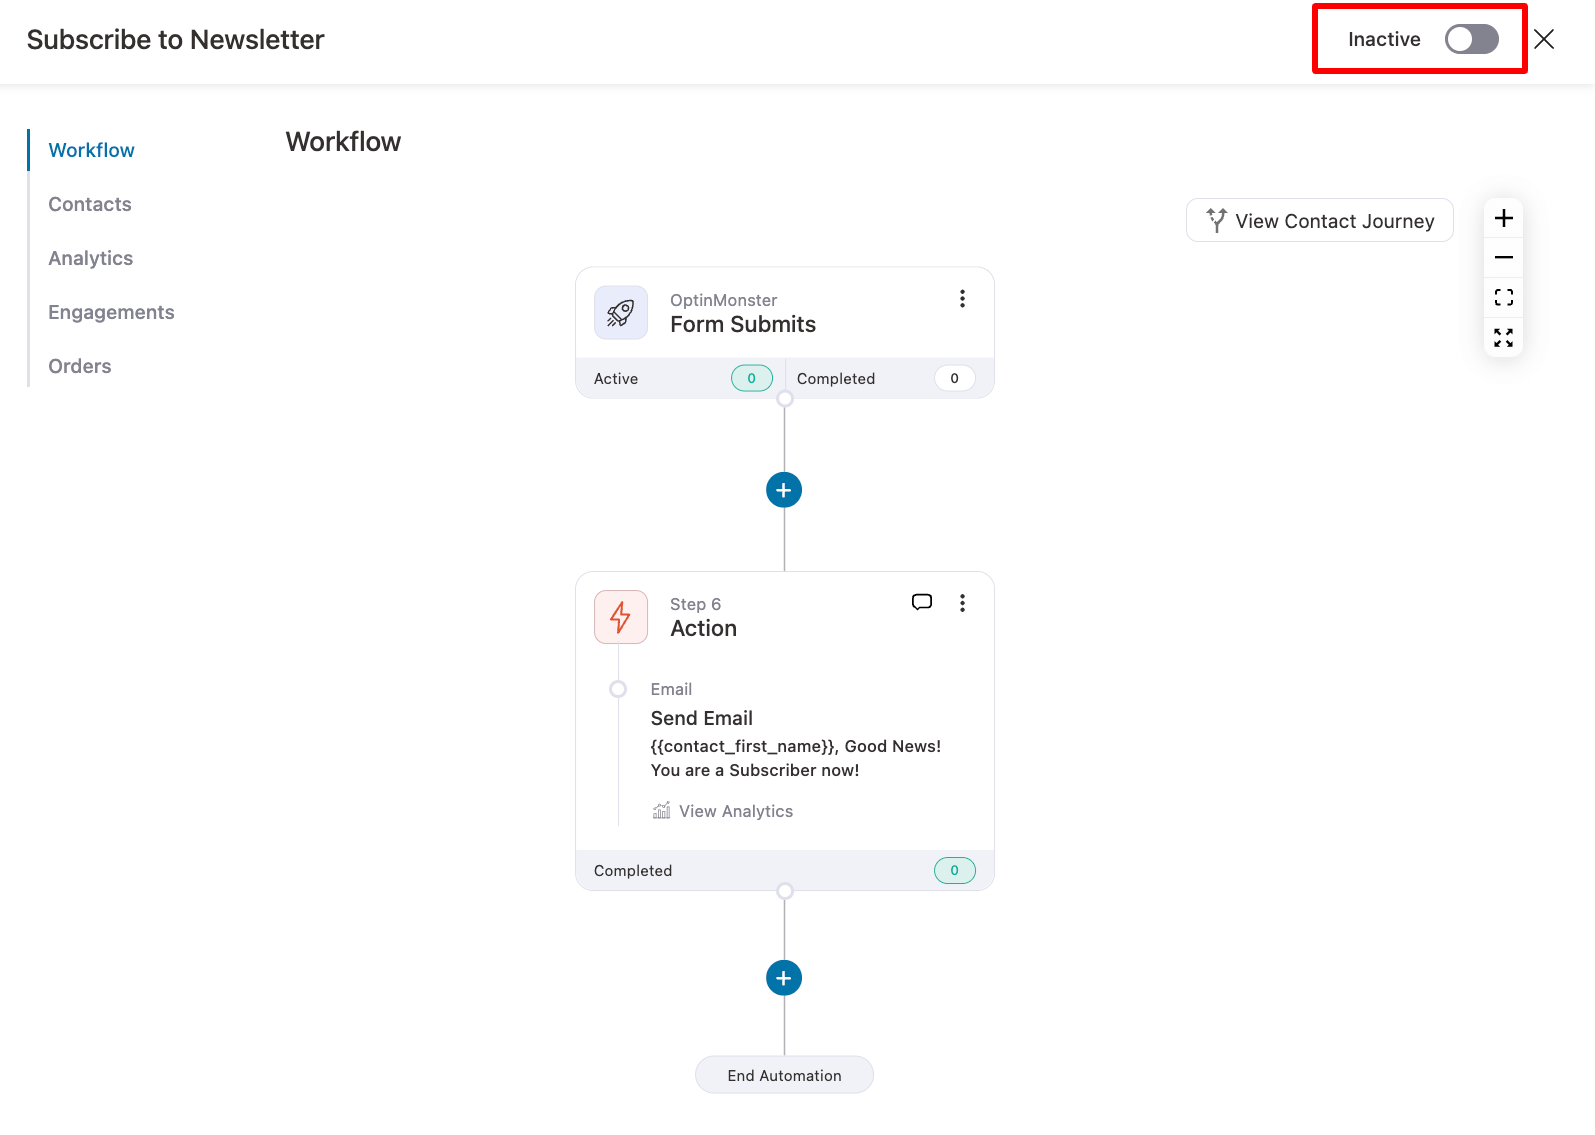
Step 8: Activate the automation
The last step is to activate the automation you just created. To do this, just turn on the toggle button.
Step 8: Test the integration
To test the integration, complete the form when it appears on the front end.
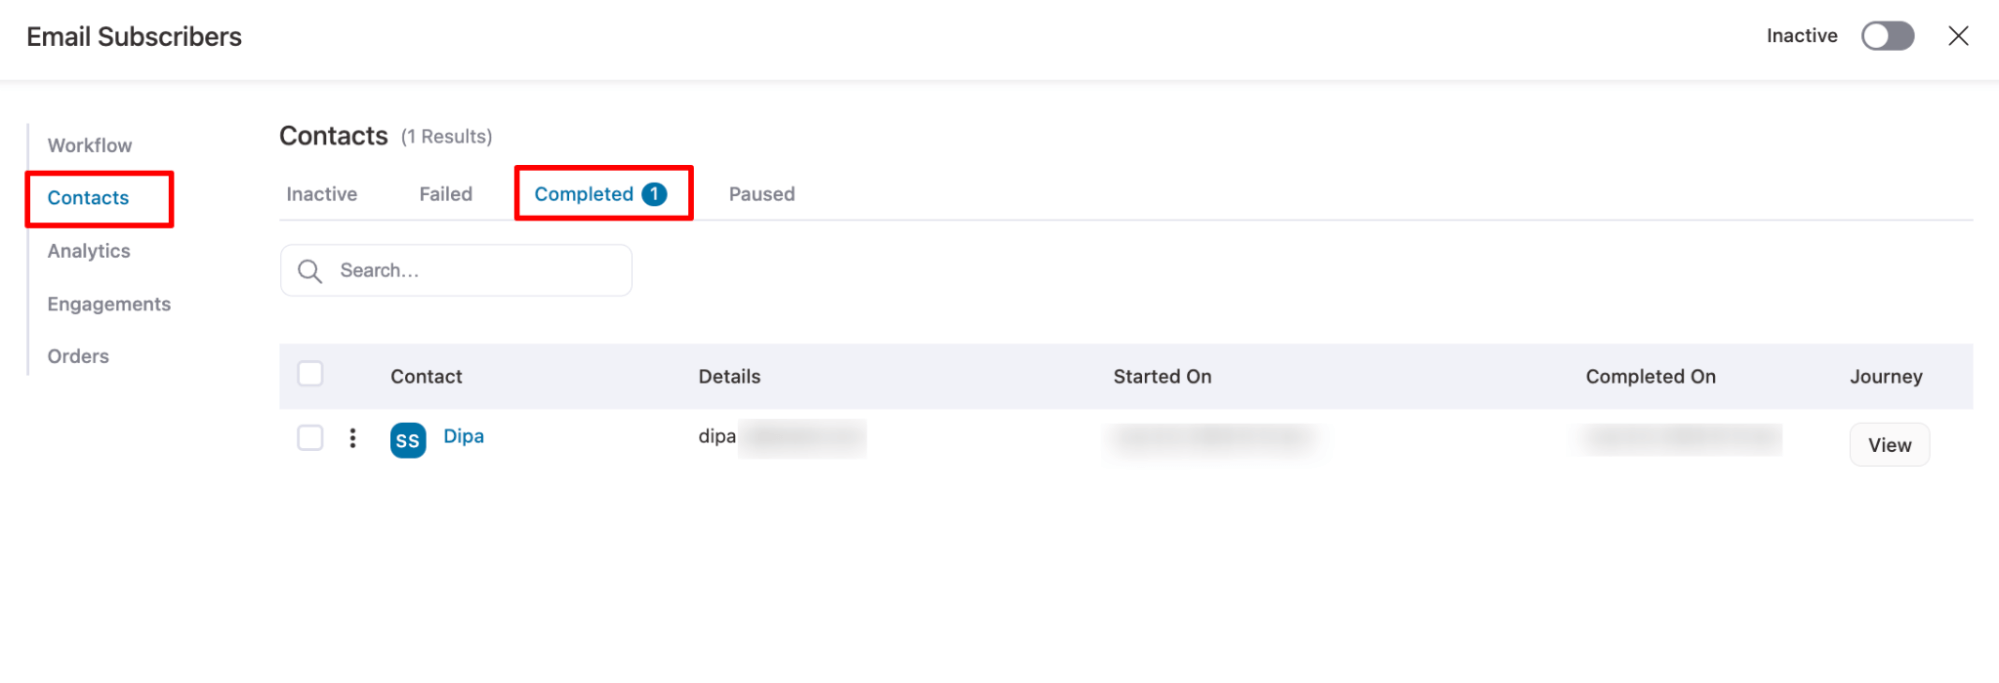
Now go to Automation and then to the Contacts tab. Under Completed, you should see the name and email you used to sign up.
Plus, you should see the confirmation email in your inbox as well.
And that’s it. You have successfully integrated OptinMonster with FunnelKit Automations.
5 Use Cases for Integrating FunnelKit Automations with OptinMonster: Collect, Nurture, and Convert Leads Effectively
Here are some of the practical use cases you can implement with FunnelKit Automations and OptinMonster to collect leads and nurture them to convert them:
Use Case #1: Send lead magnets or freebies with follow-ups
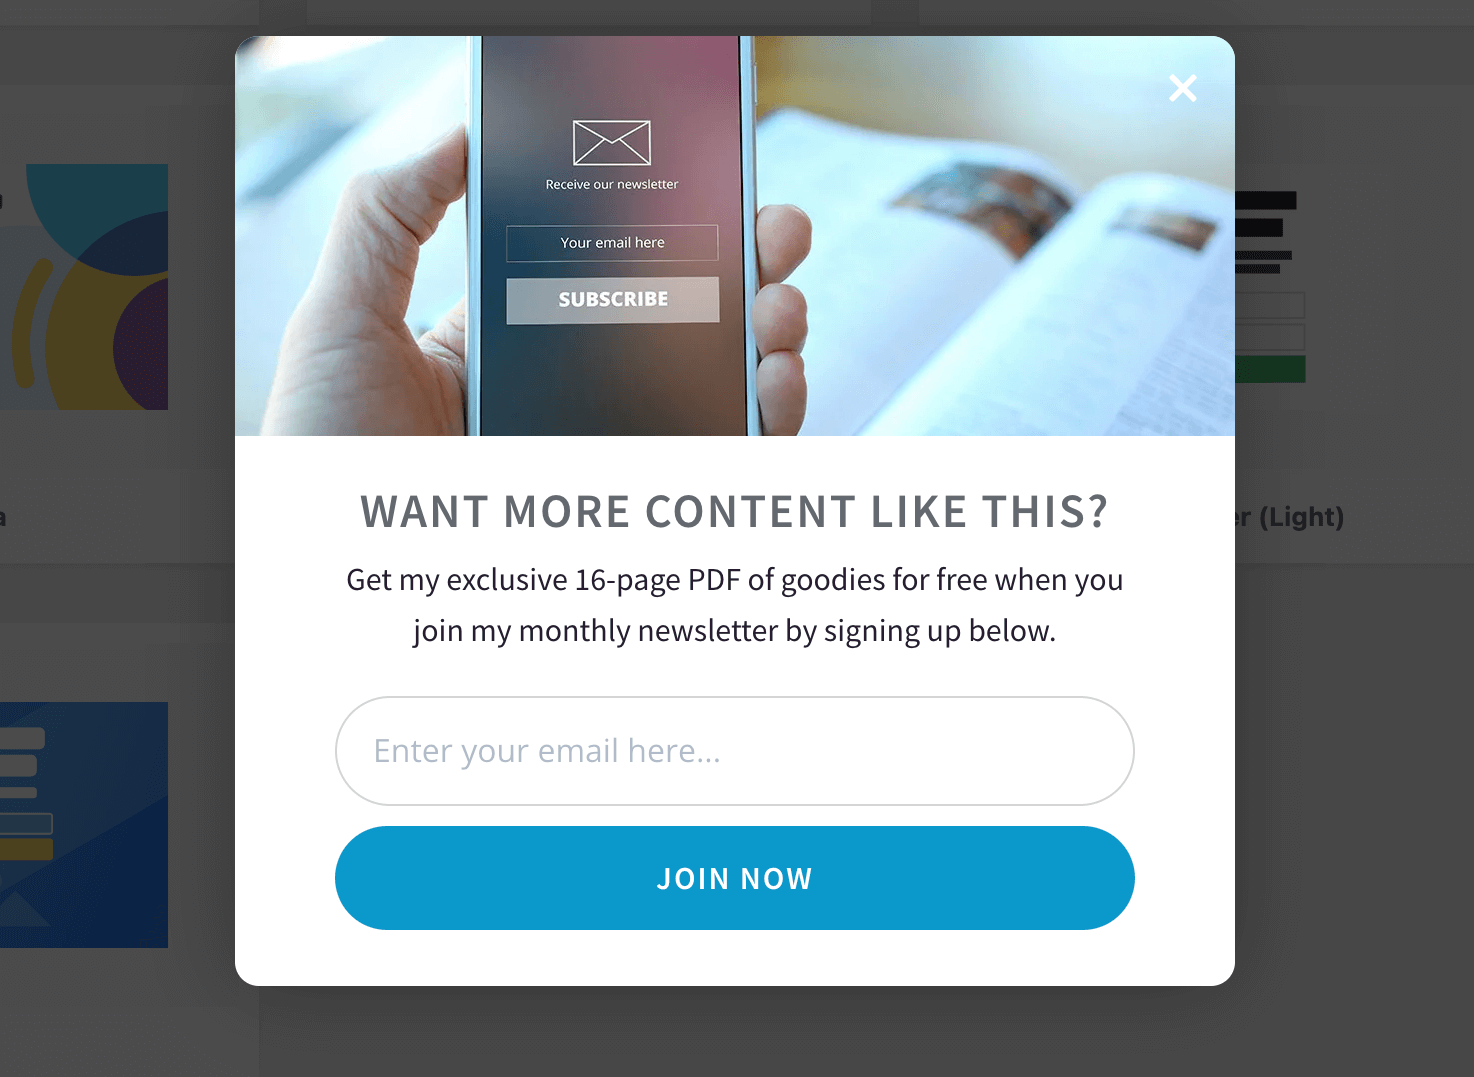
One of the most effective ways to collect leads is by offering a freebie or lead magnet. You can offer anything as a freebie, such as an eBook, access to a free course, etc.
OptinMonster offers pre-built templates to help you offer a lead magnet in exchange for an email address.
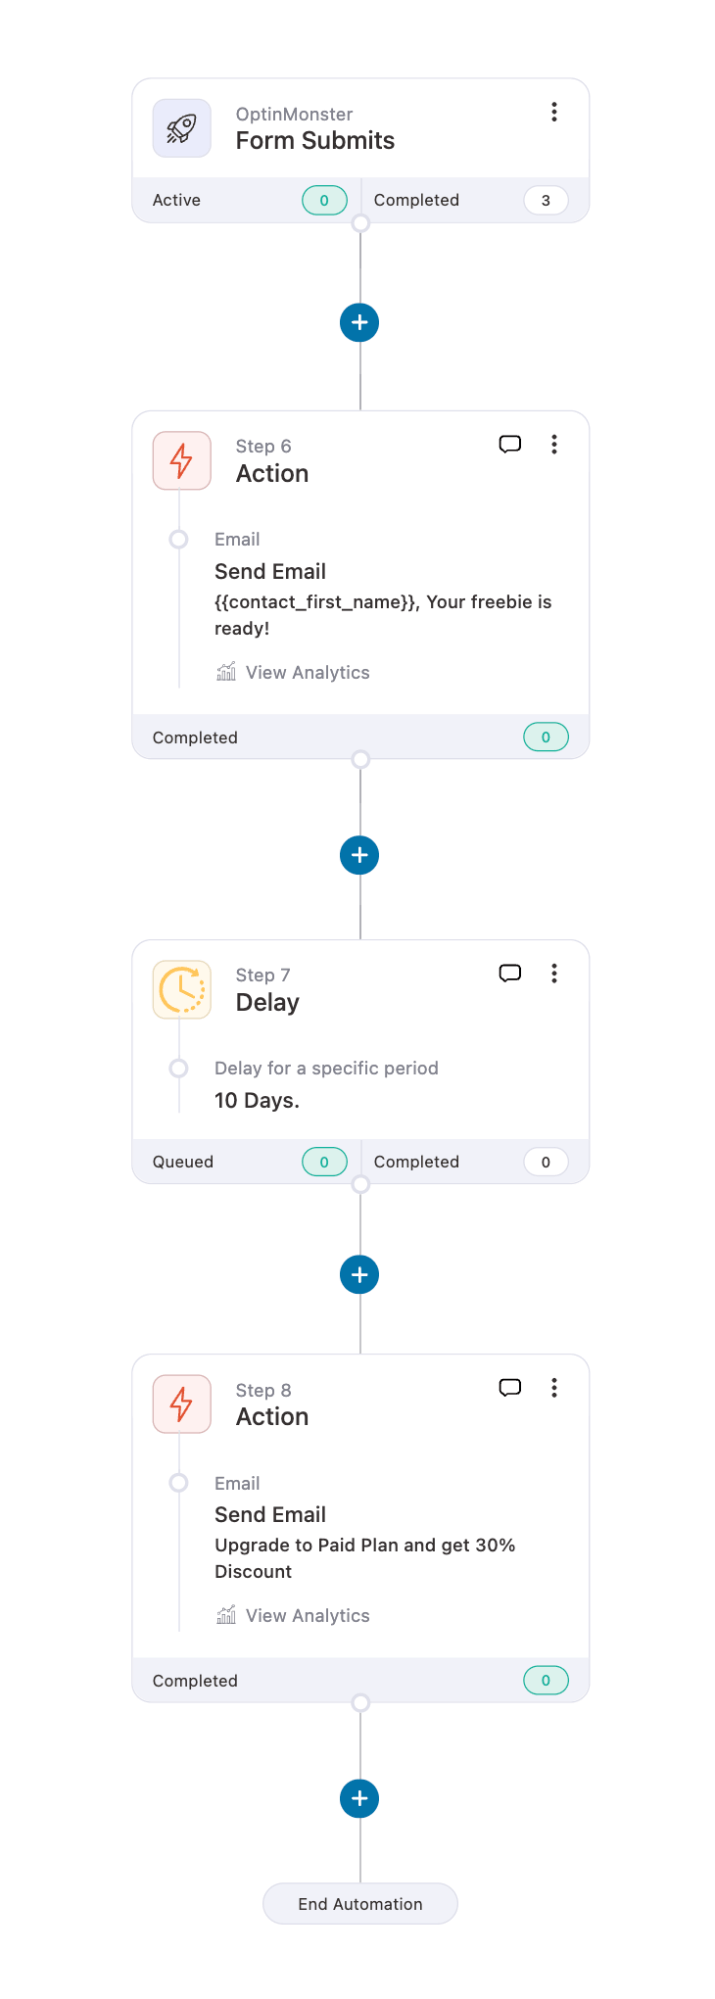
Once you’ve collected the email, you can set up an automation to deliver the promised freebie via email, following the process we outlined above.
Here is an email designed with the Visual Builder email by FunnelKit Automations:
After sending the freebie, you can also send follow-up emails to get the person to opt for the paid plan.
Use Case #2: Share dynamic coupons to boost sales
Sharing dynamic coupons is a powerful way to boost sales. WithOptinMonster’s discount templates, you can offer discounts in exchange for email addresses.
For example, you can use a time-restricted discount template by OptinMonster like the one shown below.
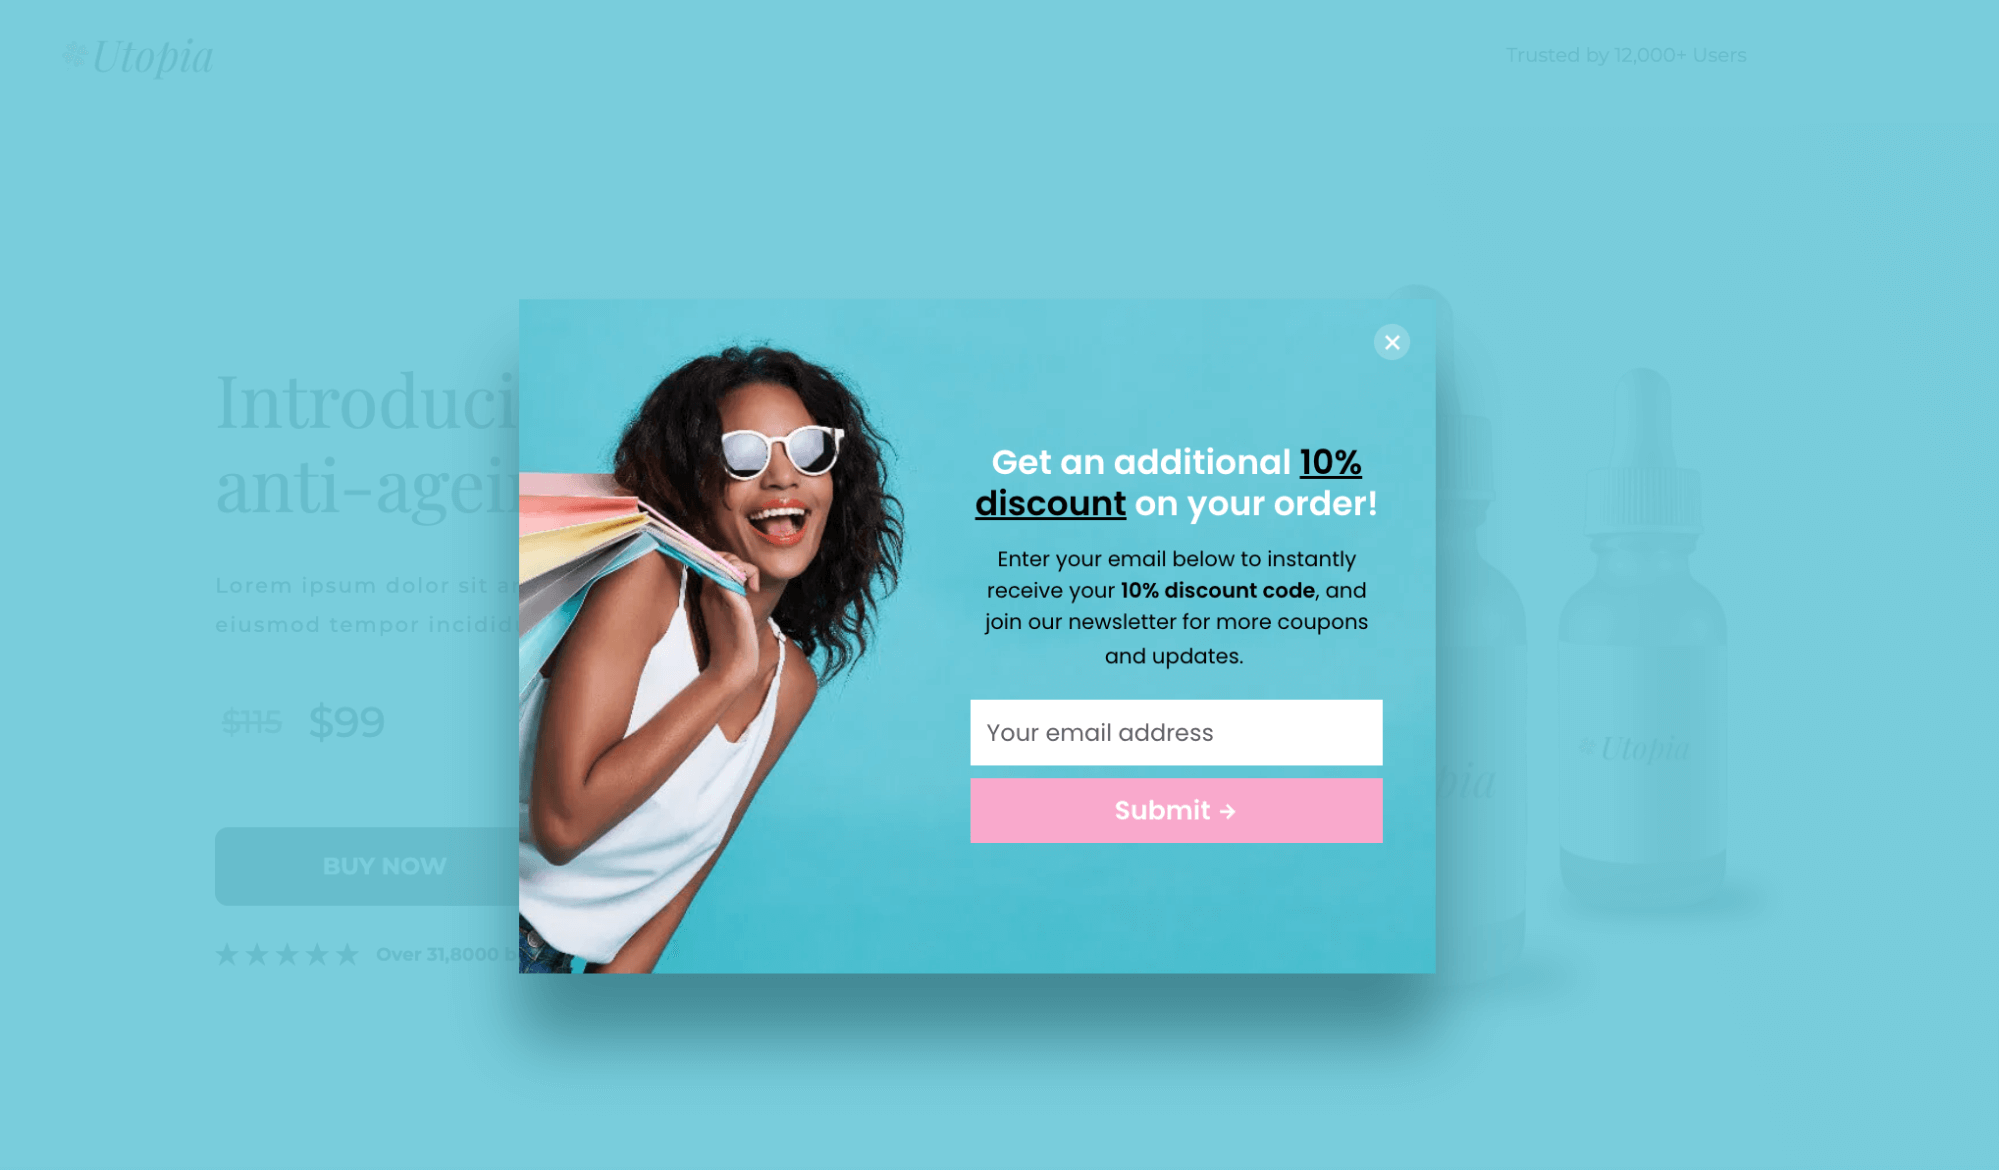
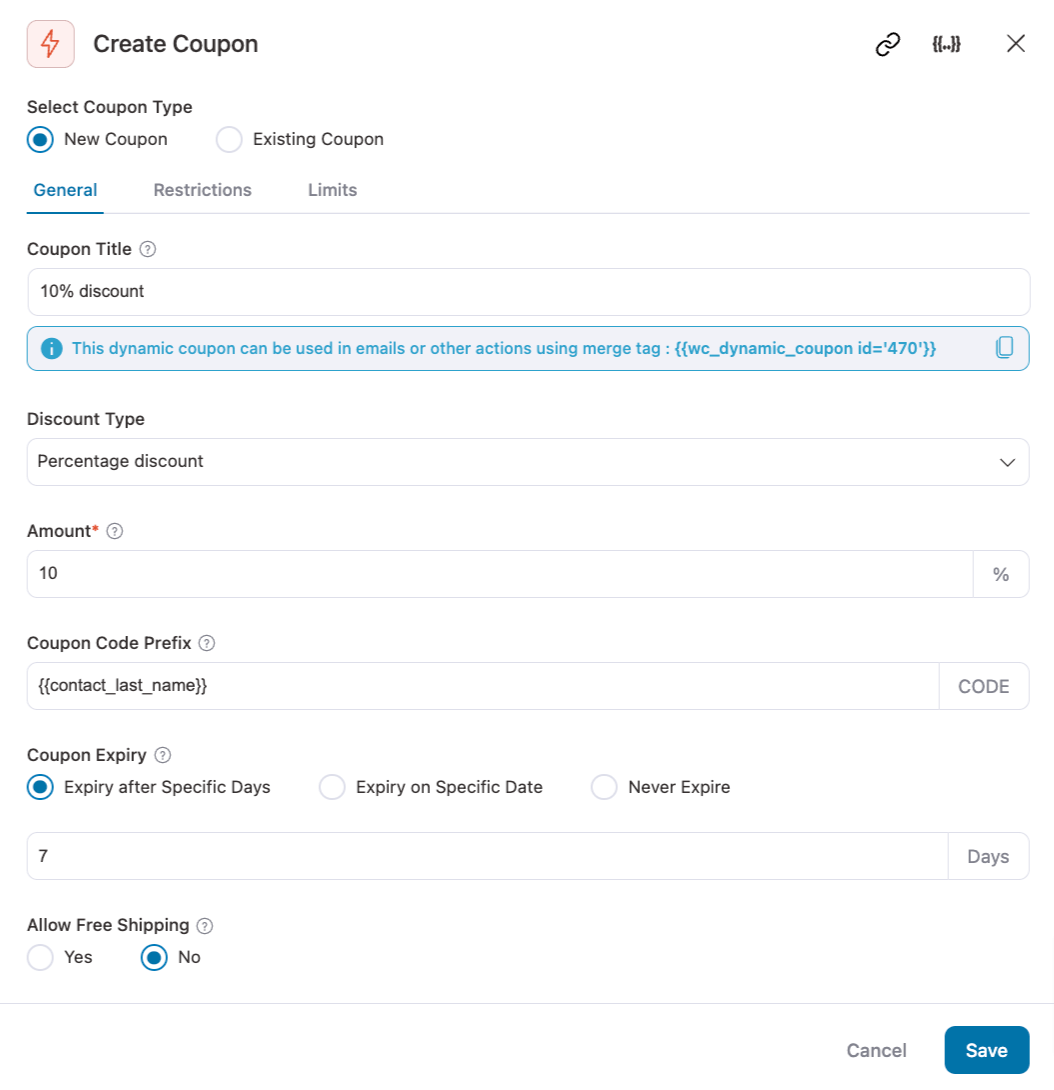
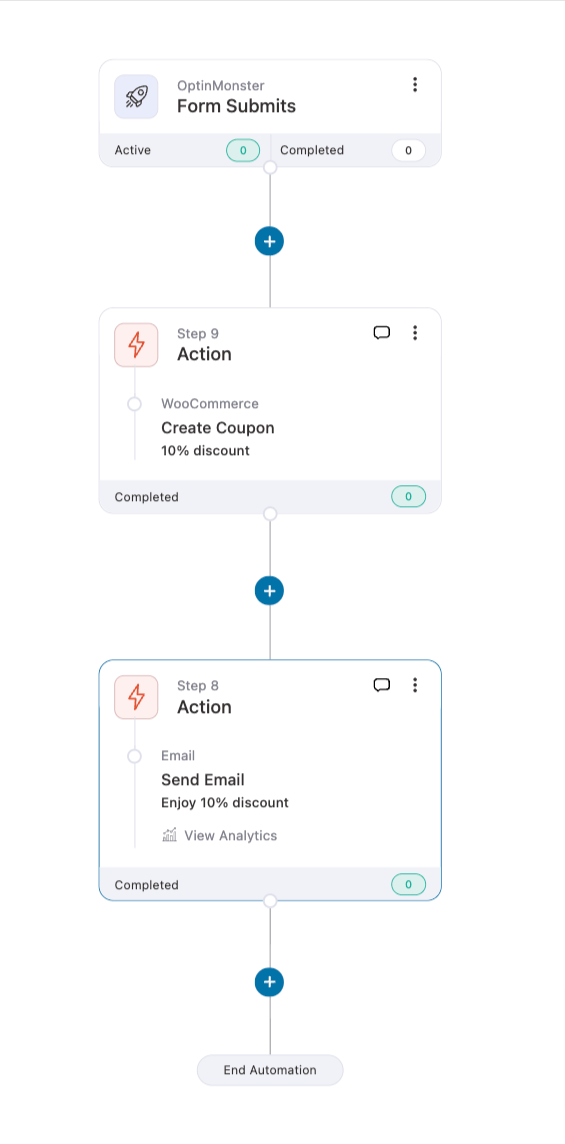
After users submit the form, you can trigger an action to create a dynamic coupon through your automation and deliver it to them via email.
Note: With FunnelKit Automations’ dynamic coupon, you can personalize the coupon code and set usage and time restrictions.
Here is the workflow for sharing dynamic coupons via email after a successful OptinMonster form submission.
Use Case #3: Exit intent popup to recover abandoned carts
Around 70% of people abandon their cart without completing a purchase. Now, with OptinMonster’s exit-intent popups and FunnelKit Automations’ email automations, you can recover those abandoned carts.
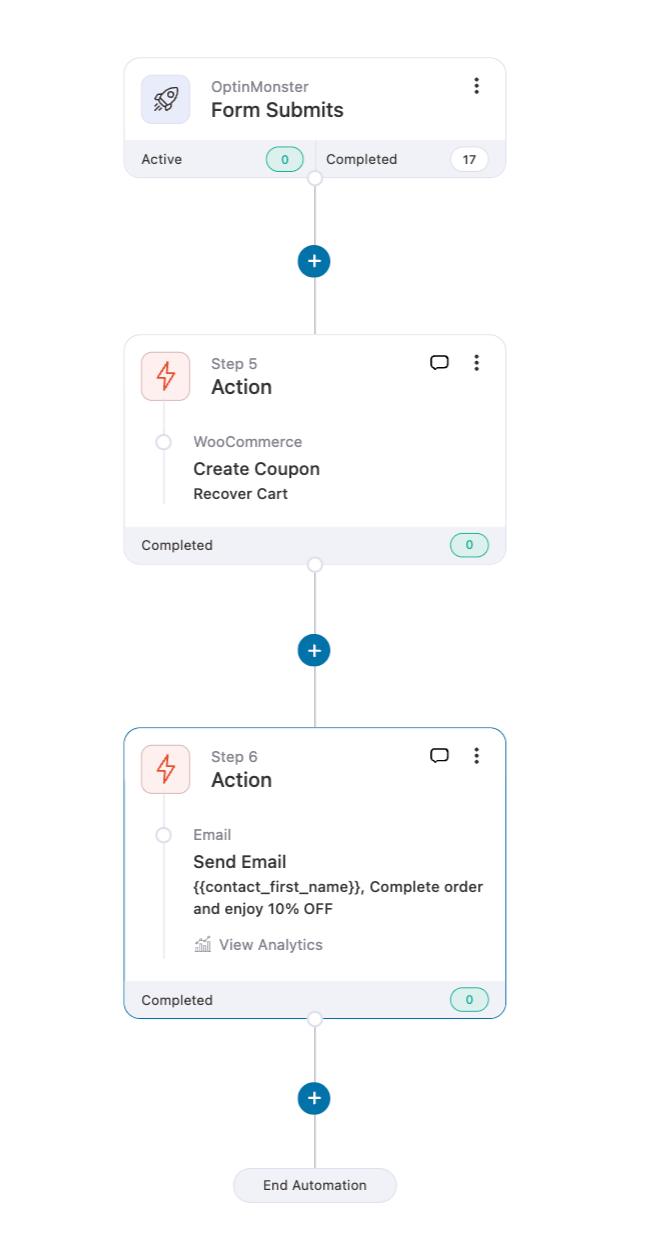
To start, set up an exit-intent popup on the checkout page using an abandoned cart recovery template.
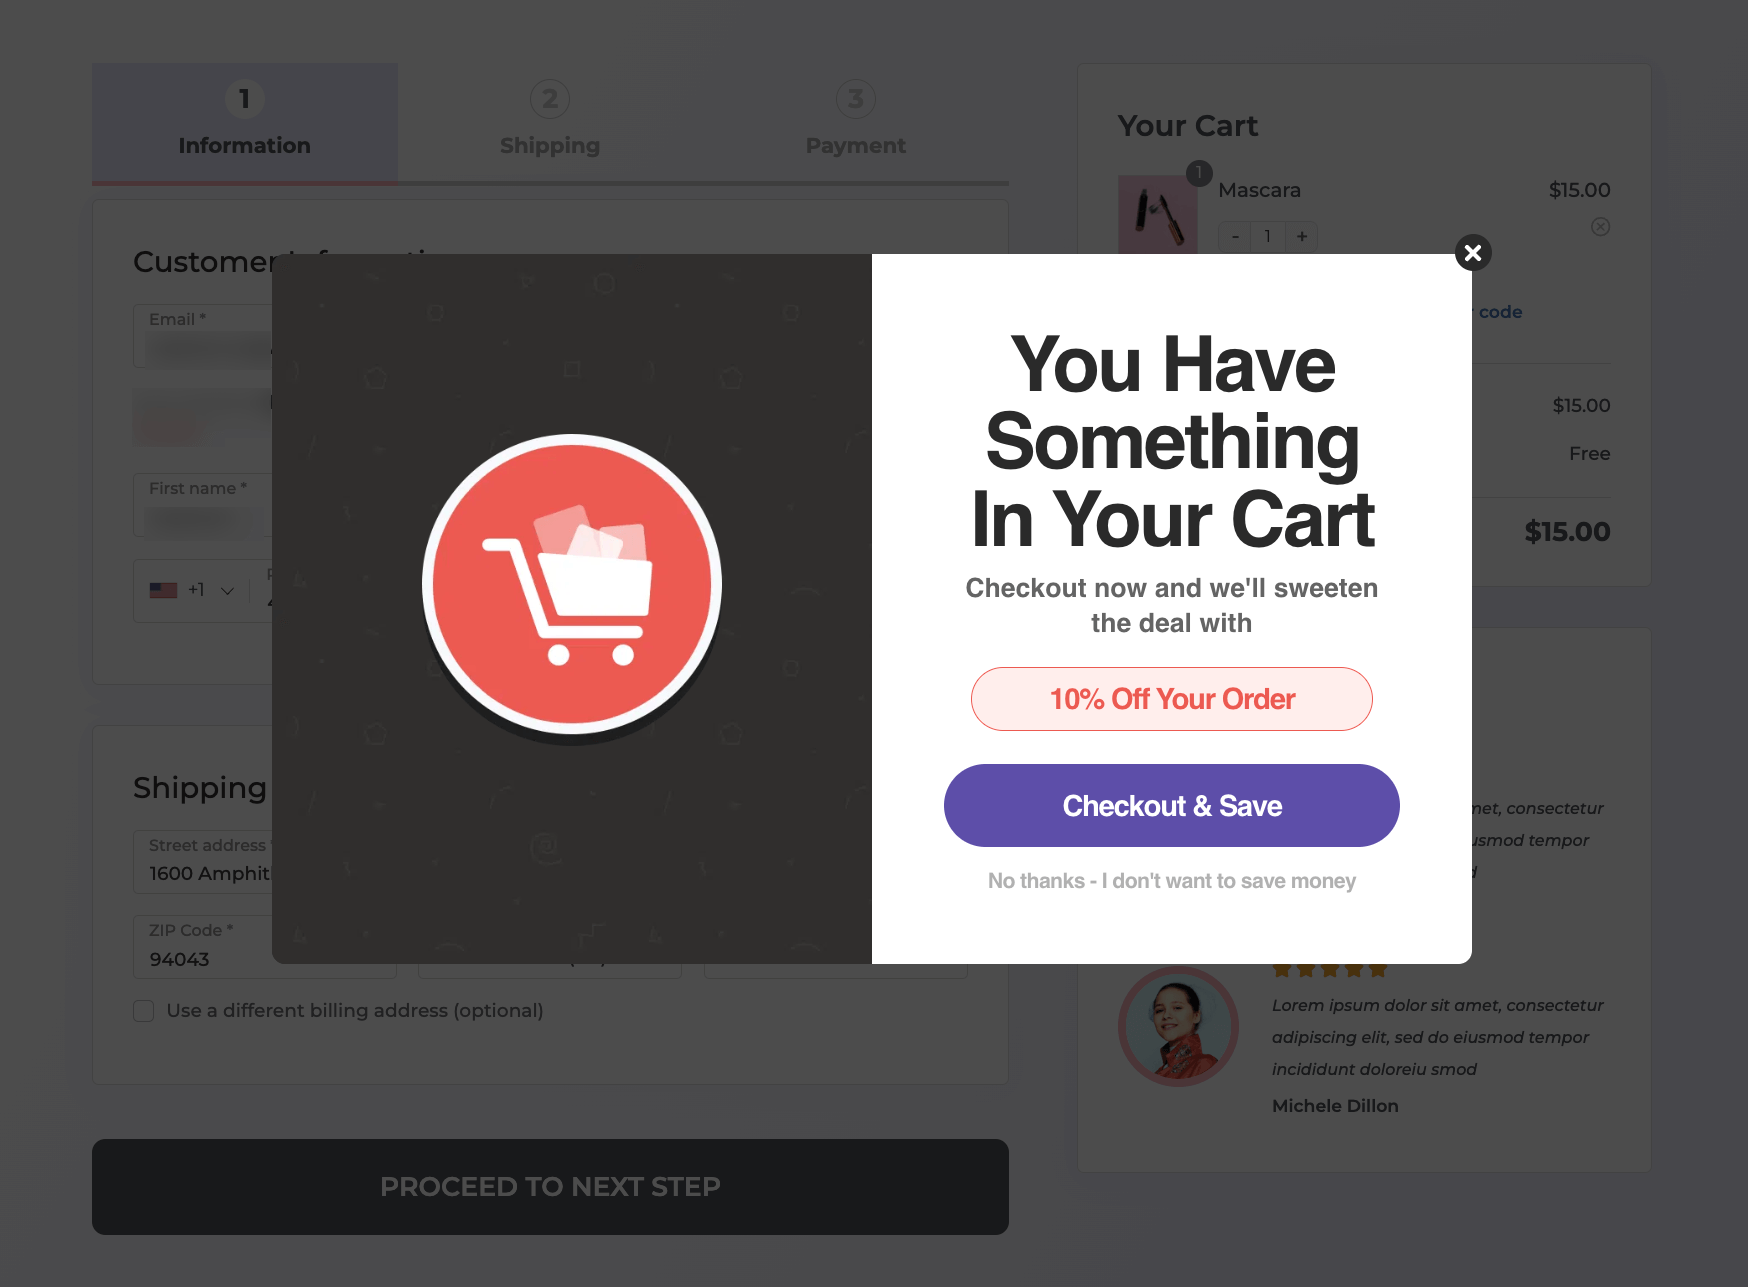
Next, automate the cart recovery process by setting up an action to generate and email a dynamic coupon.
With FunnelKit Automations, you can also share a cart link that takes users directly to a checkout page with their cart items prepopulated and ready to purchase.
Use Case #4: Offer flash sales with a countdown timer to increase sales quickly
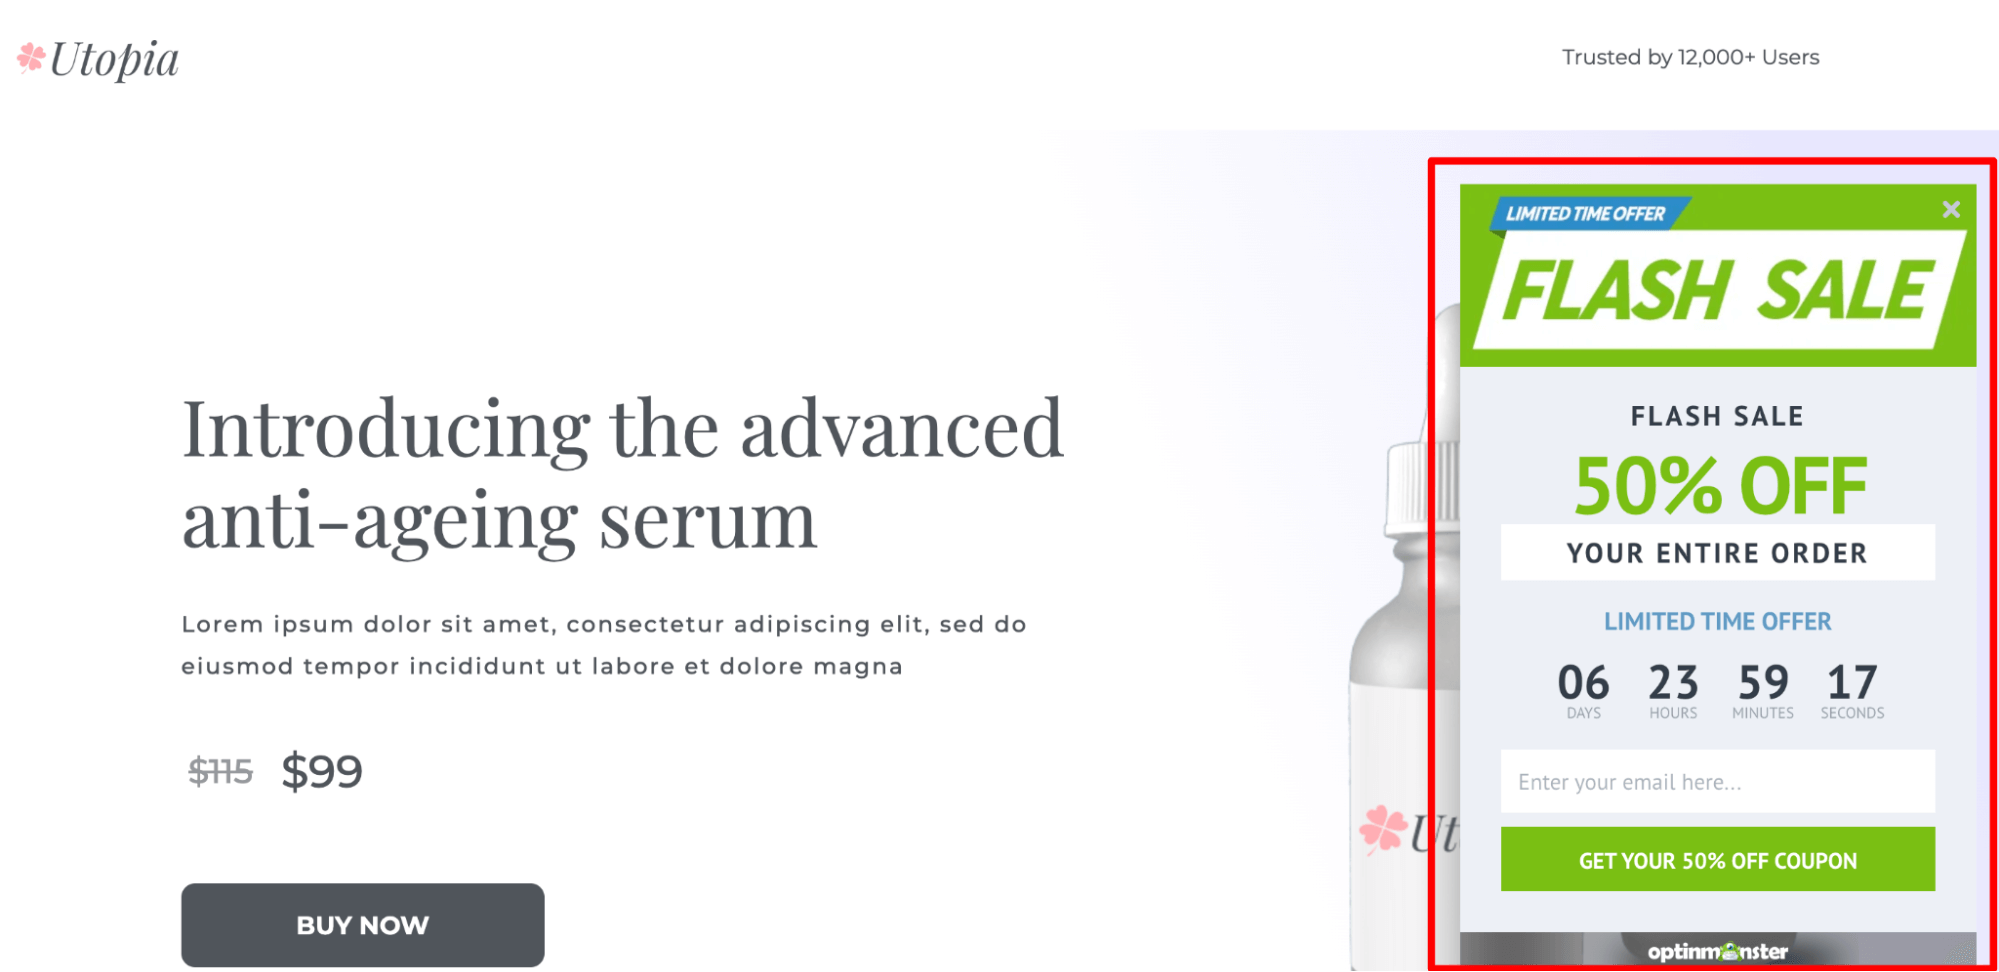
Flash sales are a great way to boost sales and clear excess stocks. To increase urgency, you can display a countdown timer to create FOMO (fear of missing out) among users.
OptinMonster makes this easy with its “Run a Flash Sale” template.
After you have collected the email, you can share the discount as shown in the above use case.
If your goal is to boost sales for specific products, you can create a sales funnel promoting those products with the auto-apply coupon option enabled.
This way, you can effectively promote certain products and offer discounts to encourage users to buy those products. In case of excessive stock, you can also create a sales funnel for quantity discounts.
For this, you need to create the sales funnel separately using FunnelKit Funnel Builder and then share the URL in your email.
You can create a simple automation that gets triggered every time a user submits the form and then sends an email sharing the sales funnel URL with an auto-apply coupon.
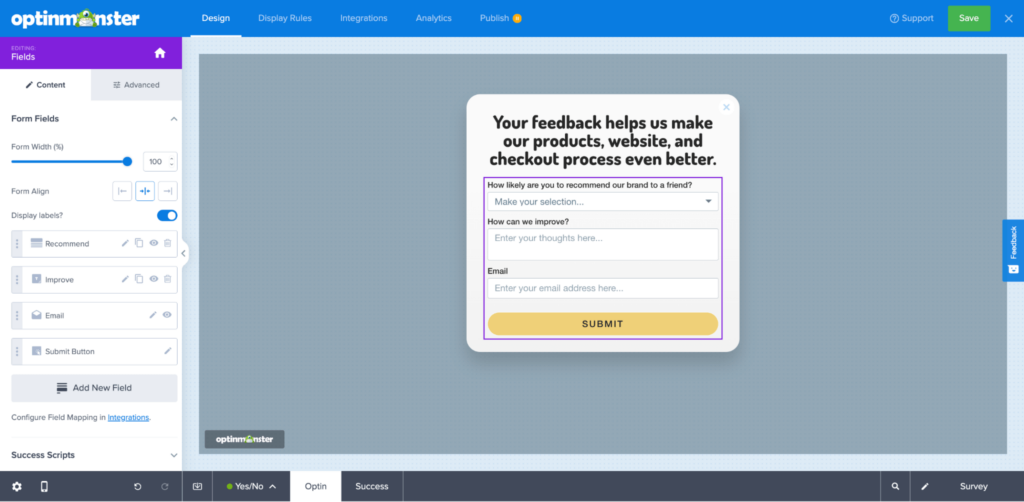
Use Case #5: Run a product survey via popup to collect user feedback
Gathering feedback directly from customers can help you improve your product and support you in the right direction.
With OptinMonster, you can easily collect feedback using any of their survey templates.
Simply import a survey template and customize the form to include the questions you want to ask your customers. You can add new fields as needed.
Once users submit their feedback, you can send them a thank-you email or offer a discount for their next purchase.
Additionally, with FunnelKit Automations, you can add tags to create specific segments. This way, when you make updates to your product, you can easily inform them via email.

These were some of the use cases you can follow to utilize the power of both OptinMonster and FunnelKit Automations.
Ready to Harness the Power of FunnelKit Automations and OptinMonster Integration?
OptinMonster helps you engage customers while they are on your website and successfully collect leads.
On the other hand, FunnelKit Automations takes care of the nurturing needed to turn leads into paying customers.
In short, it is the perfect combination to drive more sales on autopilot.
We have shared different cases of how you can combine the power of both these tools to grow your online business.
Once you start exploring, you will find more ways to use them to grow your experience exponentially.
So, don’t waste any more time. Get both OptinMonster and FunnelKit Automations today, and let the magic begin!
The post FunnelKit Automations Integrates with OptinMonster: The Perfect Duo to Convert Leads into Customers appeared first on FunnelKit.