You did everything right by setting up Apple Pay, enabling it in your WooCommerce settings, and even double-checking your Stripe configuration.
But at checkout? No Apple Pay button in sight.
Then, you’ve cleared the cache, read random articles, and maybe even reinstalled the Stripe gateway plugin. And yet… nothing.
Sound familiar? This is a frustrating wall many WooCommerce store owners hit.
You want to offer fast, tap-and-go payments, especially for mobile users. Still, the Apple Pay button visibility issue boils down to something critical that quietly kills your conversion rates while you’re scratching your head.
We’ve worked with dozens of clients to solve this issue in under 15 minutes.
In this post, we’ll walk you through the most common causes of WooCommerce Apple Pay not showing and how to fix those step by step. No fluff, just practical solutions that get Apple Pay back in your store.
Integrating Apple Pay with WooCommerce
Adding Apple Pay to your WooCommerce store is one of the best ways to offer convenience to your customers.
No need to fill out long checkout forms - just a tap with Face ID or Touch ID, and the payment is complete.
You can integrate Apple Pay with your store by installing the Stripe Payment Gateway for WooCommerce for free.
The main advantage of using this plugin is its easy onboarding, allowing you to integrate this gateway in less than two minutes.
There is no need to manually copy keys or go through the tedious process of Webhook setup. Everything is done for you with a few simple clicks.
Here are some features of the Stripe Payment Gateway for WooCommerce:
- Credit and debit card payments
- Express checkout methods like Apple Pay and Google Pay
- Buy now, pay later payments with Affirm, Klarna, and Afterpay
- Local or bank redirect methods include SEPA, iDEAL, P24, Bancontact, etc.
- Automatic webhook integration
- Smart admin only testing mode
- Compatible with one-click upsell payments
Why Apple Pay Is Not Showing Up in WooCommerce: Top 8 Reasons
Apple Pay offers lightning-fast checkout, but it can be frustrating when it doesn’t show up. This is a common issue in WooCommerce stores using Stripe to power Apple Pay.
The good news? It’s usually easy to diagnose and fix. Let’s dive into all the possible causes and what you must do to resolve them.
1. Your Device or Browser Is Not Compatible with Apple Pay
Problem: Device compatibility is the most critical issue for WooCommerce Apple Pay not showing up in your store.
How to fix
Apple Pay only works under specific conditions. If even one of these conditions isn’t met, the Apple Pay button won’t appear, no matter how perfectly you’ve configured your Stripe setup or plugin settings.
Ensure you’re using a compatible Apple device
- iPhone: Models with Face ID or Touch ID, excluding iPhone 5s
- iPad: iPad Pro, iPad Air, iPad, and iPad mini models equipped with Touch ID or Face ID
- Apple Watch: Series 1 and later
- Mac: Models with Touch ID, those introduced in 2012 or later paired with an Apple Pay-enabled iPhone or Apple Watch, and Macs with Apple silicon paired with a Magic Keyboard with Touch ID
- Apple Vision Pro: Supports Apple Pay for purchases and payments
Web browsers that support Apple Pay
- Safari: Apple’s default browser supports Apple Pay on compatible devices
- Third-party browsers: With iOS 18 and iPadOS 18, Apple Pay has extended its functionality to third-party browsers like Google Chrome, Mozilla Firefox, and Microsoft Edge.
Make sure Apple Pay is set up in your Wallet app with a valid card before testing.
2. Your Store’s Currency or Country Is Not Supported
Problem: Even if your setup is perfect, Apple Pay won’t appear if your store uses an unsupported country or is in a country where Apple Pay isn’t supported.
How to fix
Apple Pay is supported in many countries, but not all. The option won't be available if your Stripe account is registered in a country where Apple Pay doesn’t work.
Check if your store’s base location is in a supported country
| Australia | Austria | Belgium |
| Brazil | Bulgaria | Canada |
| Côte d'Ivoire | Croatia | Cyprus |
| Czech Republic | Denmark | Estonia |
| Finland | France | Germany |
| Ghana | Gibraltar | Greece |
| Hong Kong | Hungary | Ireland |
| Italy | Japan | Kenya |
| Latvia | Liechtenstein | Lithuania |
| Luxembourg | Malaysia | Malta |
| Mexico | Netherlands | New Zealand |
| Nigeria | Norway | Poland |
| Portugal | Romania | Singapore |
| Slovakia | Slovenia | South Africa |
| Spain | Sweden | Switzerland |
| Thailand | United Arab Emirates | United Kingdom |
| United States of America |
List of supported currencies
Apple Pay supports a wide range of currencies, but the specific currencies available depend on the country or region where Apple Pay is offered.
Some commonly supported currencies are:
- US Dollar (USD)
- Canadian Dollar (CAD)
- British Pound Sterling (GBP)
- Euro (EUR)
- Australian Dollar (AUD)
- New Zealand Dollar (NZD)
- Singapore Dollar (SGD)
- Japanese Yen (JPY), and many more.
Ensure that your WooCommerce store’s base country and its currency are compatible with Apple Pay to show up.
3. Your Domain is Not Verified in Stripe for Apple Pay
Problem: If Apple Pay is not showing up on your WooCommerce checkout or related pages and you see a message that says, Your domain is not verified in Stripe. This means Stripe cannot enable Apple Pay on your website.
How to fix
Apple requires each website domain using Apple Pay to be verified to prevent fraud and ensure secure transactions.
Re-verify the domain for Apple Pay
- Go to Stripe settings in the WordPress dashboard.
Under the Express Checkout tab, click on the ‘Re-verify Domain’ button.
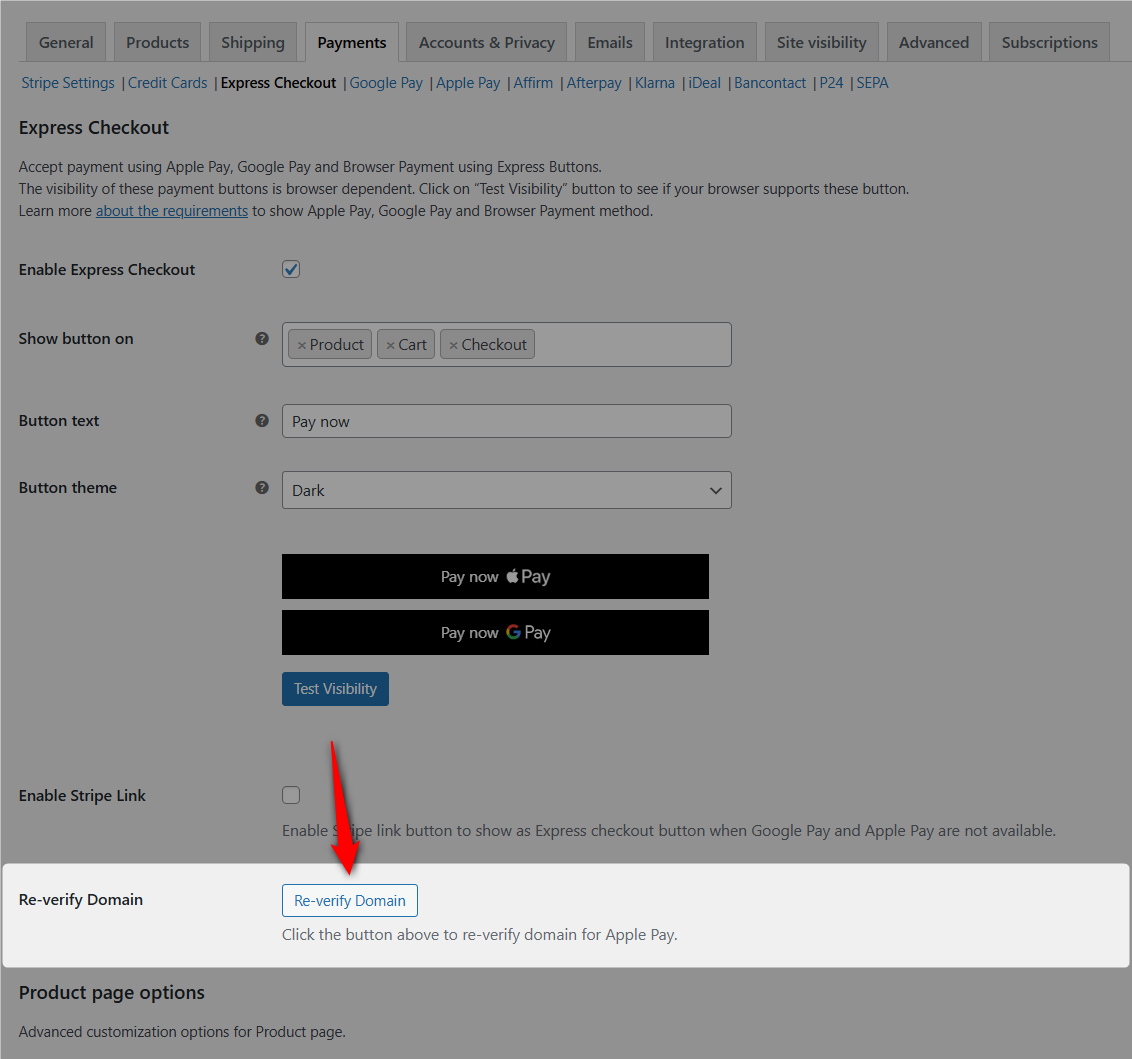
The prompt ‘Domain verification successful’ will pop up within a few seconds.
Manually verify the domain for Apple Pay
In case the domain verification fails, manually add your domain for Apple Pay verification from the Stripe dashboard.
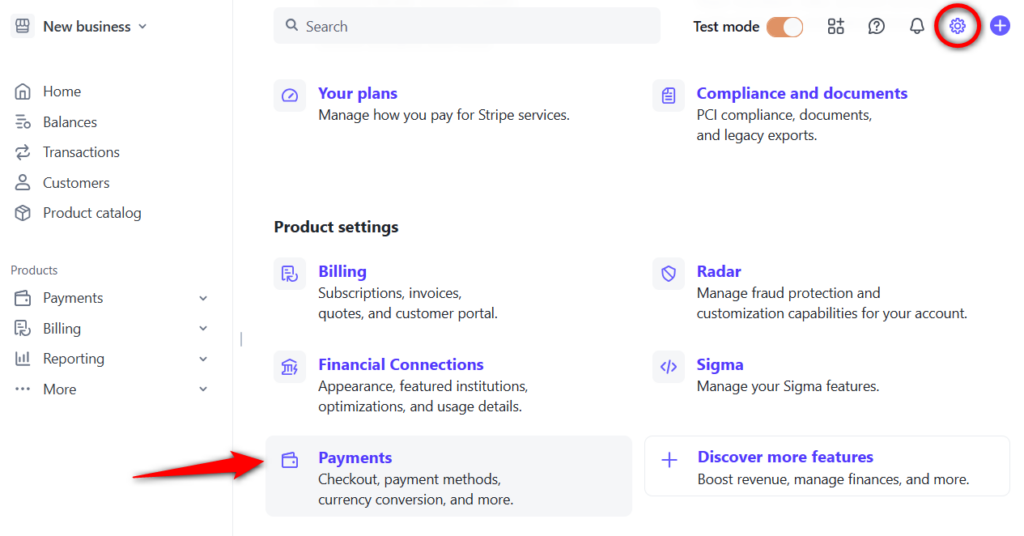
- Log in to your Stripe account and click on Payments under Settings.
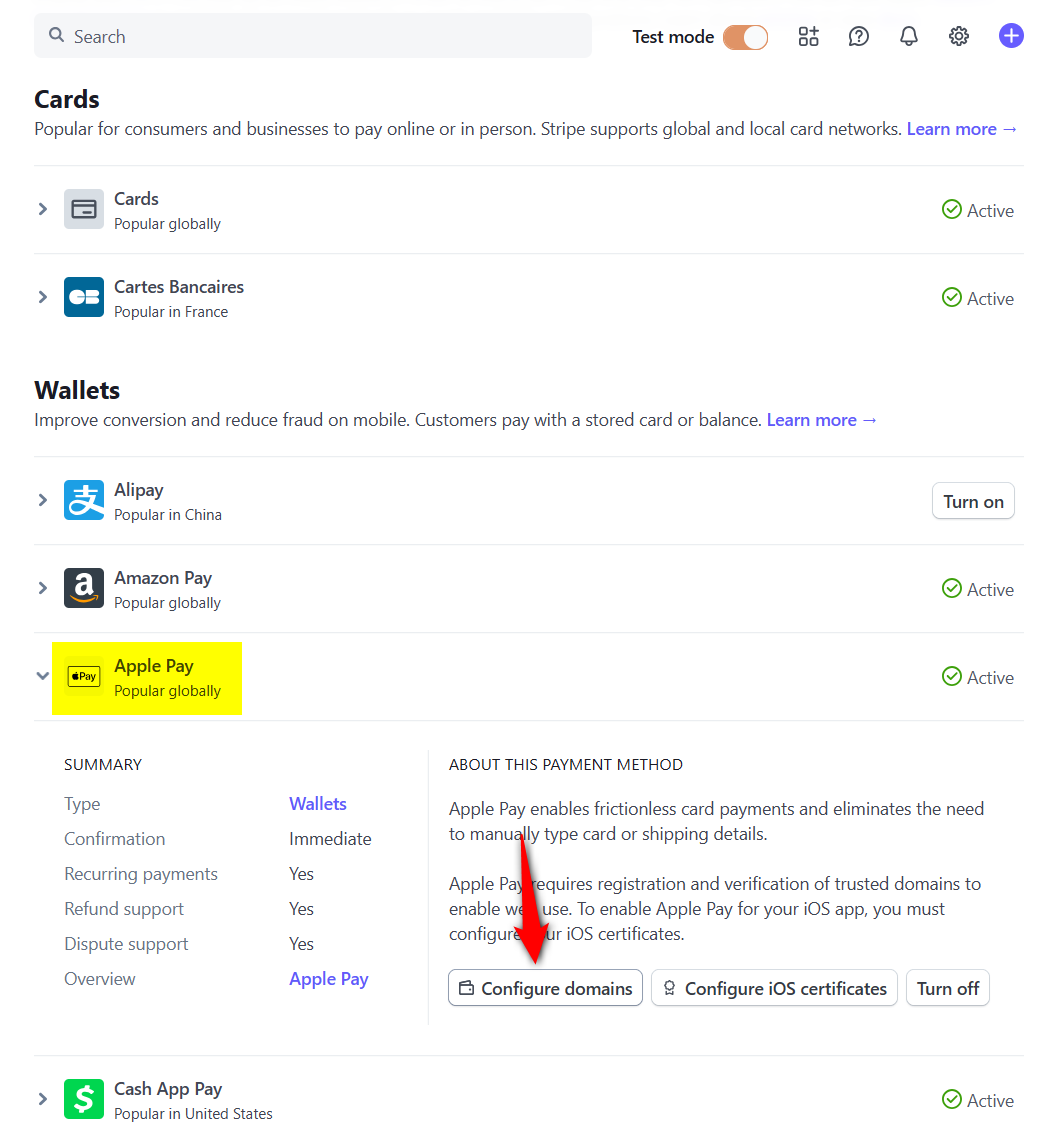
- Under the Payment Methods tab, scroll down to the Wallets section and click on the ‘Configure domains’ button under Apple Pay.
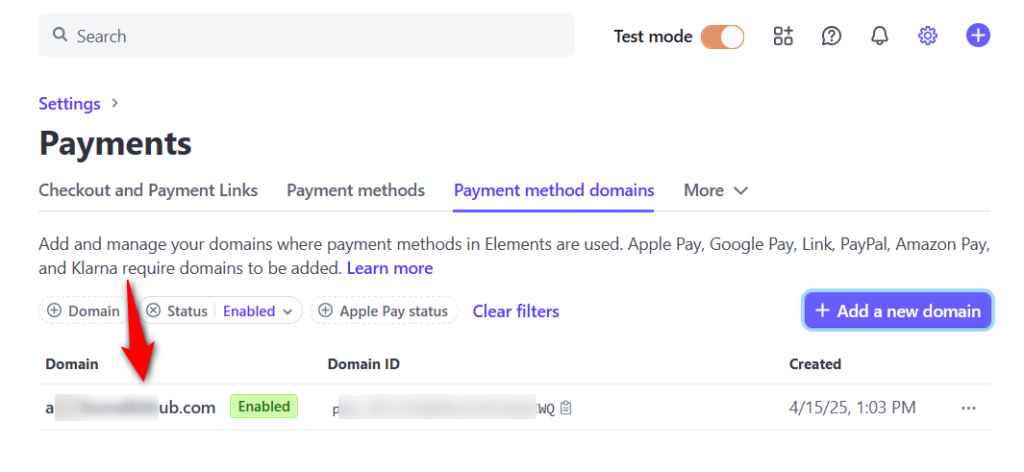
- Click on + Add a new domain and enter your website URL.
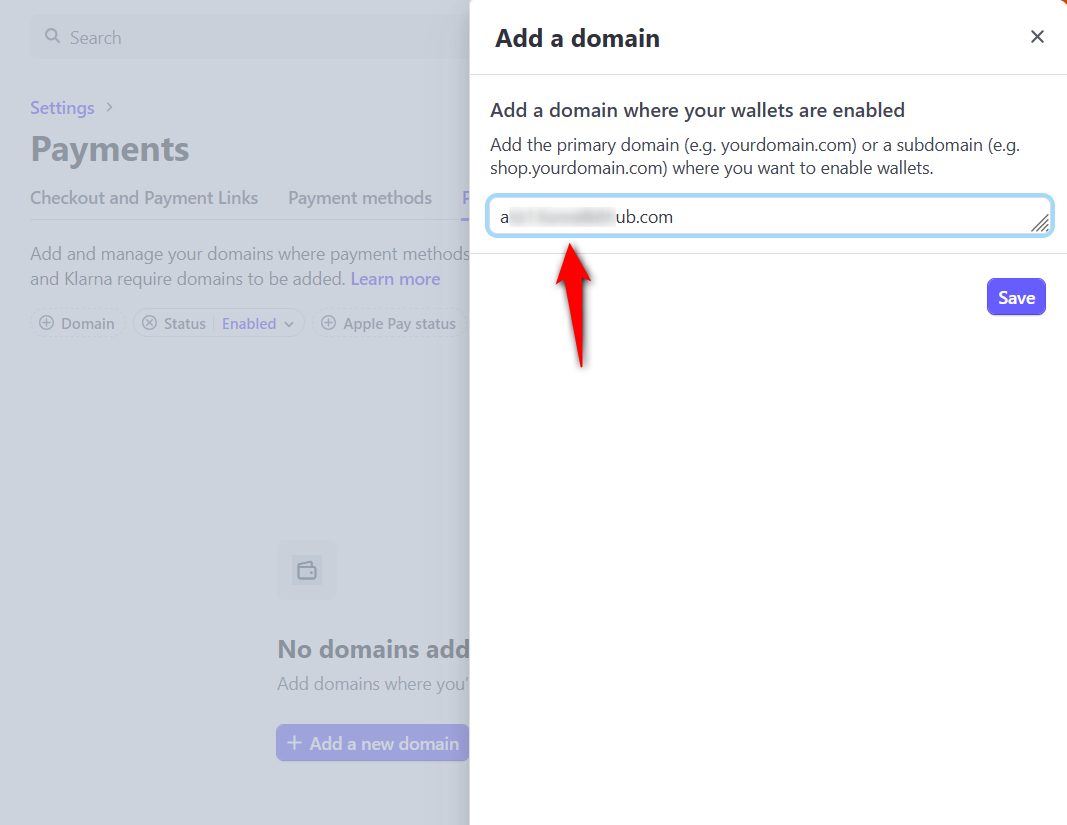
- Clicking on ‘Save’ will add your domain to the Payment method domains page in Stripe.
Make sure to test the Apple Pay method in supported browsers and devices to check whether it shows up in your WooCommerce store.
4. Apple Pay is Disabled in Stripe
Problem: This is another common issue for Apple Pay not showing up in WooCommerce. You didn’t enable the Apple Pay method under the Wallets section in Stripe.
How to fix
Stripe uses the Payment Request API, which powers the Apple Pay button. Without enabling it, WooCommerce will not show the Apple Pay option at checkout.
Enable Apple Pay in Stripe
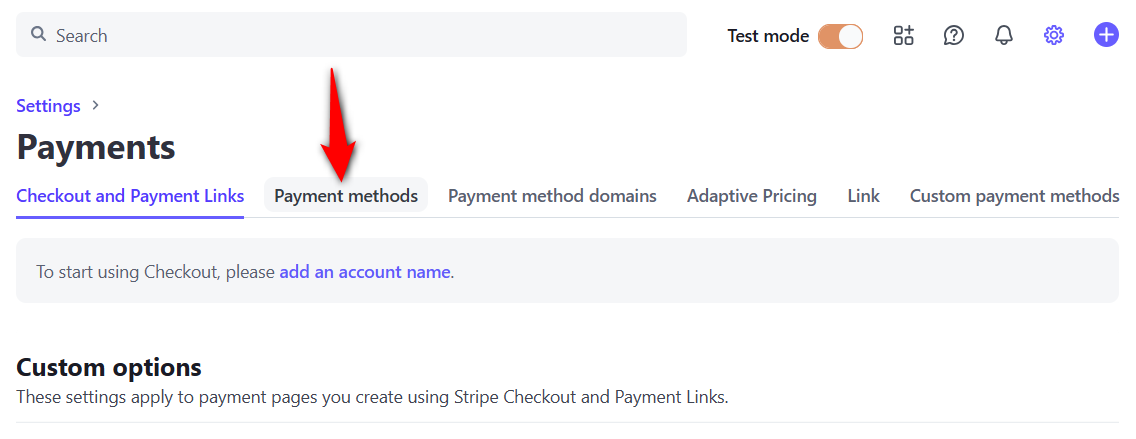
- Log in to your Stripe dashboard and click on Payments under settings.

- Click on Payment Methods to see all the options that can be enabled via Stripe.
- Scroll down, and you’ll see Apple Pay under Wallets. Click ‘Turn on’ to enable the Apple Pay express checkout method.
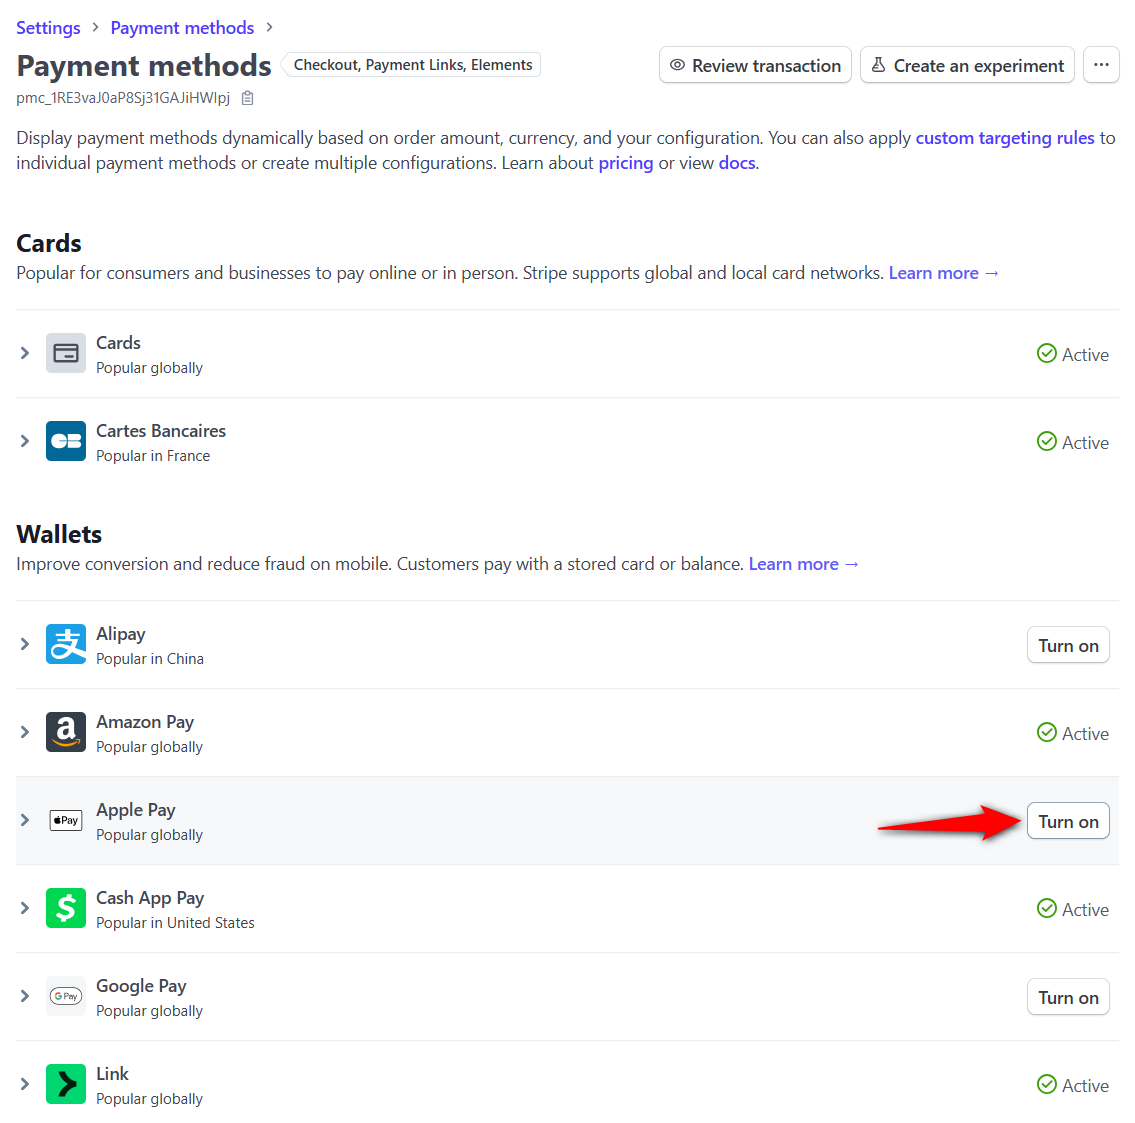
This is how you can enable Apple Pay from your Stripe account.
5. Apple Pay Button Is Not Enabled in Your Stripe Plugin
Problem: Even with Stripe enabled, Apple Pay won’t show up unless the Payment Request Button setting is enabled in the Stripe Gateway for WooCommerce plugin.
How to fix
The WooCommerce Stripe Payment Gateway plugin has separate settings for express checkout. Just enabling Apple Pay in Stripe isn’t enough; you must also turn on the Apple Pay button from your WooCommerce payment settings.
Enable Apple Pay in WooCommerce Stripe Plugin
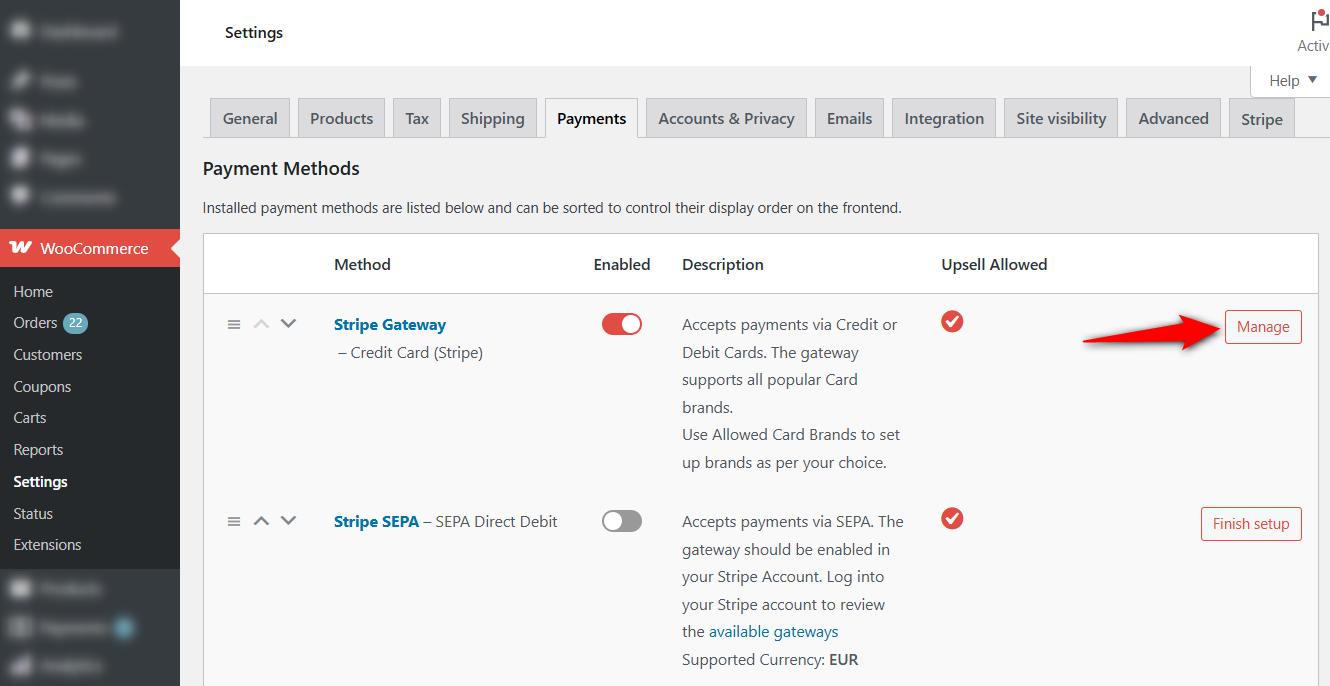
- Navigate to WooCommerce ⇨ Settings ⇨ Payments and click on ‘Manage’ next to Stripe Gateway - Credit Card (Stripe).
- Hit the ‘Enable Express Checkout’ option under the Express Checkout tab.
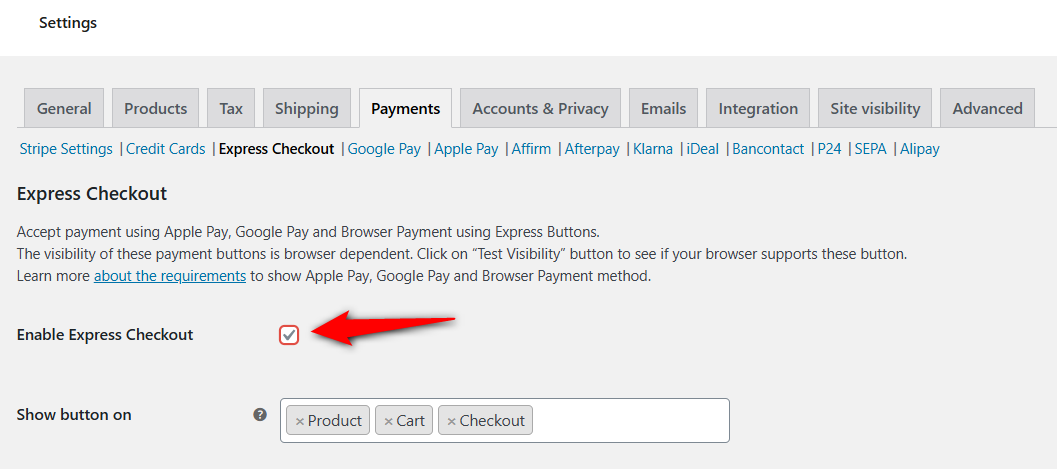
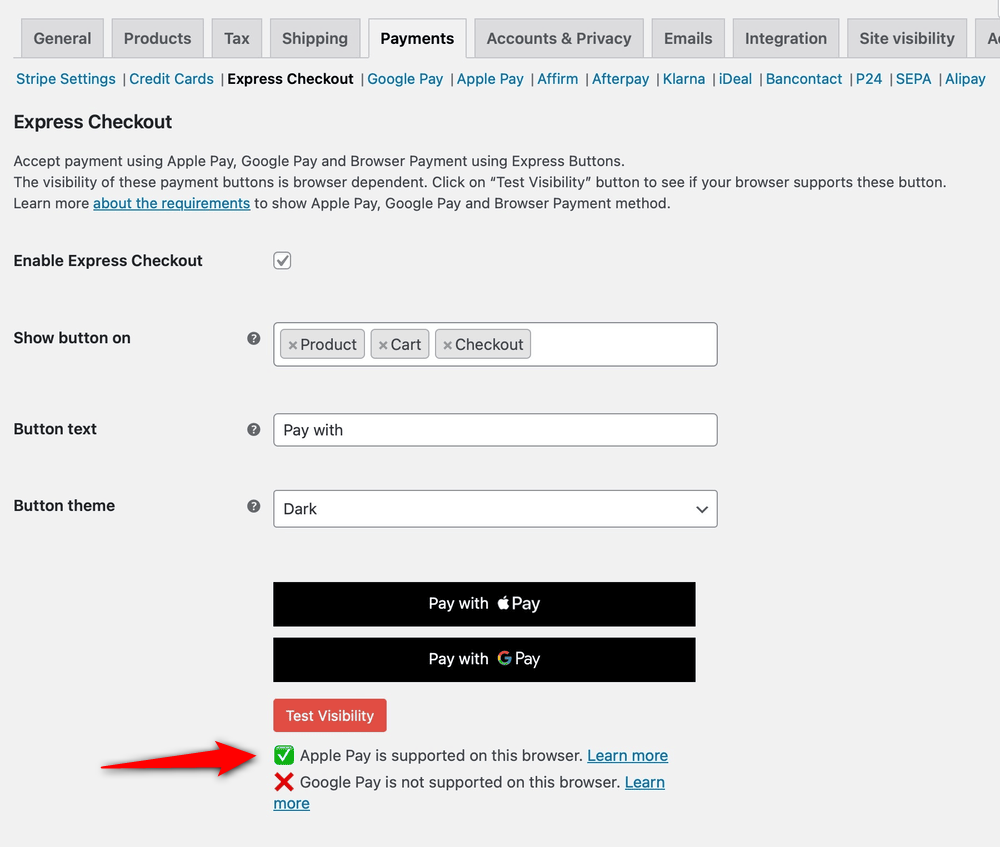
You can even test the visibility of the Apple Pay button on your browser.
Save the changes when done. This will enable Apple Pay in your WooCommerce Stripe plugin.
6. Conflicts with Theme or Other Plugins
Problem: Sometimes, a theme or plugin conflict can prevent Apple Pay from displaying on your WooCommerce website.
How to fix
The Apple Pay button in WooCommerce is typically rendered using JavaScript injected by the Stripe plugin. Apple Pay won’t show up in case:
- Your WordPress theme is poorly coded
- Another plugin disables Stripe’s payment request buttons
- JavaScript is broken or blocked
Here’s how you can fix this issue.
Check the browser console
Use the Inspect developer tool to look for errors on your web browsers. If there are errors related to Stripe.js, paymentRequest not defined, or JavaScript not loading, etc., it’s likely a conflict or script blockage.
For this, you can exclude Stripe scripts from optimization or whitelist URLs from security plugins.
Switch to a default theme
Temporarily activate a default WooCommerce-friendly theme like storefront or twenty twenty five.
Then, check if the Apple Pay button shows up. If it does, your current theme is likely blocking Stripe’s button from rendering.
Deactivate all other plugins
Temporarily deactivate all the plugins except WooCommerce and the Stripe Gateway for WooCommerce plugin.
Then, test again. If Apple Pay now appears, one of the plugins you deactivated will be the culprit.
You can reactivate plugins one at a time by refreshing your site and testing if the Apple Pay button disappears. This way, you can find the conflicting plugin.
7. Your Site Is Not Fully Secure (No HTTPS)
Problem: Apple Pay only works over a secure HTTPS connection. If your site isn’t secured with an SSL certificate, Apple Pay won’t be displayed, even if everything else is set up correctly.
How to fix
Apple Pay handles sensitive customer information and enforces strict security standards. It includes a valid SSL certificate, and all pages must load over HTTPS.
Install an SSL certificate
Most web hosting providers offer free SSL certificates via Let’s Encrypt or similar when purchasing a hosting plan.
Once you’ve got it, make sure to:
- Check your hosting dashboard, such as cPanel, WHM, etc.
- Locate the certificate code, copy it, and install it
If you’re not sure, contact your hosting provider to help you set up.
Force HTTPS across the entire site
Use a plugin like Really Simple SSL or SSL Insecure Content Fixer to redirect HTTP to HTTPS. It can also help fix mixed content issues.
This way, you can ensure every page is fully secure.
Update all internal links
Make sure all internal links, image paths, and scripts in your theme or plugins are using https:// instead of http://.
8. Apple Pay Is Showing Only on Certain Pages
Problem: Sometimes, the Apple Pay button may show on the product or cart page but not on the checkout page (or vice versa).
How to fix
You can choose the Apple Pay button to show on different pages in WooCommerce. If only some of the pages are specified, the button will only show up there.
Configure the display location of Apple Pay
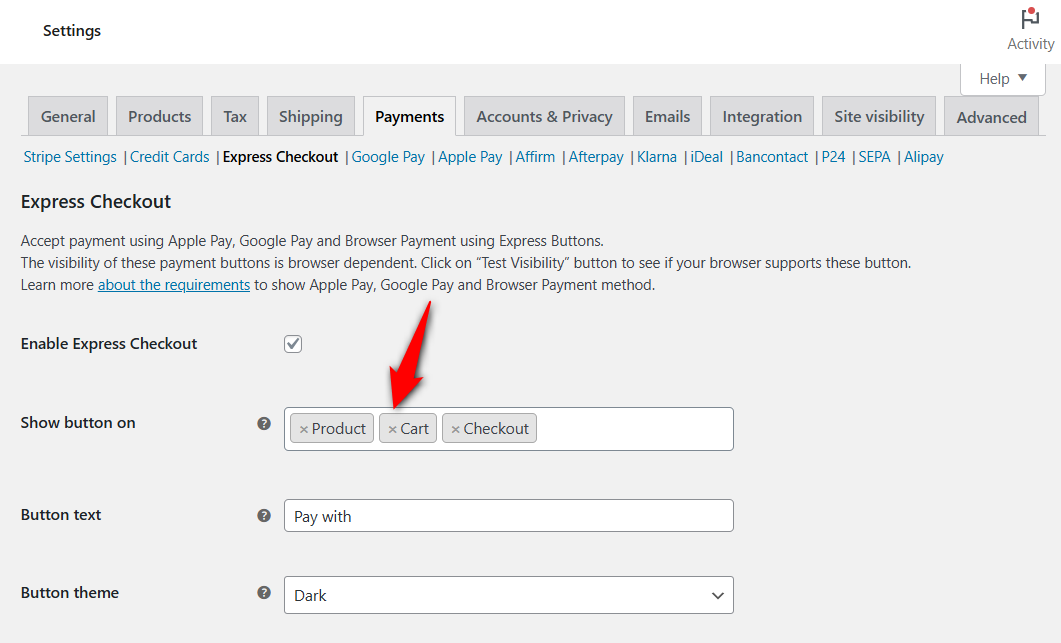
- Navigate to WooCommerce ⇨ Settings ⇨ Payments and click on ‘Manage’ next to Stripe Gateway - Credit Card (Stripe).
- Under the Express Checkout tab, select the pages on which you want to show the Apple Pay button.
You can even customize the text and theme of your Apple Pay button.
Not only that, but you can also customize the button position, separator text, width, alignment, etc., for your product, cart, and checkout pages.
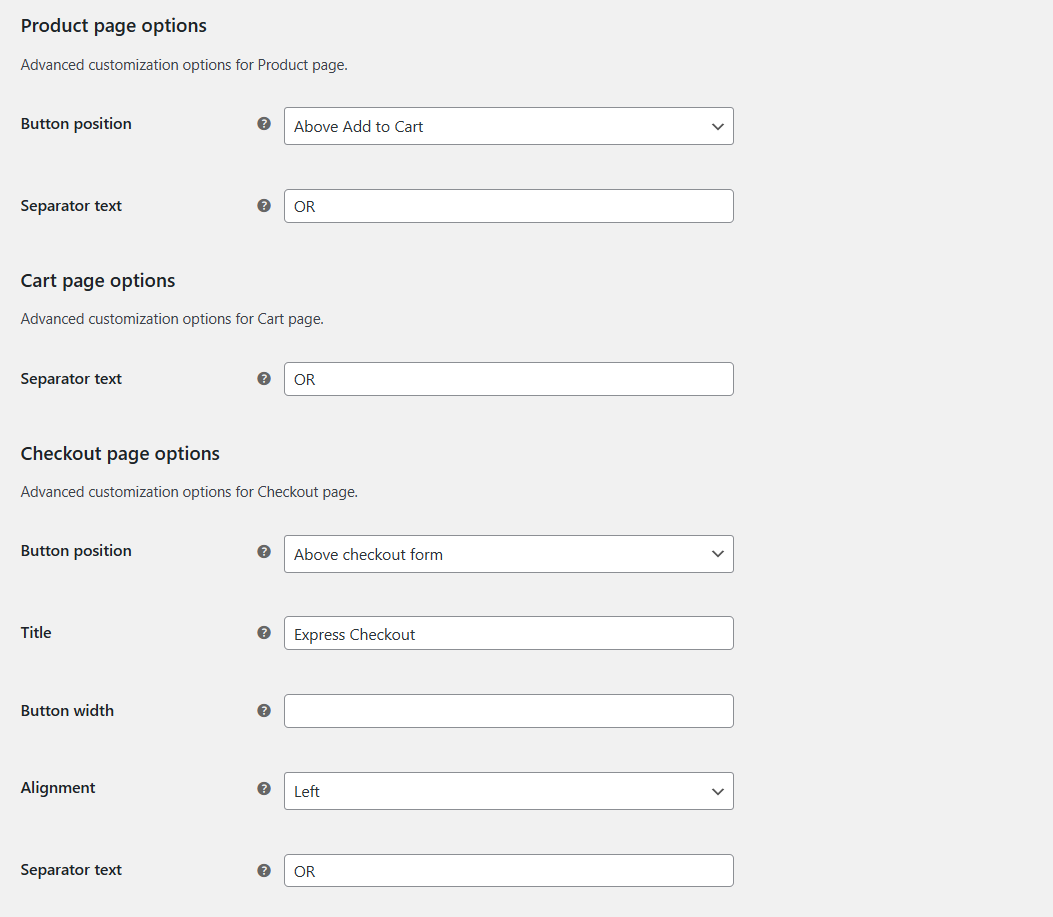
Save your changes when you are done.
This will solve the Apple Pay issue of not showing on some WooCommerce pages.
Test Apple Pay in Supported Browsers and Devices to Check If The Issue Is Resolved
Once you’ve followed all the steps above, it’s important to test your checkout and payments functionality to check if the Apple Pay issue is fixed.
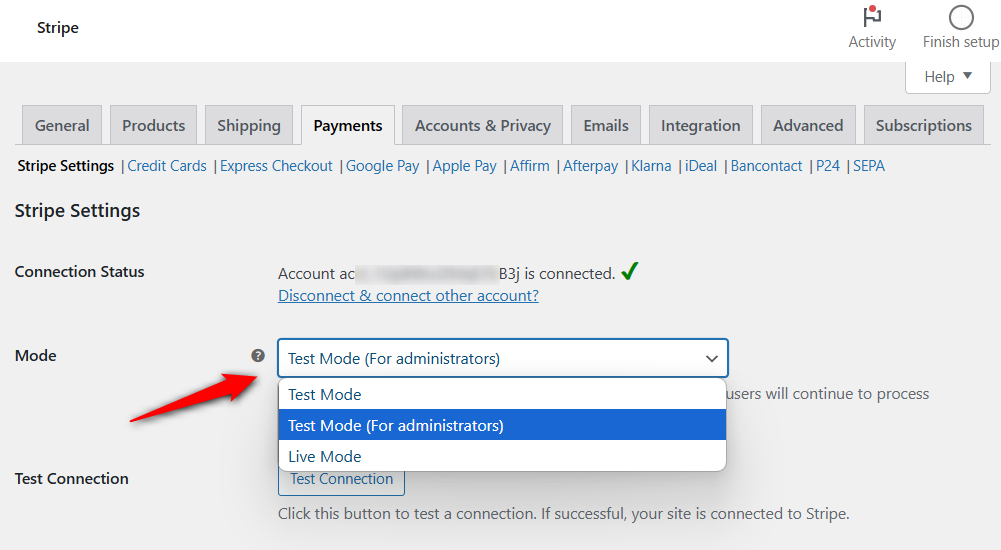
For that, navigate to WooCommerce Stripe settings and enable the Test or Admin Only Test mode.
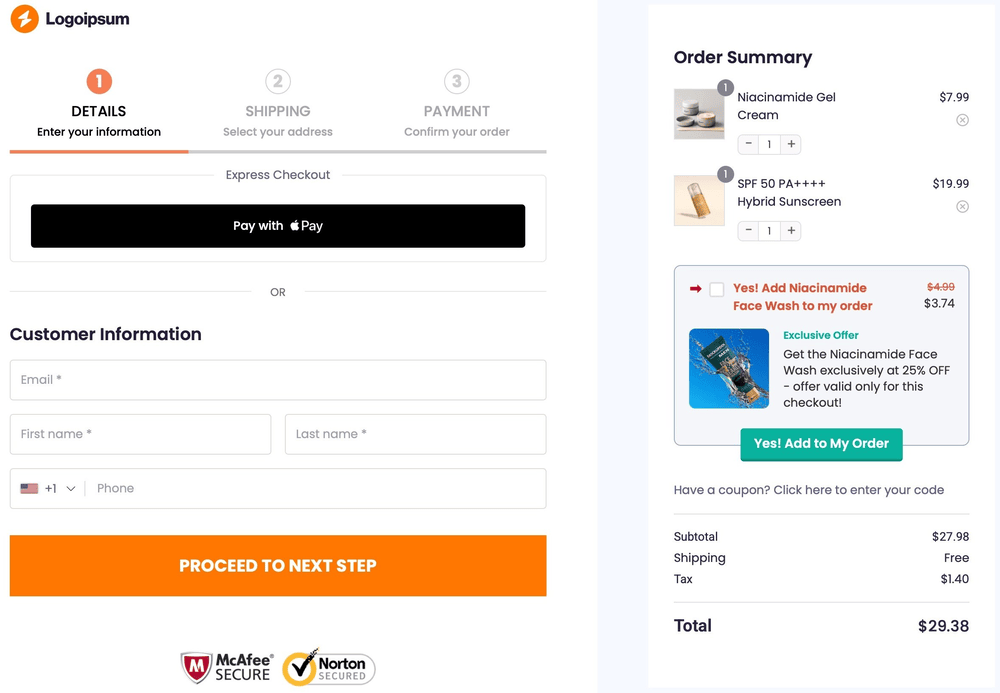
Add a product to your shopping cart and head to the checkout page. Verify if you see an Apple Pay express checkout button there.
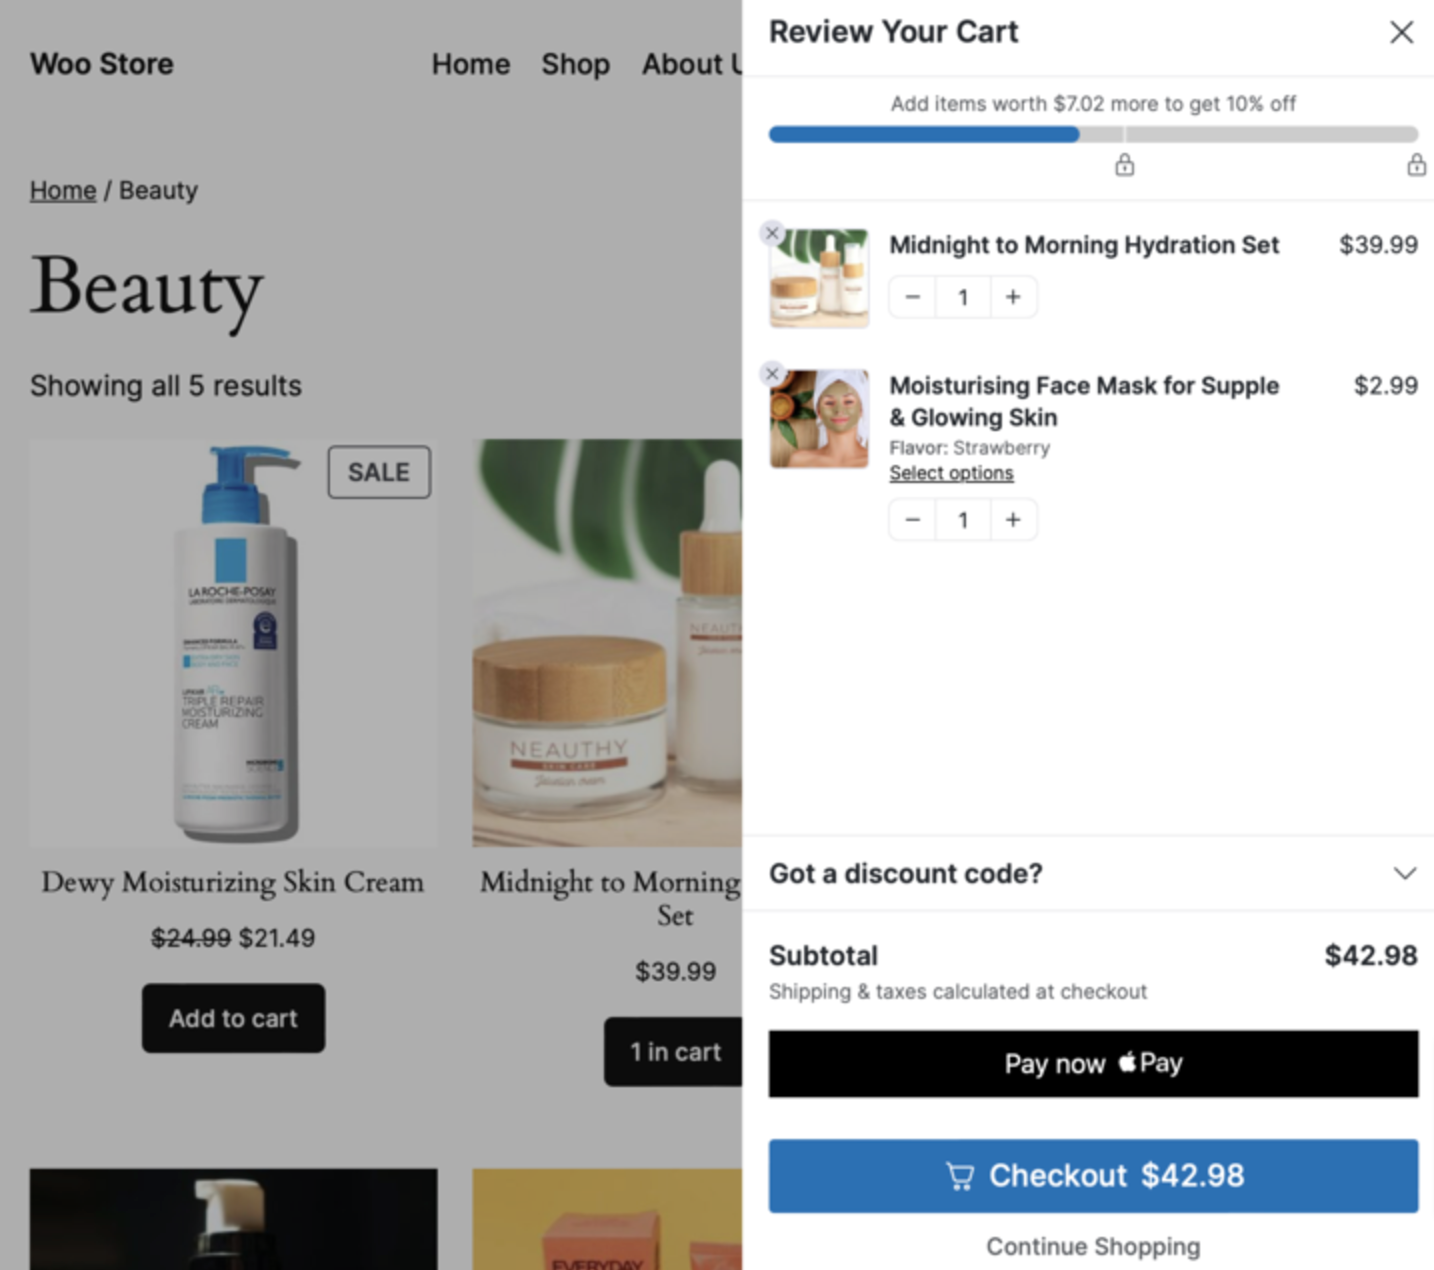
If you use FunnelKit Cart for WooCommerce, you’ll be able to see the Apple Pay button inside your shopping cart:
Alternatively, you can even go to the Stripe Payments Demo URL and check if you’re able to see the Apple Pay button there.
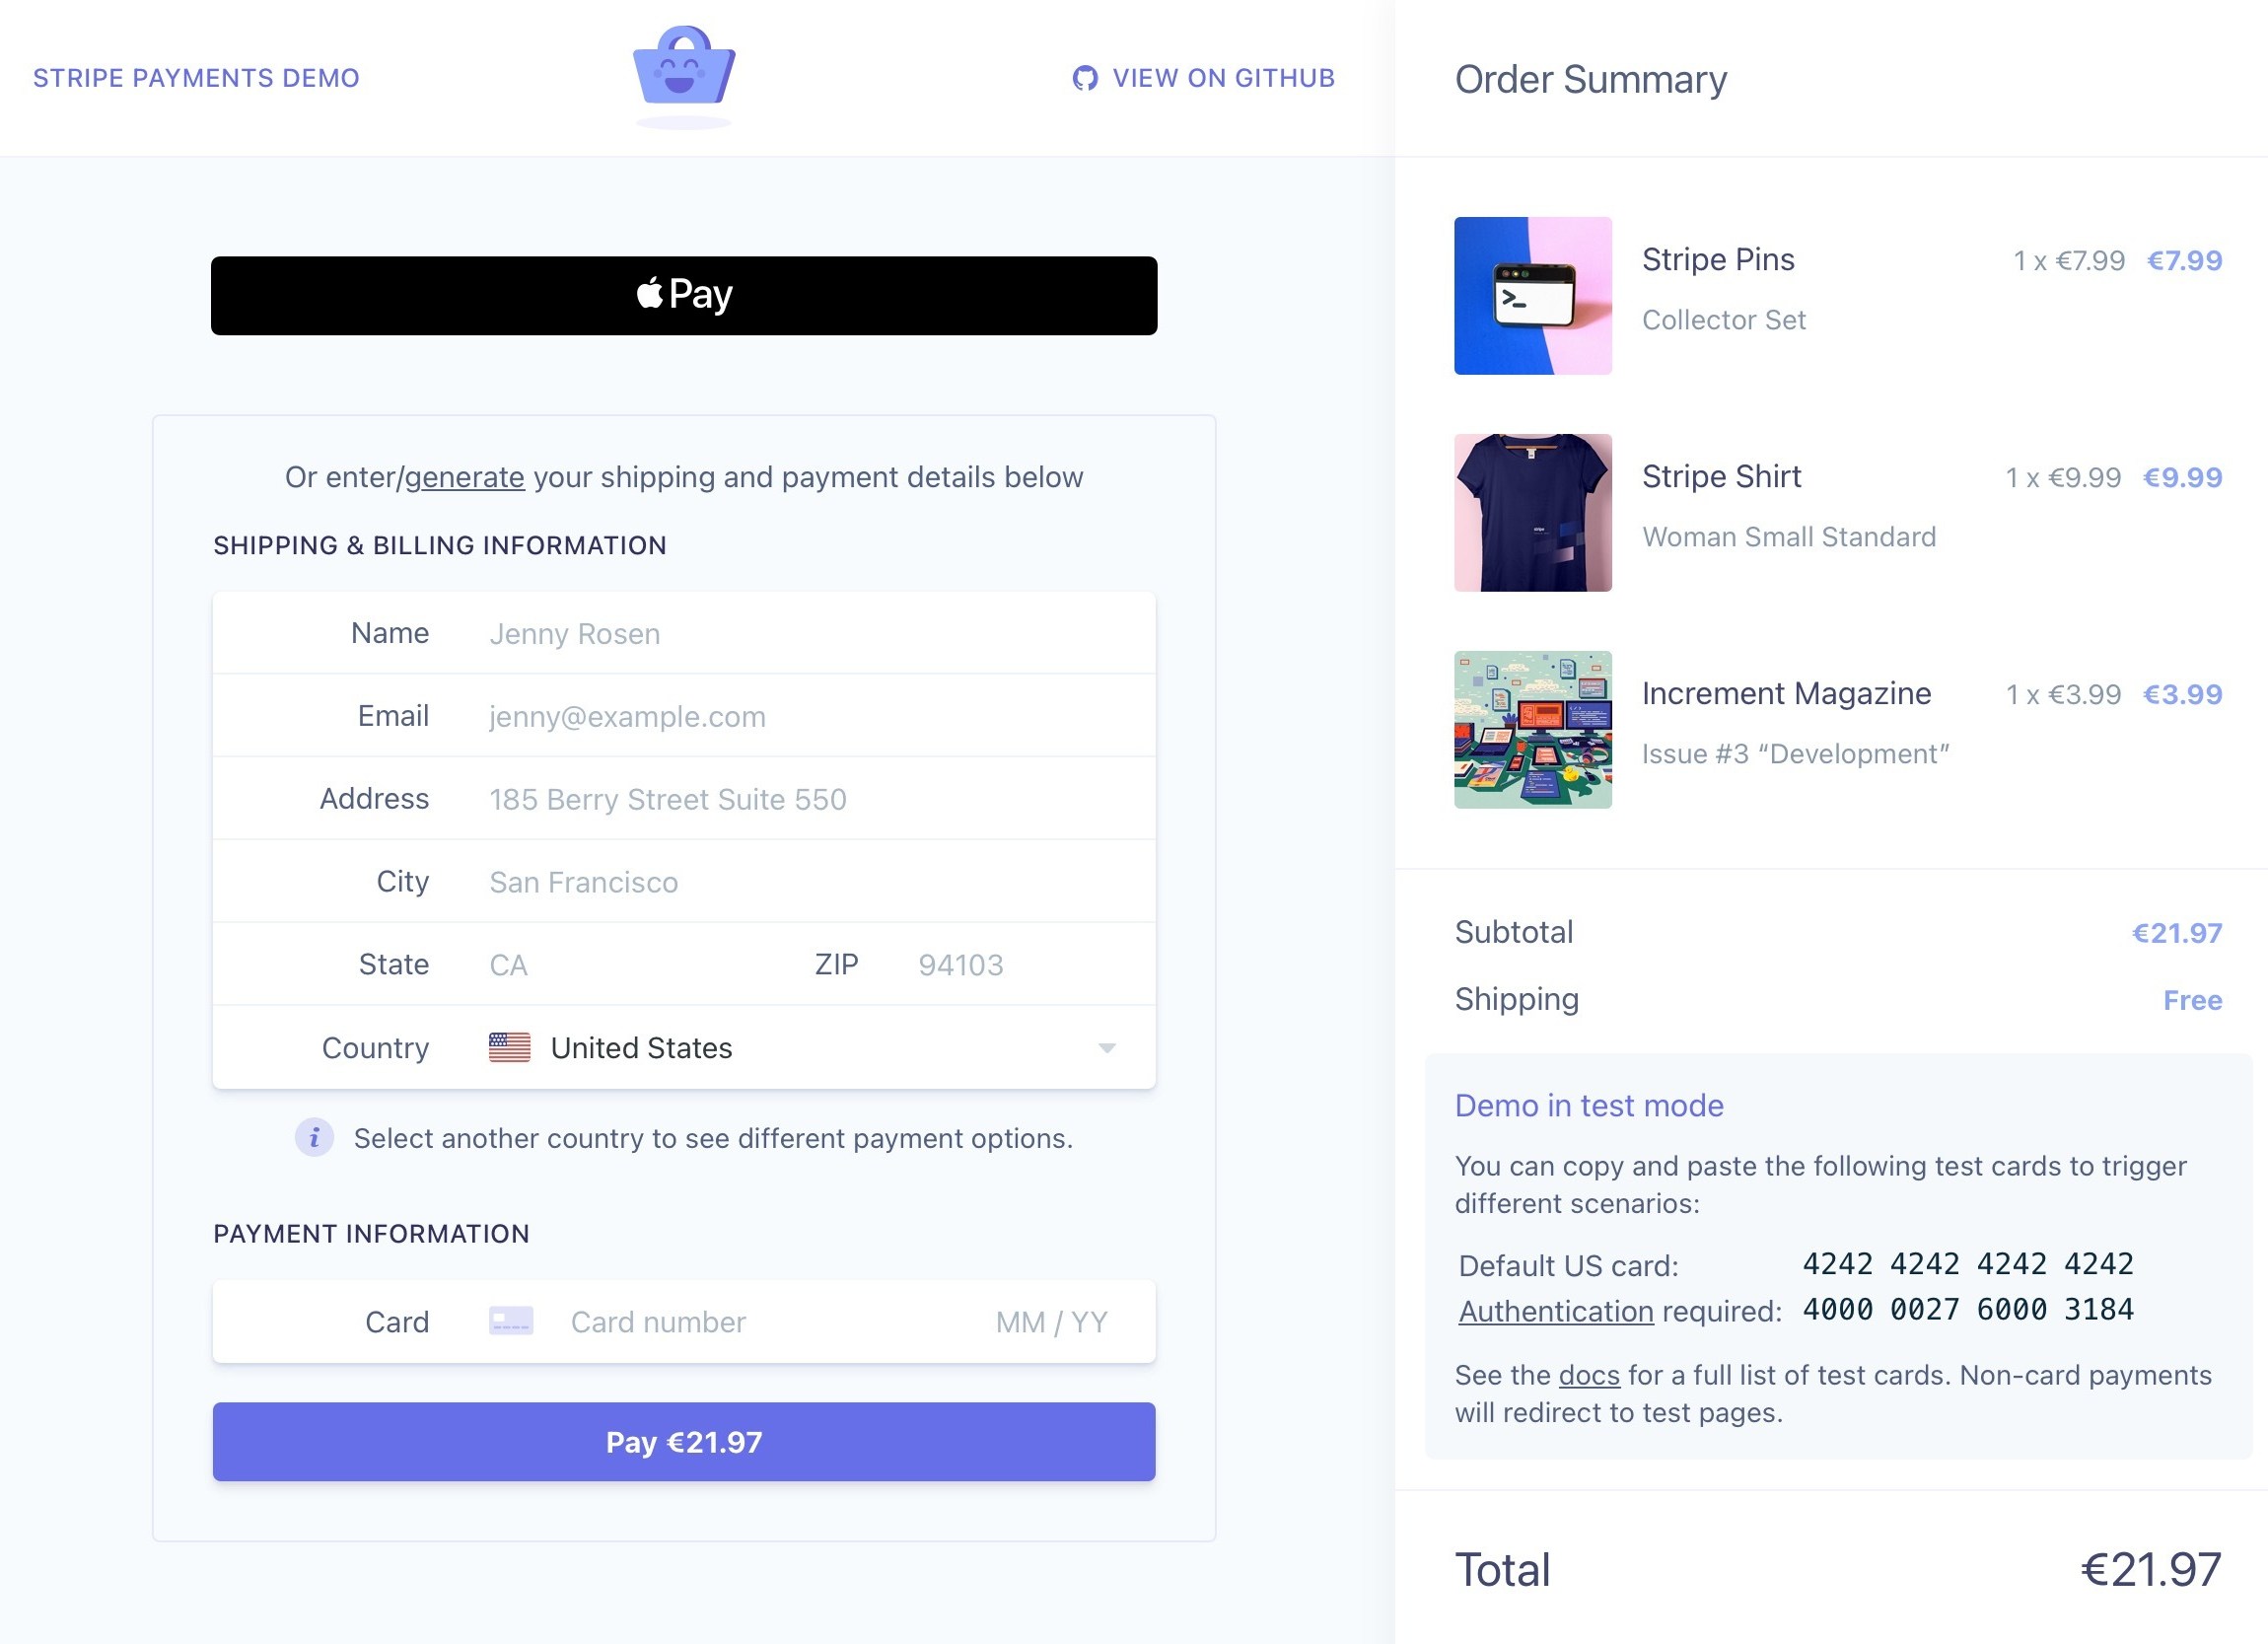
If everything is right, the Apple Pay button will be shown here.
If you don’t see the express checkout button, this means it’s configured on your device, and we recommend you follow the instructions above from pt. 1 to 8.
Bonus: Transform Your Default Checkout into a High-Converting One!
The default WooCommerce checkout is boring, old-fashioned, and unsuitable for conversions.
It lacks high-converting elements to push not-so-sure visitors into paying customers.
That’s where experts recommend using FunnelKit Funnel Builder to transform your default checkout experience.
It’s the most powerful sales funnel and checkout manager plugin for your WooCommerce store, and it has already been trusted by over 30,000 businesses to boost their sales and conversions.
Here’s what you can do with it:
- Design high-converting checkouts: Build distraction-free one-page or multi-step checkout pages that guide users smoothly from cart to payment without any coding. Use your favorite page builder to customize various templates the way you want.
- Modern sliding shopping cart: Replace your default cart page with a dynamic, WooCommerce side cart that lets shoppers view, edit, or check out without ever leaving the page. You can also offer upsells and smart rewards inside the cart to improve the experience.
- Add smart order bumps and one-click upsells: Increase your average order value with perfectly timed offers shown at checkout or post-checkout with zero friction.
- Smart checkout optimization: Optimize your WooCommerce checkout to speed up the buying process, like enabling Apple Pay and Google Pay, auto-apply coupons, Google address autocomplete, smart customer login, and more.
- Run A/B tests: A/B test different headlines, layouts, upsell and cross-sell offers, and make profitable decisions based on real-time insights.
- Get detailed analytics: See how your sales funnels are performing, conversions, orders placed, revenue generated, UTM reports, etc. FunnelKit Funnel Builder has the detailed analytics to improve performance and grow your sales faster.
Ready to Turn Apple Pay Troubles Into Seamless Conversions?
If Apple Pay isn’t showing on your WooCommerce store, you’re not alone. But now, you know exactly what to look for.
Whether it’s testing on the wrong device, skipping Stripe domain verification, or a simple HTTPS issue, these fixes are all straightforward once you know where to focus. The payoff is a faster, more frictionless checkout experience that your customers will love.
But why stop there?
If you want to create high-converting checkout flows with Apple Pay, then you need more than just fixes.
You need a conversion-optimized, seamless checkout experience, and that’s where FunnelKit Funnel Builder comes in. It lets you design beautiful checkouts, optimize it for mobile, add smart upsells, and more.
So, Apple Pay is just one piece of your WooCommerce puzzle. FunnelKit Funnel Builder can help complete it by boosting conversions and unlocking your store’s full potential.
Give your shoppers the fast, seamless buying experience they expect. Start building high-converting checkouts with FunnelKit Funnel Builder!
The post WooCommerce Apple Pay Not Showing: Learn Why and How to Fix It appeared first on FunnelKit.